Tiny-Touch NMPG Ender 3/Ender 3 Pro edition
thingiverse
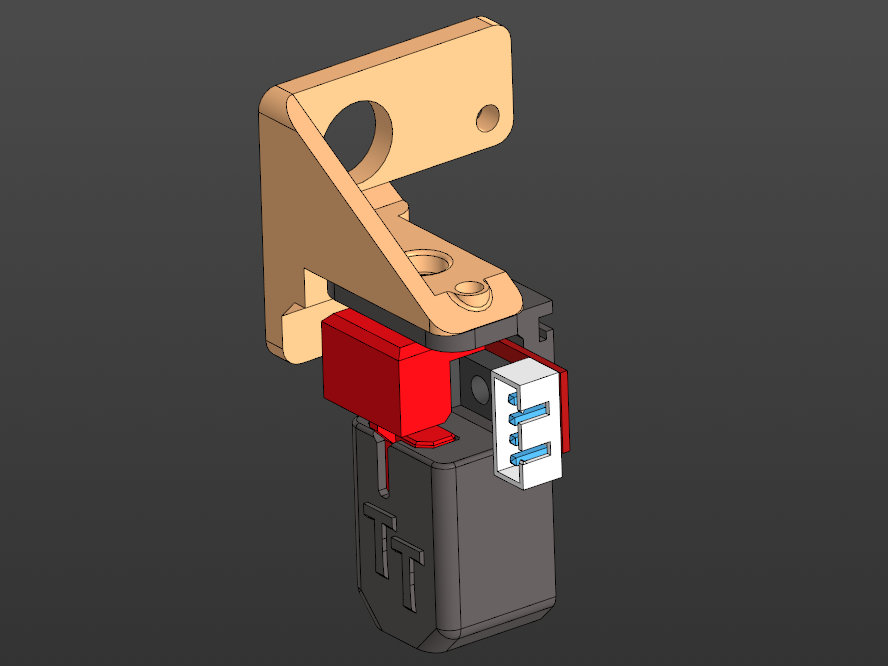
**Description** ==================== This is a remix of TinyTouch NMPG, a very cost-efficent alternative to BLTouch and other commercial products - adapted for use on Ender 3/Ender 3 Pro with stock extruder assembly Please note that even though this is a really interesting project for a weekend ***it might be hard to reproduce*** - minimal soldering skills, basic knowledge about firmware configuration (or will to learn about these things for one+ evening ;]) and a decently calibrated printer are required (problems are inevitable really) You will need to tap M3 holes in body, flag and sensor cap, this will require good layer adhesion - but you can always try to re-melt plastic in holes using a screw and a solder iron in case something goes wrong (be careful about it tho!) Although mount is BLTouch-friendly, it's not fully compatible with it - if you decide to swap to BLTouch at some point you will likely need a spacer between device and mount (TT is slightly taller) **Instructions** ==================== For full instructions see [TT NMPG](https://www.thingiverse.com/thing:4661556) and [TT v1](https://www.thingiverse.com/thing:3833861) **Servo and sensor models** ==================== Compatible servos are [Mosquito R](https://www.graupner.com/micro-linear-servo-14001.html) and GS-1502 R (R stands for Right - this is ***important***, but you can also buy a pair of L and R and find use for Left one later) Key words for alternatives are: Micro Linear V-Tail Servo As for optical sensors, there are tons of compatible ones if you search for 3D Printer Endstop Optical Switch, just look for similar models (I used Aokin/HESAI branded one) Both items are easily sourced from Amazon/Aliexpress/etc. Note that this is not a full list of materials, see original thing's BOM - most importantly, don't forget about JST XH 4POS header! **Corrections and notes** ==================== Make sure to print flag using filament that doesn't allow much light to pass through! My first try had flag in yellow PLA and optical sensor was getting semi-triggered, but not enough for printer to detect anything Probe offset for parts provided in this remix is `X-43 Y-10` `#define NOZZLE_TO_PROBE_OFFSET { -43, -10, 0 }` Actual angles for me were the other way around, `#define Z_SERVO_ANGLES { 20, 170 }` And also we will have a bigger mesh inset compared to original guide `#define MESH_INSET 45` I personally use it with vanilla Marlin (no forks), you can mostly follow a [guide by *u/cpxazn*](https://www.reddit.com/r/ender3v2/comments/nxm865/guide_for_bfptouch_on_ender_3_v2/) mentioned in [TT NMPG](https://www.thingiverse.com/thing:4661556) instructions with corrections above in mind - but make sure to read all comments for parameters you change in config files, don't change anything blindly. And yes, you ***must not uncomment BLTouch define***
With this file you will be able to print Tiny-Touch NMPG Ender 3/Ender 3 Pro edition with your 3D printer. Click on the button and save the file on your computer to work, edit or customize your design. You can also find more 3D designs for printers on Tiny-Touch NMPG Ender 3/Ender 3 Pro edition.