Tiny Trak - Mini FPV Tank with OSD - 1S and 2S
thingiverse
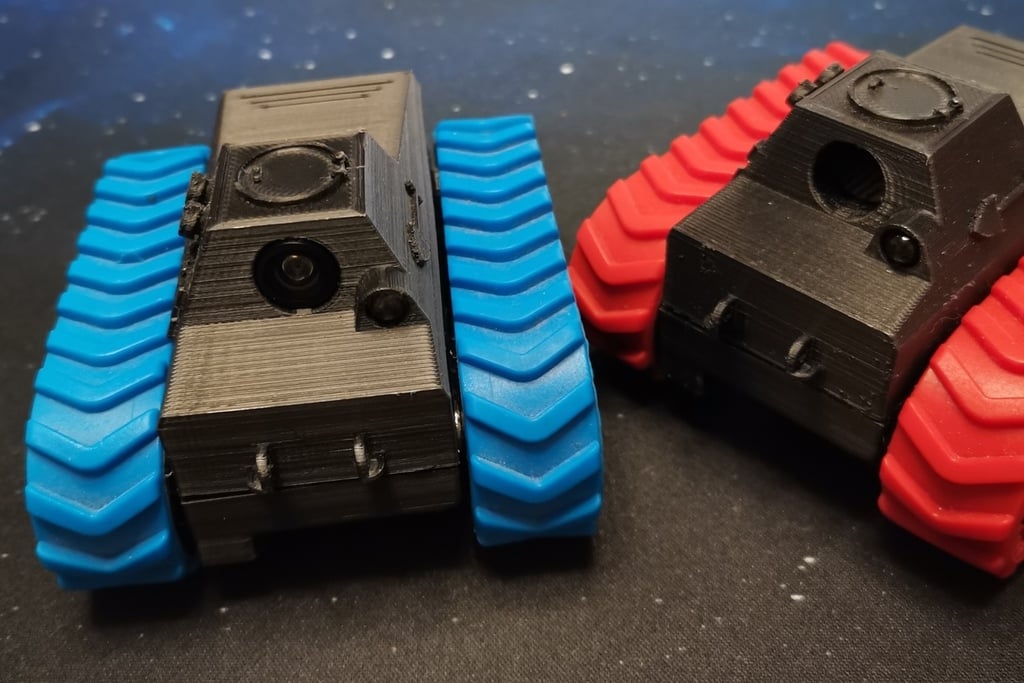
**Introduction** ============= This is a servo driven tiny trak FPV tank with the possibility for operating on 1S or 2S and an optional OSD. It is built as one unit that when finished never has to be opened, because it can be charged, turned on and off with a key that fits in the port on the rear. The Tank will work just fine on 1S and can be updated to 2S and OSD later on. The 6th picture shows the basic 1S configuration. The 7th and 8th picture shows the 2S configuration but with a connection between the top and bottom that is quite a bit ugly. This problem has been updated in the circuitry. ------------- **Parts List** ============= **Hardware:** ------------------ - HEXNUB – Monster Trax for Mibro -> If unavaillable I have to make new wheels for other tracks - JR servo cable extensions (2x Female, 2x Male) - Male LiPo connector - 4x 684ZZ bearings - 4x M2 10mm + nuts - 2x M4 20mm + washer - 2x tapping screw 2,2x14 - heat shrink tubing - double sided foam adhesive tap **Baseline 1S Build:** ----------------------- - Foxeer Razer Pico - Eachine Nano (V2) VTX - 2x FS90R 360dg Servo / 2x Tower Pro SG90 HV digital (much faster with 2S and no random travel) - ZOP 1S 850mAh battery - 5mm LED + resistor (in relation to your LED color) **2S OSD Update:** ----------------------- - Micro MinimOSD - Matek Micro BEC 6-30V to 5V/9V-ADJ - USB to TTL Serial Converter Adapter - 2S battery (Hacker ECO-X 350 2S) -------------- **Instructions** ============= **OSD:** The OSD is made by Sven (https://www.jetcontrol.de/) and is based on the KV Team OSD and displays only the most necessary things. The runtime in the top left corner and the battery voltage and percentage in the top right corner. Download Panzer_OSD.ino, Max7456.ino and symbols.h, put the three files in a folder and flash the software on the MinimOSD. Good video for that task is this one by Jeremy's Review Room. https://www.youtube.com/watch?v=5g1GWSX8A8w -------------------- **Tank Build:** Download the .7z folder with the circuitry and FrSky Taranis settings I used for this tank. Flash the MinimOSD as mentioned in the OSD paragraph. Print the parts following the print settings paragraph. Read the notes regarding the important support settings. Sand the mating surfaces between the top and bottom chassis flat to ensure best fit. Put the bearings in the idler wheels and screw them on the chassis with the M4 screws. Put a washer between the chassis and the wheel. Slide the servos in the chassis and screw them on with the M2 screws. Put the drive wheels on with the screws from the servo. Solder the Servos to the RX (make use of the circuitry for the wiring) and connect it to the BEC. Then solder the servor connector, that connects the bottom and top half of the tank, to the BEC and RX and fit everything in the chassis. The Receiver fits best between the servos and can be fixed to the chassis with the foam tape, like all the other components. The BEC fits next to the RX on the wall of chassis. Now them bottom half of the tank is finished. Solder the camera to the VTX and OSD. Now connect the VTX with the MinimOSD. Calculate the right resistor for the color of your LED and solder them to the OSD. Now solder the Female servo connector, used as the Port, and the Male servo connecor, connecting the top and bottom half of the tank, to the OSD. Now solder the Male connector from the battery to the Port and OSD. Put foam tape on the inside of the tower and slide the camera in the hole. It should sit quite snug. Put the LED in its hole and secure it with superglue. Secure the VTX and OSD with foam tape on the inside óf the top. Superglue the Female servo connecor in the opening in the back of the tank. Make the key to the tank by connecting the red and orange(or white) wire on a Male servo connector and put heat shrink on to secure it. The charging cable is made by connecting another Male JR servo connector to your favorite connector used for charging. Connect the battery and put the key in place to bind the tank before closing it up with the tapping screws. Now you can start the tank with the key and load it without opening it. PS: The original model has more than 200 rivets that the FDM Printer neither sliced nor printed. So if anyone wants a riveted version for a resin printer...
With this file you will be able to print Tiny Trak - Mini FPV Tank with OSD - 1S and 2S with your 3D printer. Click on the button and save the file on your computer to work, edit or customize your design. You can also find more 3D designs for printers on Tiny Trak - Mini FPV Tank with OSD - 1S and 2S.