tiptoi Cap
thingiverse
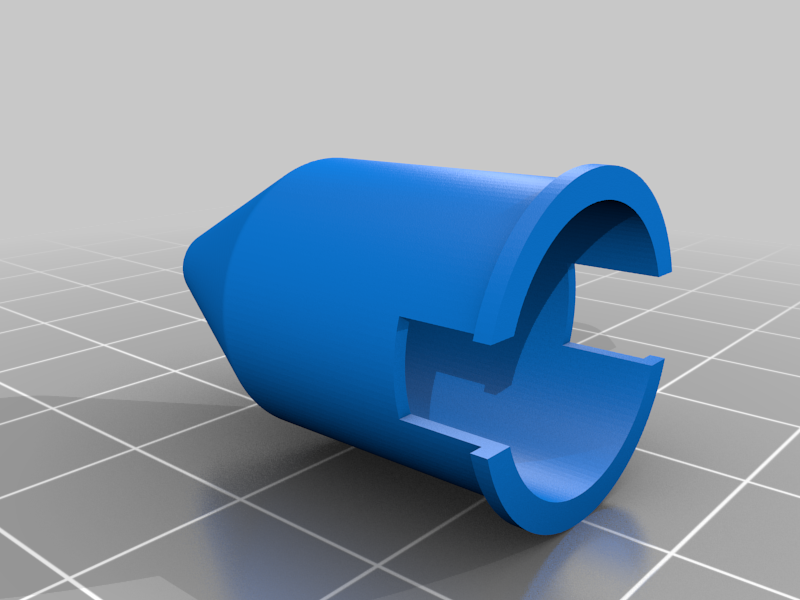
# Deutsche Anleitung Ersatzteil für die durchsichtige Endkappe am Tiptoi Stift. Nachdem die Spitze des Tiptoi Stifts nach einiger Zeit etwas verschlissen war und dieser die Muster in den Büchern nicht mehr zuverlässig erkannte musste ein Ersatz her. Gedruckt mit dem Elegoo Mars SLA Drucker in transluzentem Harz liefert die Spitze wieder den richtigen Spaß mit den Büchern. Empfehlung: Druck in transluzentem SLA Harz. Kurze Nacharbeit mit feinem Schleifpapier und einer Schicht Klarlack liefert eine fast transparente Spitze. Abhänging von der Druckqualität muss man ggf. die Spitze etwas runterschleifen um den Fokuspunkt der Kamera im tiptoi Stift gut zu erwischen. Einbau: - Äußere Hülle wie bei Batteriewechsel entfernen - Batterien entnehmen - Die vier Kreuzschlitzschrauben entfernen - Den Stift vorsichtig auseinander nehmen, dabei müssen mehrere Clips gelöst werden. (Mit entwas Fingerspitzengefühl funktioniert die recht gut. Auf den Lautsprecher aufpassen, dass man die Anschlussleitungen nicht abreist) - Alte Kappe vom schwarzen Kameramodul abziehen - Neue Kappe auf die Kamera schieben ( Auf die Aussparungen an der Kappe achten, da der Stift sonst nicht zu geht) - Stifthälften und Lautsprechereinsatz übereinanderlegen und mit Gefühl zusammen drücken - Schrauben wieder eindrehen - Batterien einlegen - Hülle aufclipsen, fertig! Viel Spaß damit ;) # English Instructions Spare part for the transparent end cap on the tiptoi pen. After the tip of the tiptoi pen was worn out after a while the pen could not recognize the patterns in the books anymore, a replacement had to be found. Printed with the Elegoo Mars SLA Printer in translucent resin, the tip of the tiptoi pen is now fun to use with the books. Recommendation: Print in translucent SLA resin. Short reworking with fine sandpaper and a layer of clear varnish will give an almost transparent tip. Depending on the quality of the print, you may have to sand the tip down a bit to get a good grip on the camera's focus point in the tiptoi pen. Installation: - Remove outer cover as for battery change - Remove batteries - Remove the four Phillips screws - Carefully disassemble the pen, several clips must be loosened. (With a little more dexterity it works quite well. Take care not to tear off the speaker wires) - Remove the old cap from the black camera module - Slide the new cap onto the camera (pay attention to the notches on the cap, otherwise the pen will not close) - Place the pen halves and speaker insert on top of each other and carefully press them together - Screw the screws back in - Insert the batteries - Clip on the cover, done! Have fun with it ;)
With this file you will be able to print tiptoi Cap with your 3D printer. Click on the button and save the file on your computer to work, edit or customize your design. You can also find more 3D designs for printers on tiptoi Cap.