Titan Aqua Extruder mount
prusaprinters
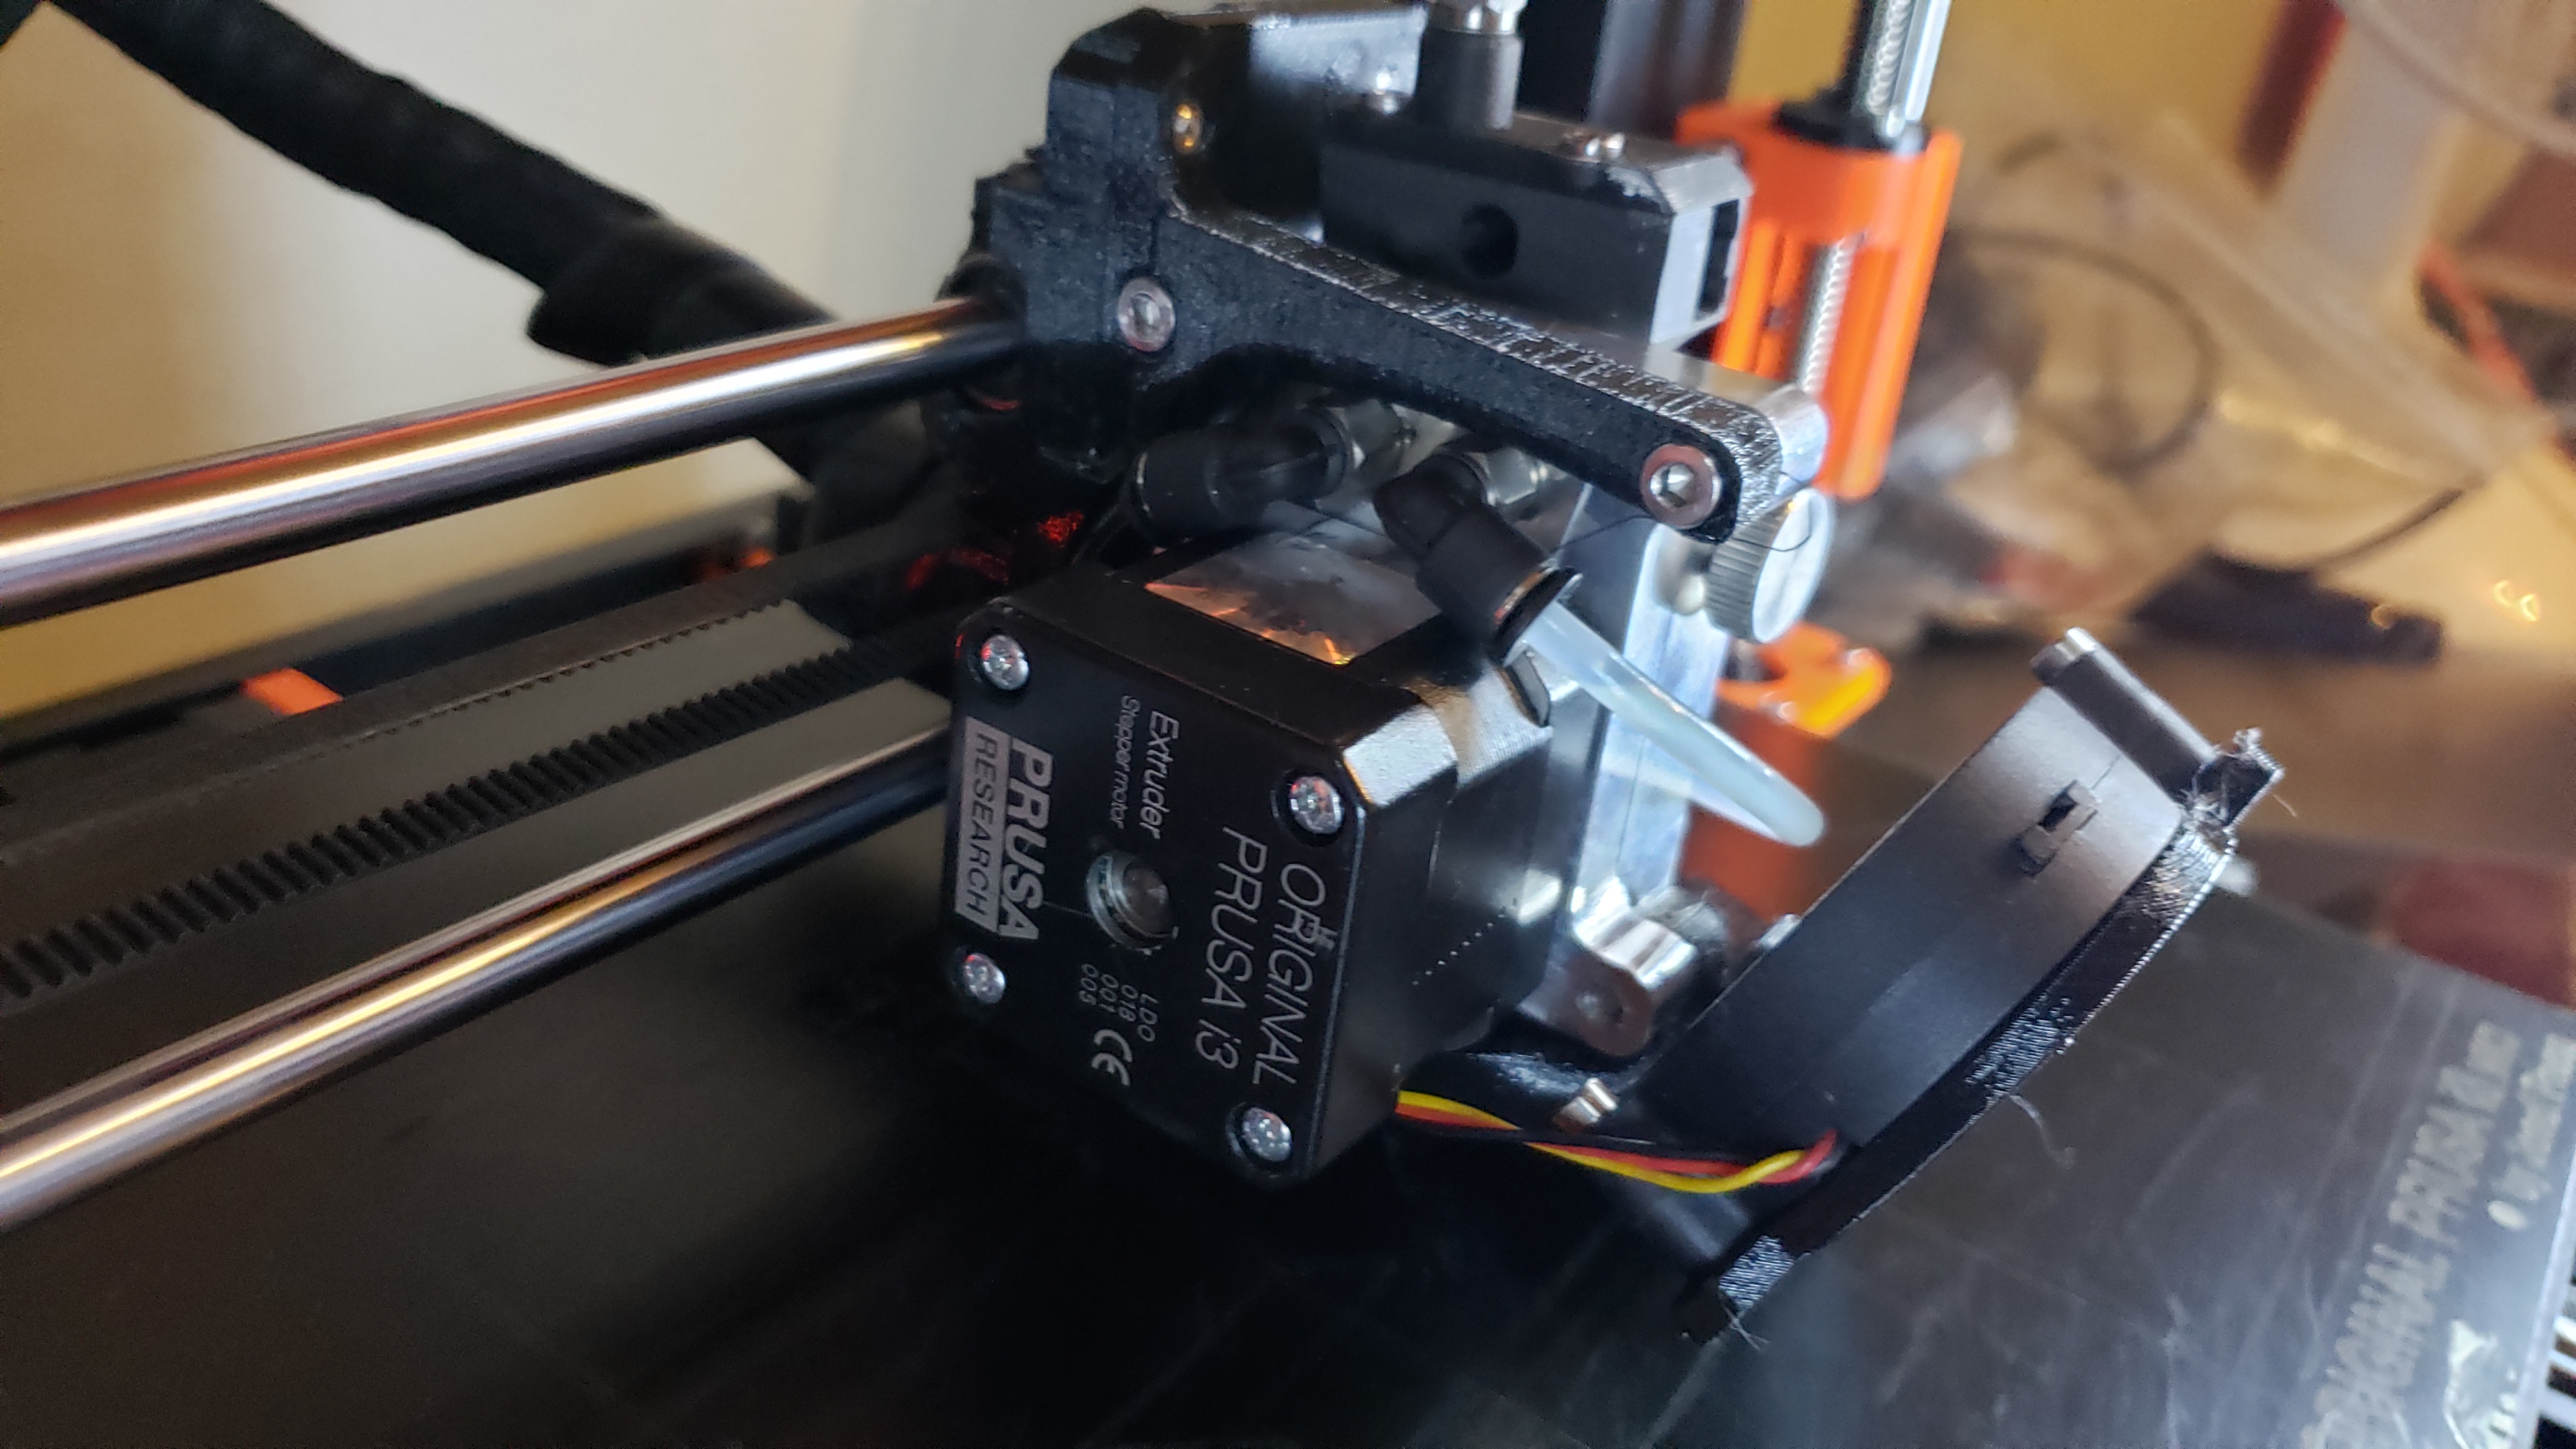
<p>This is the third version of my holding fixture for the e3d Titan Aqua on my mk3. It includes the complete E-axis which is based on the mk3s files. The x-carriage/back are virtually identical except for the passages for the coolant lines. The cable holder is the same as the mk3s, so if you already have that you can exclude that from your print. I included a gcode file for mk3/s using 0.2mm Speed resolution (I've found this setting to have the best quality for PETG). I intend to include filament sensor capability soon, stay posted for updates.</p> <h3>Print instructions</h3><p>All components are setup to be printed without supports. The fan mount and the extruder mount have built-in supports so there is no need to mess with enforced supports.. I recommend 0.2mm speed profile for best results.</p> <p>To assemble follow the Prusa manual instructions for the e-axis or mk3s upgrade. I find it easier to run the 4mm nylon coolant line closest to the Einsey case into the x-carriage just before installing the Extruder Mount while taking care not to pinch the tube. Get the length close but it can be adjusted after installing the mount. Install the lower bolt in the Titan Aqua first (loose), then pivot it up into place to install the tube into the rear fitting. Once you have confirmed the tube is properly seated, pivot the Titan Aqua all the way up to the upper bolt holes while gently pulling the tube from the backside to the correct length. It's a tight fit but has been working very well for me. Once the extruder is installed run the other coolant tube through the passage on the other side, looping it around the front of the extruder.</p>
With this file you will be able to print Titan Aqua Extruder mount with your 3D printer. Click on the button and save the file on your computer to work, edit or customize your design. You can also find more 3D designs for printers on Titan Aqua Extruder mount.