Titan Extruder for the Anycubic I3 Mega, Prusa i3
thingiverse
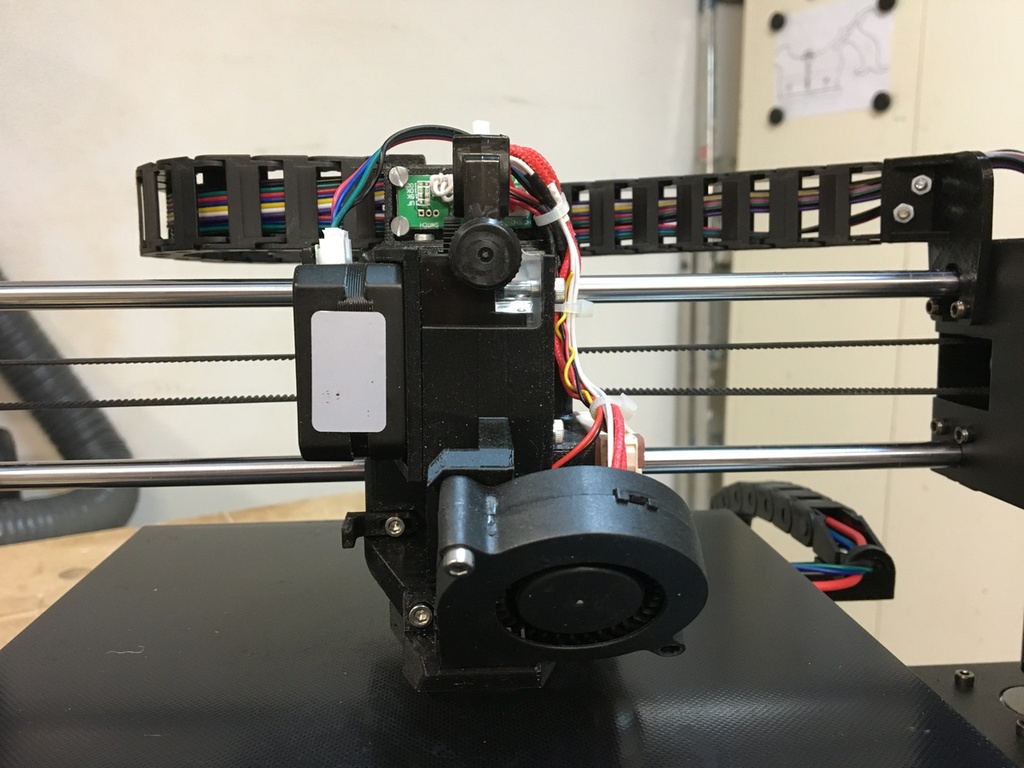
# Titan Extruder for the Anycubic I3 Mega, Prusa i3 This Thing turns your Anycubic I3 Mega from a bowden to a direct drive extruder printer. https://www.youtube.com/watch?v=PVOJr0LqMk0 I was mostly inspired by petrzmax's [Goliathus Extruder - Anycubic I3 Mega, Prusa I3](https://www.thingiverse.com/thing:2894777). I wanted to use the Prusa fan duct which is very effective and tried to remix the Goliathus extruder but ran into too many problems so I finally decided to recreate the whole thing from scratch. So this is a complete new design. ## Things I have changed in this design * Moved the hotend fan to the right side, because I could not get it to work with the printer X-endstop switch on the left. The switch was touching the spinning fan wings. * Adjustable X-endstop * Prusa fan duct. This was the most important change for me because the Prusa fan duct is very effective. No additional mount adaptors needed. ## What do I need? * Titan Extruder or clone (I use the TriangleLab) with pancake stepper motor * V6 Hotend or clone * 50x50x15 parts cooling fan * 40x40x10 hotend cooling fan * 2 M3x8 screws for the Nema-17 mount * 2 M3x8 screws for the BLTouch (optional) * 4 M3x20 screws for the X-carriage * 7 M3x10 screws (hotend fan, fan duct, parts cooling fan, adjustable X-endstop) * M3 nuts * 4 M3 washers ## What else do I need to print? * X-Carriage: [Anycubic I3 Mega Prusa i3 X-Carriage Converter](https://www.thingiverse.com/thing:3495652) * Prusa fan duct or derivative. This one works great: [Prusa Mk3 fan duct (Includes double mount adaptor)](https://www.thingiverse.com/thing:3009290). You only need to print the fan duct, no mount adaptors. ## BLTouch If you want to use BLTouch just print the Nema-17 holder with the integrated BLTouch mount. Use these offsets in `Configuration.h`: X_PROBE_OFFSET_FROM_EXTRUDER -31 Y_PROBE_OFFSET_FROM_EXTRUDER -5 Z_PROBE_OFFSET_FROM_EXTRUDER 0 **Note:** I don't use BLTouch so this is untested. Let me know if there are any issues. ## Assembly 1. Insert the M3 nuts into the Nema-17 mount. This is important, if you forget them you have to disassemble the whole thing later! 2. Insert the 4 M4 nuts for the X-carriage into the base 3. Follow the instructions to assemble the [V6 Hotend](https://wiki.e3d-online.com/E3D-v6_Assembly) and the [Titan Extruder](https://wiki.e3d-online.com/Titan_Assembly) 4. Mount the cover and the adjustable X-endstop. This should be pretty straight forward, the photos will help. 5. Assemble the fan duct and the parts cooling fan 6. Mount the hotend fan with 4 M3x10 screws, the screws are directly screwed into the plastic 7. Mount the whole thing onto the X-carriage with 4 M3x20 screws and washers from the carriage side. 8. Adjust the X-endstop with the adjuster When everything is in place and working you need to calibrate the extruder. Expect a much higher value for the E-steps (around 440-450) because of the gear ratio. ## Changelog ### 2019-11-23 - Redesigned the base and the cover to increase the clearance of the fan duct ### 2019-05-03 - Redesigned the base and the cover to improve the air flow of the hotend cooler ### 2019-04-27 - BLTouch mount - Cable tie holders in the base - Relaxed the tolerances of the Nema-17 mount
With this file you will be able to print Titan Extruder for the Anycubic I3 Mega, Prusa i3 with your 3D printer. Click on the button and save the file on your computer to work, edit or customize your design. You can also find more 3D designs for printers on Titan Extruder for the Anycubic I3 Mega, Prusa i3.