TM SGR-12 Auto Bolter
thingiverse
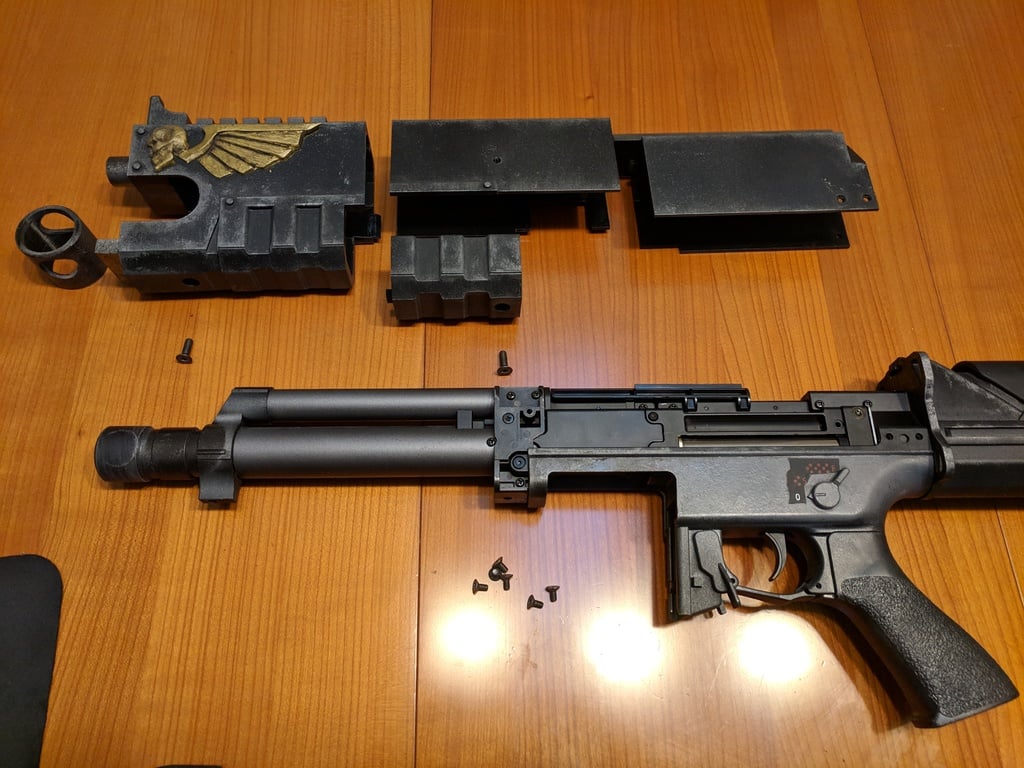
This kit fits right over the TM SGR-12 with no modifications or screws needed. Simply remove your existing metal receiver by unscrewing the 6 screws from each side and two large screws underneath. The metal receiver should slide off in two pieces. Step 1: Mount the rear cover with Mlok sections and use the stock screws that were there before. Step 2: Mount center piece and screw both sides. Step 3: Mount small grip extension underneath and use the large stock screw Step 4: Insert the faux cylinder and rectangle in the front end. Use glue if you feel the pressure fit isnt enough. Step 5: Glue skullwings on both sides or leave them off and print your own icons :) Step 6: (This part takes a little fidangling) Slip the front over the barrel and lower the front end and try to get the indexing tabs below the faux gas block rails while keeping the gas tube in the upper portion and use the last screw on the bottom to secure the piece. Step 7: Press fit the new muzzle over the old one with both holes on the sides. This part also indexes the front end so it sits straight. Thanks everyone for the overwhelming support! Feel free to remix this thing as it is my first time using cad. Its probably not very optimal and mistakes were made. UPDATE: 12/29/18 Uploaded a new skullwings file. I just tried printing them and one of the skullwings wasnt printing for the first few layers. I also uploaded a smaller file version of it.
With this file you will be able to print TM SGR-12 Auto Bolter with your 3D printer. Click on the button and save the file on your computer to work, edit or customize your design. You can also find more 3D designs for printers on TM SGR-12 Auto Bolter.