TMA 1 headband - replacement part
thingiverse
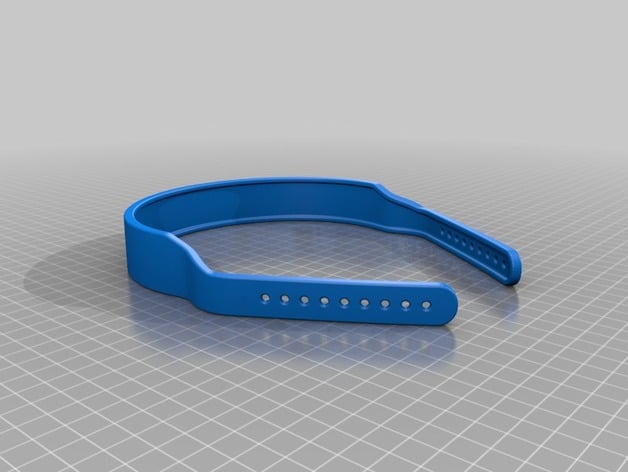
TMA 1 Headband Replacement Project: Print Your Own Headband If the Old One Snaps Check out the complete guide on this page for step-by-step instructions. Printed as part of the Endless Objects project: www.endlessobjects.com Print Settings: Printer Brand: Ultimaker Printer Model: Ultimaker 2 Rafts: None Required Supports: Not Needed Resolution: Set to 0.1 Infill Percentage: 85-100% Notes: If you use Slic3r, try creating a custom model with varying infill densities to save material and weight. This technique may not significantly reduce printing time but is worth considering. Designing the Replacement Headband: The TMA 1 has been notorious for its headband snapping issue, which AIAIAI addressed in their TMA 2 model. However, if you still have your old TMA 1 parts, it's a shame to let them go to waste, especially since the headband can be pricey - around 200-250 euros. Custom Section: Replacing the Headband Removing the Old Headband: The earcups have small metal balls that snap into the headband. Use a sharp knife or similar tool to carefully press the ball into place and remove the old headband. Solving the Hanging Wire Issue: Unfortunately, this design does not address the problem of loose wires from the earcups. One solution is to reuse the original rubber part and glue it back onto the printed replacement headband. Feel free to redesign and improve upon this model if needed. If the new headband also snaps, consider making it thicker or using a stronger material for printing.
With this file you will be able to print TMA 1 headband - replacement part with your 3D printer. Click on the button and save the file on your computer to work, edit or customize your design. You can also find more 3D designs for printers on TMA 1 headband - replacement part.