TOES: Totally overengineered sample spool & spool holder
prusaprinters
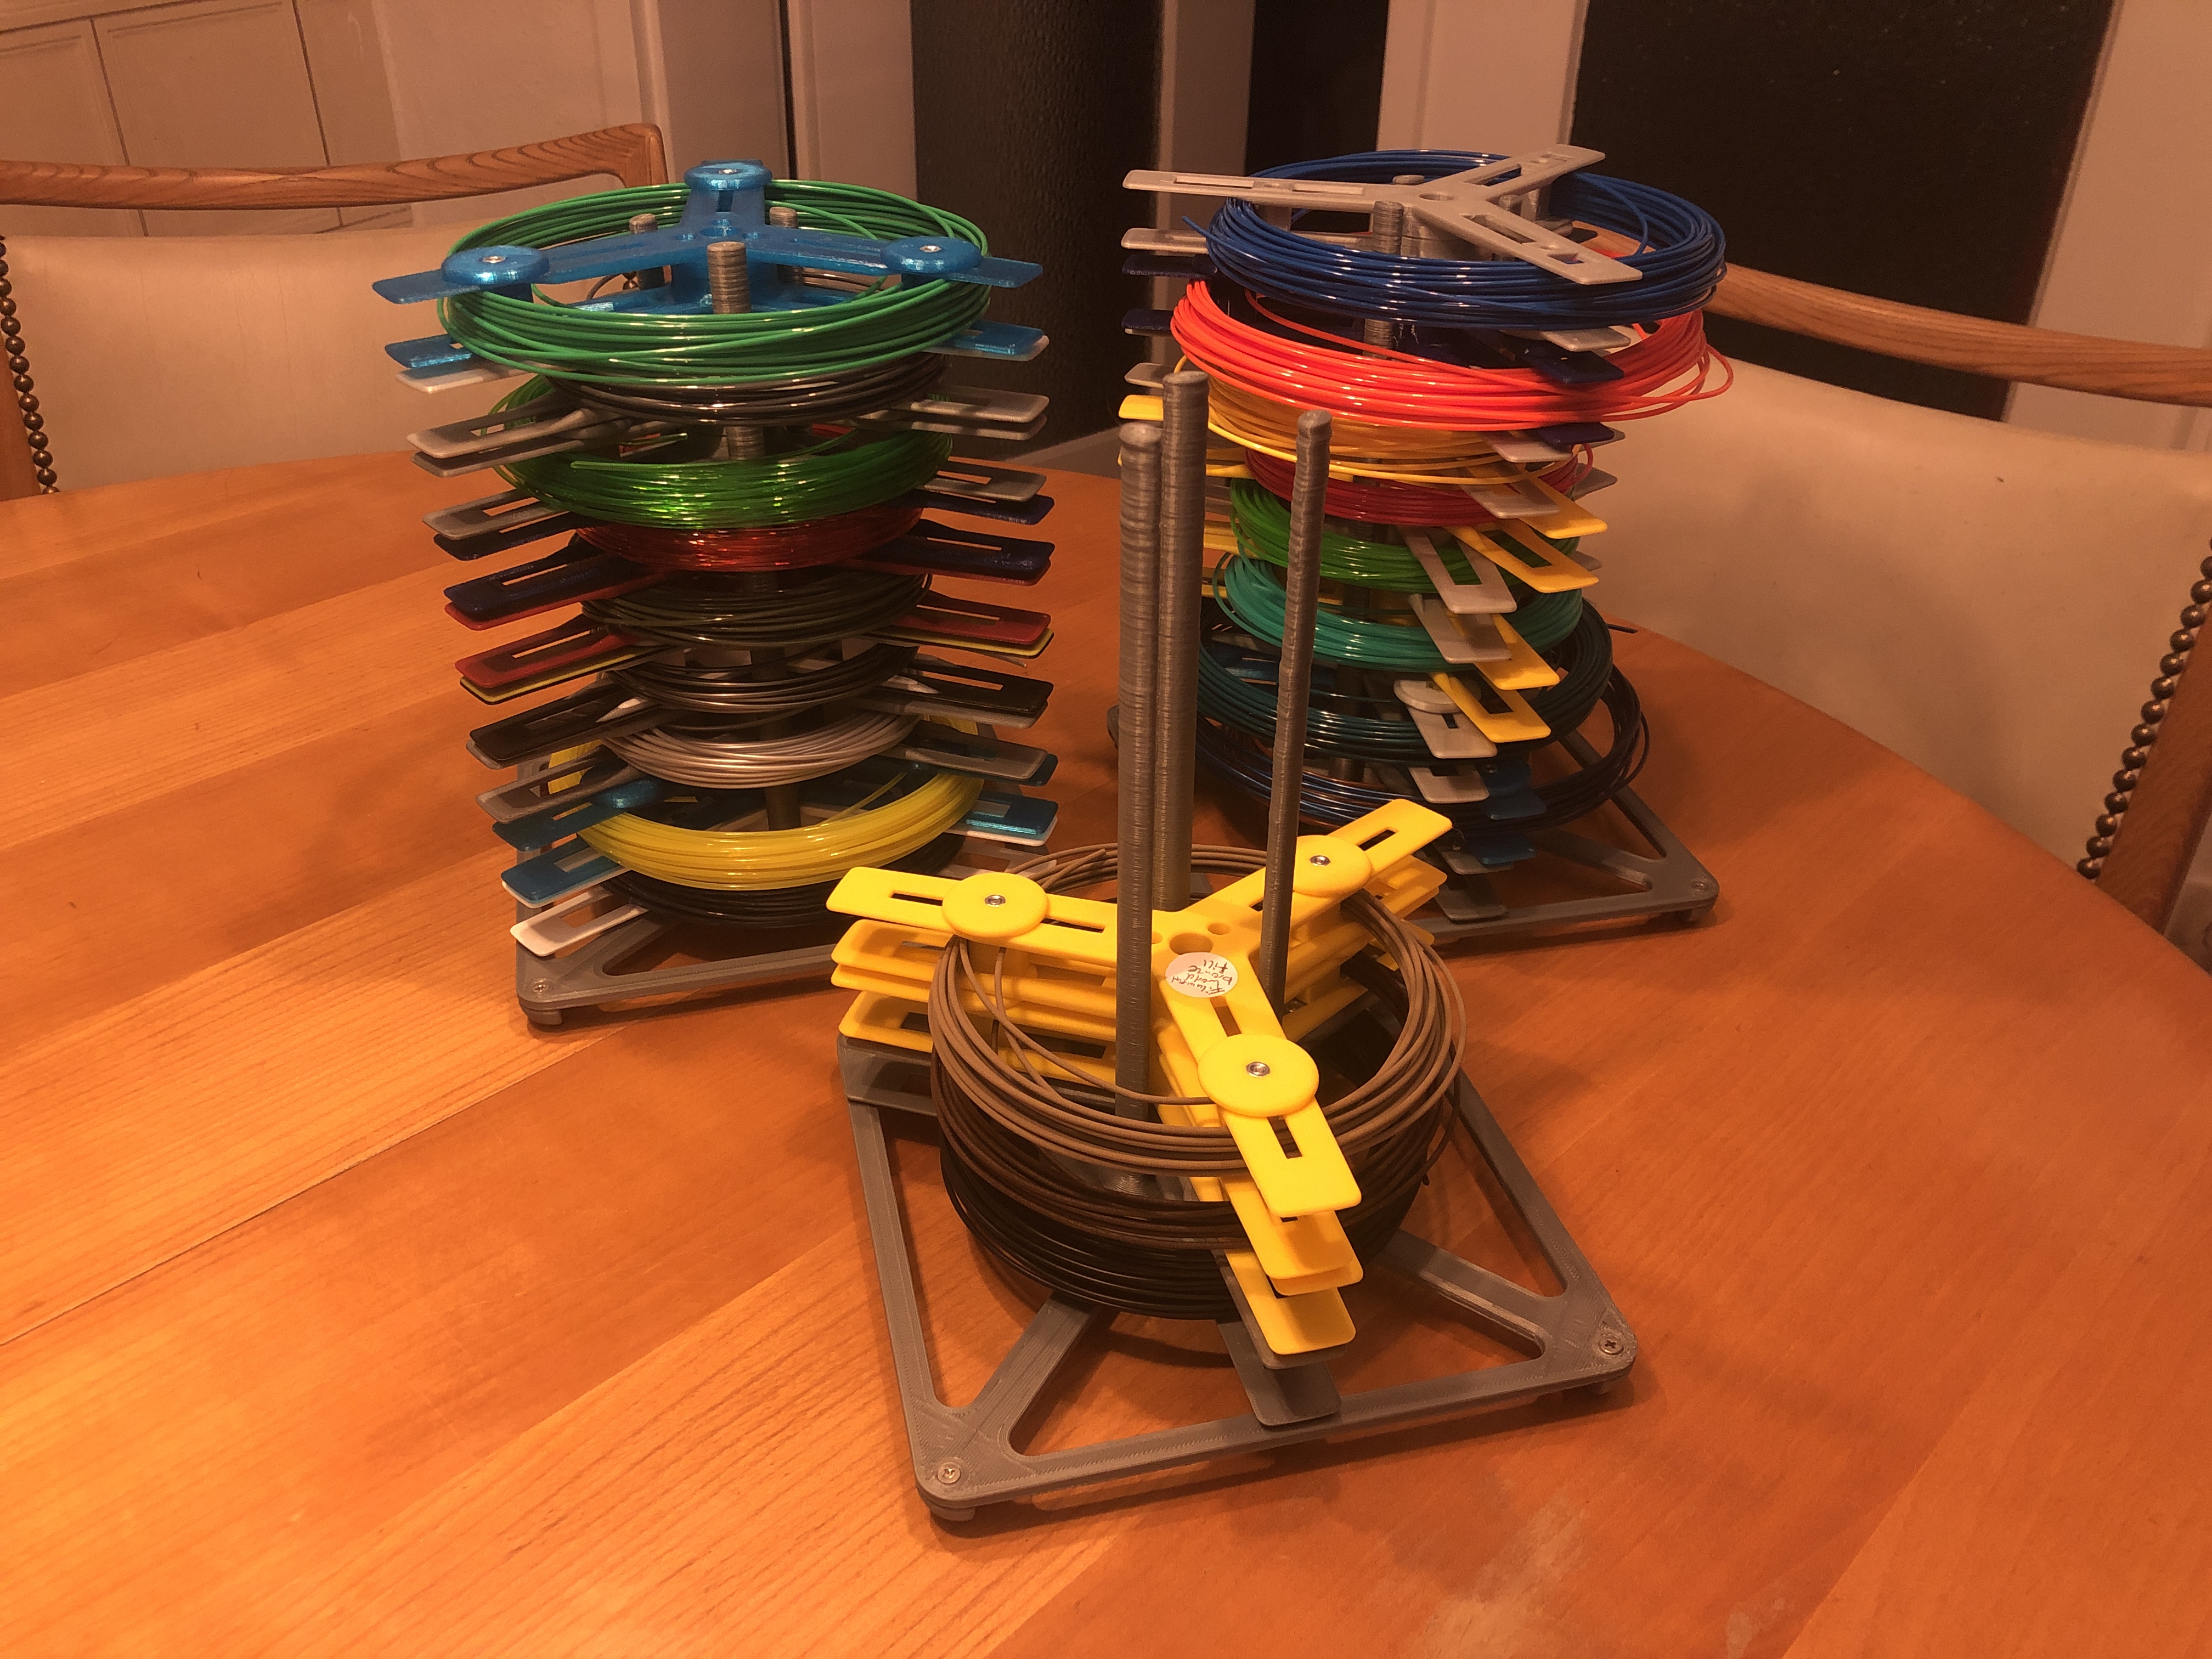
<h3><strong>Introduction</strong></h3><p>Colorprint is awesome until you get the bill for 10+ different filament spools. So I designed a sample spool filament system. This is also a great way to use up small quantities of left over filament, just put them onto a sample spool and store it away nicely until needed.</p><p>I got carried away a bit, so it is a bit more complex than necessary but it works absolutely great! I have over 20 spools in use constantly and no failures. Swapping spools is extremely fast and fun. For the spool you don't need any special parts aside from a few nuts and bolts.</p><p>A design goal of this project was to reduce friction to an absolute minimum. So I decided to use a roller bearing inside the spool but you can also use the 3D printed bearing I included in the files. I use a 13x5x4mm (outer diameter x thickness x inner diameter) roller bearing, they are extremely cheap at a decent quality.</p><h3>Parts list hardware</h3><ul><li>1x 13x5x4mm roller bearing (or print the included 3d printed version. center both the bearing parts and print at a low layer height)</li><li>6x M3x10mm countersunk screws (other head geometries might work as well, just try)</li><li>3x M3 nuts</li></ul><h3>Parts list 3D printed stuff</h3><ul><li>1x Spulenkoerper_1</li><li>1x Spulenkoerper_2</li><li>3x Slider</li><li>3x Knob</li></ul><h3>Assembly</h3><ul><li>Place the roller bearing in one of the spool holder bodies</li><li>Push the second spool holder part on top and fasten with 3x M3x10 screws</li><li>Screw the remaining M3x10 screws into the three sliders</li><li>Push the 3x M3 nuts into the knobs</li><li>Attach sliders and knobs to the spool holder</li></ul><h3>How to get the filament onto the spool</h3><p>There are two methods: </p><ol><li>You can either set the sliders to the minimum size and start spooling away. You can fix the start of the filament in one of the sliders, they have holes for that purpose.</li><li>Or you can take the sample spool, slide it over the spool holder and center and fasten it by moving the sliders outwards</li></ol><p>I would recommend option 1 since it will be spooled nicely and there is no risk of the filament getting loose or falling over the edge during a print. But option 2 also works fine most of the time ;)</p><h3>Great, and now what?</h3><p>There is a simple spool holder for MK3 style printers available:</p><p><a href="https://www.prusaprinters.org/prints/136768-toes-filament-spool-mount-for-prusa-mk3mk3smk3s-in">https://www.prusaprinters.org/prints/136768-toes-filament-spool-mount-for-prusa-mk3mk3smk3s-in</a></p><p>You can also design one based on a M4 srew.</p><p>Link to all my TOES stuff: <a href="https://www.prusaprinters.org/social/23474-jens83/collections/111873">https://www.prusaprinters.org/social/23474-jens83/collections/111873</a></p><p>Update: step files added so you can modify the design to your needs.</p>
With this file you will be able to print TOES: Totally overengineered sample spool & spool holder with your 3D printer. Click on the button and save the file on your computer to work, edit or customize your design. You can also find more 3D designs for printers on TOES: Totally overengineered sample spool & spool holder.