Toolbox for 3D Printer Repairs
prusaprinters
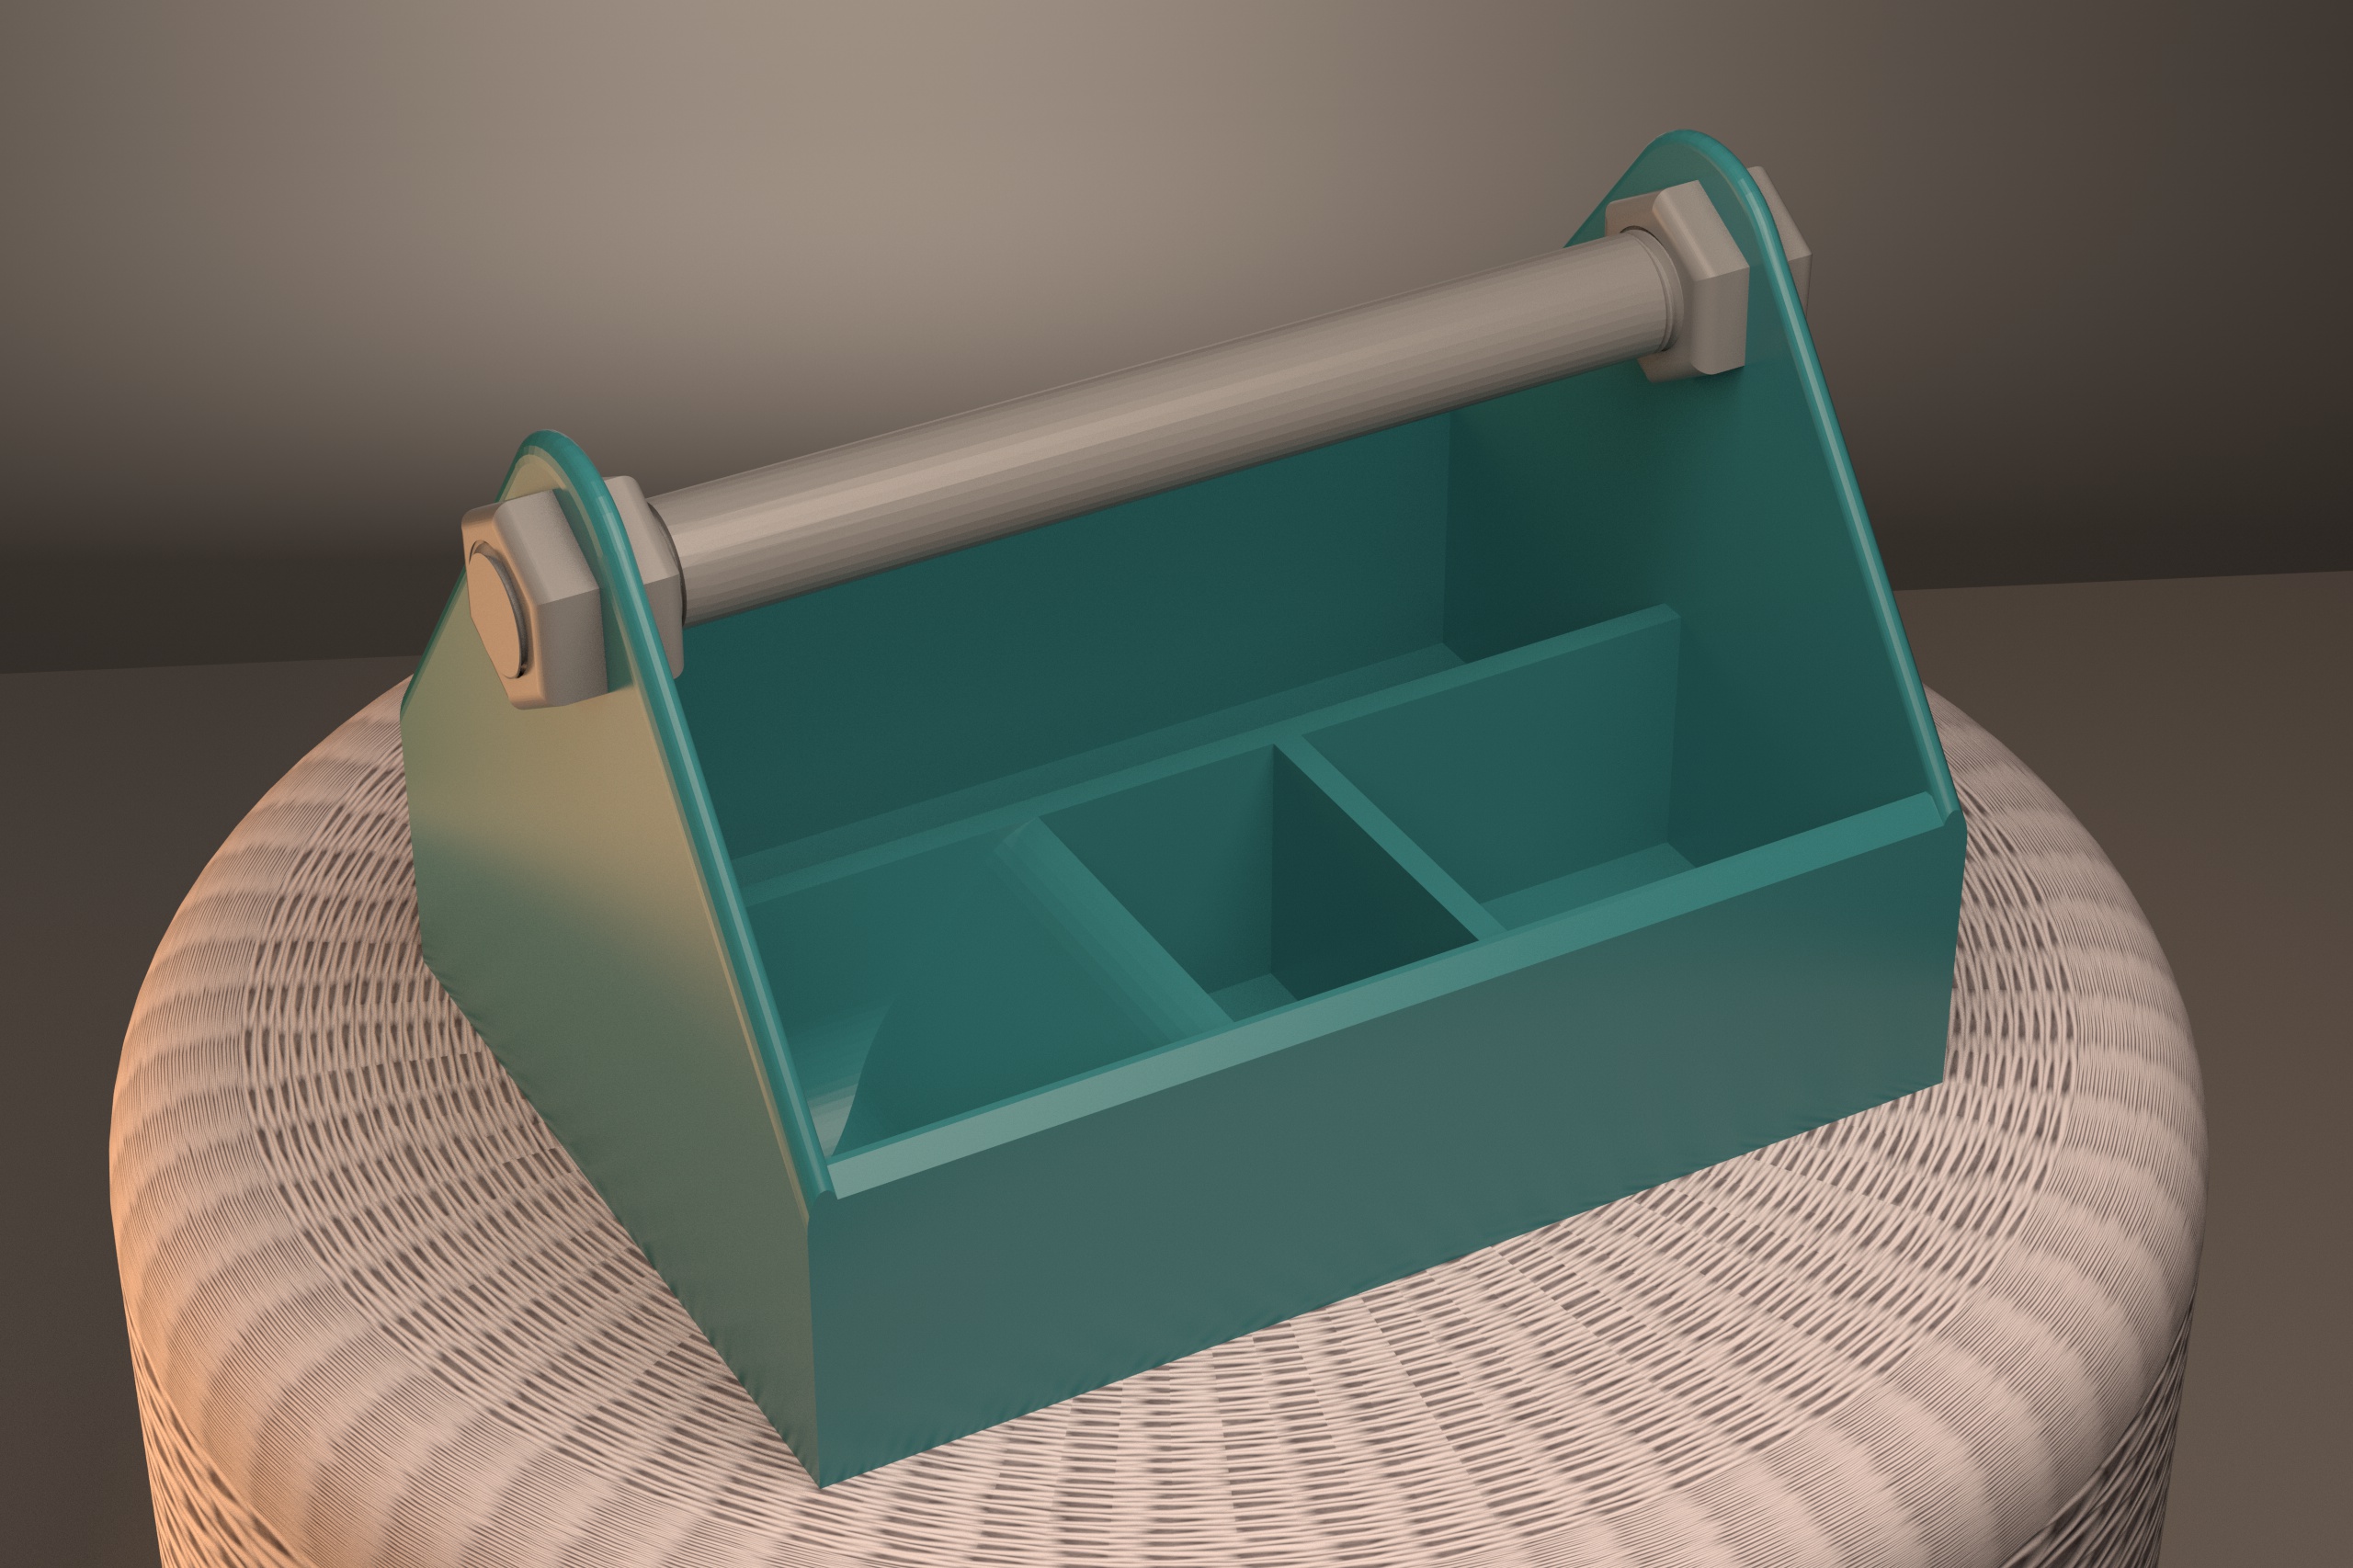
<p>This is a large, useful toolbox for small tools and parts. I use it for repairing my 3D printers because of all the small parts and tools needed.</p> <p>I have several printers that are used a lot. Anyone that really puts their printer to good use knows that you will be repairing them. I had a cardboard box with tools and small screws, nuts, etc that I used but thought that there must be a better way, especially with the small parts.</p> <p>At first I thought of designing a small print that made it easy to remove those little screws and nuts with my hands. But then thought that I would be better off if I designed a toolbox to hold those small parts in addition to the tools I need. So one of the compartments is rounded to make it easier to slide out those tiny little nuts.</p> <p>As with most of my designs, this is a huge print taking more than a day to print. What's the point of having an awesome 3D printer if all you do is print out small useless things that end up in a landfill, right? Well, some of you may not agree with me, but I would rather use my plastic on something useful rather than printing ten cats or busts of Neferneferuaten Nefertiti!</p> <p>Obviously this toolbox is not limited to repairing 3D printers and could be used for all kinds of small tools and parts.</p> <p>The first image is a render done in Cinema4D with the Redshift renderer. The second picture is an actual print. The third image is a render in Fusion 360 showing the version of the handle spit in two for Prusa printers. The fourth image is a render in Fusion 360 with the handle that is not split in two (for those that have a printer tall enough to print the handle in one piece.) The fifth image is a render showing all parts with both options for the handle. The last render is also done in Fusion 360 to show the assembled unit.</p> <h3>Print instructions</h3><p>This is an easy print, although a rather large print. To be successful, you will need to make sure you have good bed adhesion. The main box is large and may possibly warp a bit if you do not have good bed adhesion (but still usable.) However, the issue with poor bed adhesion may affect the handle. This is a tall part and may dislodge itself during the print.</p> <p>I created two versions of the handle. The handle is tall and will not print on a Prusa in one piece but will print on other printers (like the Ender 3, Tornado, CR 10, etc.) So if you have a printer that can print up to 220mm in the Z axis, you can use the stl of the one-piece handle. Just make sure that you have VERY good bed adhesion or it will fall over. I tested this on one of my non-Prusa printers and it printed fine. If you are having difficulties with the tall print, you can of course use the version of the handle that is split in two. The second version of the handle is designed for the Prusa printers or any printer that can not print up to 220mm in the Z axis.</p> <p><b>Using the gCode Files</b><br/> I have included two gCode files for the Prusa MK3/s. I could have easily fit all parts on one print, but the bed movement while printing the main box is significant and may cause the handle to fall over. Besides, the completed toolbox looks better if the handle is a different color than the box.</p> <p>So one gCode file is for the main box, and the other includes the two halves of the handle along with the four nuts required to attach it. Both files have been prepared for PLA.</p> <p>I spent a lot of time on the two-part handle to make sure it is strong and fits together correctly. I printed so many of these handles (to test how much pressure was needed to snap them in half) that I filled an empty filament box with them! So in addition to designing the print to be strong, I modified the gCode for the handle and nuts to have the default extrusion width set at 0.9.</p> <p><b>Using the stl Files</b><br/> I have included five stl files oriented properly for printing. One is the main box, one is the one-piece handle, two files for each half of the split handle, and the last file is the nut (you will need to print four of these.) No supports are needed for this print. A layer height of 0.20 is recommended. I used an infill of 15%, but 10% will work as well on the main box. If you are printing the two-part handle, I would strongly recommend doubling your default extrusion width and using an infill of 20%.</p> <p>Unless you are extremely confident in your bed adhesion, I would not print the handle with the main box, The handle is a tall print and the long/fast movement of the print bed while printing the box may dislodge the handle.</p> <p><b>Using the 3MF Files</b><br/> I have posted two 3MF files for you to use. One file is the main body prepared for the MK3/s at a 0.2mm layer height, 15% infill, and in PLA. The other 3MF file is the two-part handle and four nuts. This is at a 0.2mm layer height, 20% infill, prepared in PLA, and has the default extrusion width change to 0.9 to give the handle added strength.</p> <p>Just open the files up in PrusaSlicer and create your gCode from each file. You can of course use these files to change anything you want, such as the material used.</p> <p><b>Included STEP Files</b><br/> I also include the STEP file for this print. This file includes all parts, including both versions of the handle. 3D printing is all about making something unique and this toolbox is perfect for that! I downloaded some svg files and used Fusion 360 to make this box a little more personalized for my print, and this is something you can easily do as well. (You can see how I used an svg file of a fox on my print in the picture of the print above.)</p> <p>Another modification you can make is to add things to hold specific tools you use. This will help keep your tools more organized and make it easier to find that specific Allen wrench (or hex key.)</p> <p><b>Assembling Your Toolbox</b><br/> As I said, I have created two versions of the handle. You must screw the two halves of the handle together if you printed the handle in two parts. Next, install two of the nuts on each side of the handle and tighten most of the way on each side. Please make sure the part of the nut that was on your print bed (the flat side) faces outside towards the threads. Then place the handle in position through the two holes on the main box. You will need to bend the box slightly to get it in, just be careful to not break the box. Once installed, place the other two nuts on each side of the handle with the flat part of the nut facing inward (towards the other nut.) Tighten all four nuts at the same time (in other words turn each nut slightly one at a time) until they press against the box, and make sure you are not bending the main box after all four nuts are tight (if not this will cause a stress point that may fail over time.)</p> <p><b>Final Comments</b><br/> This tool box is perfect for small tools and parts. I guess you can print it in PETG if you need more strength, but I don't think this is necessary. However, PETG may adhere to your bed better than PLA and could be a good option for the handle.</p> <p>As always, please let me know if there is anything I can do to improve this print.</p> <p>Good luck on your 3D printing journey!</p>
With this file you will be able to print Toolbox for 3D Printer Repairs with your 3D printer. Click on the button and save the file on your computer to work, edit or customize your design. You can also find more 3D designs for printers on Toolbox for 3D Printer Repairs.