Toolchanger CoreXY
thingiverse
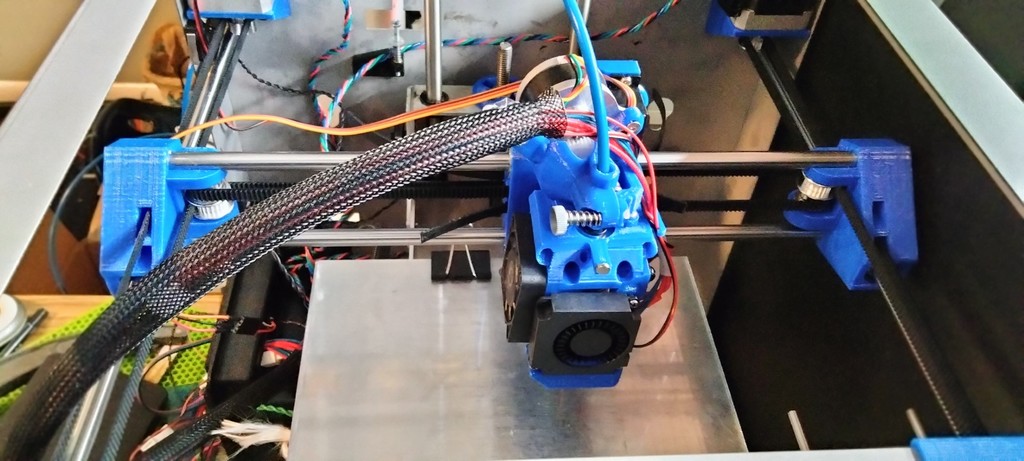
See it in action: [Cheap 3D Printed Toolchanger](https://www.youtube.com/watch?v=tlMmmSFyGIo) This is rebuild of the Solidoodle 3 with CoreXY Kinematics and a toolchanger based loosely on the E3D toolchanger. Should be easy to adapt the toolchanger to other printers. With the toolchanger, it shrinks the printable area from 200x200x200 to about 196x150x210. Without the toolchanger, it goes to about 196x205x210. This mod improves speed considerably without adding updated hardware - I'm even using damaged stepper motors! If you are only interested in the toolchanger, the rod spacing is a standard 45mm (like the Prusa), so it should transfer well to other printers. Originally used a 28byj, but updated to use a servo. Both still work, but the servo is easier. The stepper should last longer. If anyone is looking for mod ideas, an endstop would mean the stepper doesn't need to home or anything. Just run it until it stalls. # Parts - 4 3mm rods, salvaged from DVD/CD players - 5 [5x3 round neodenium magnets](https://www.amazon.com/gp/product/B09MMWH3WP) - 1 ~1.5mm needle. I found it in an ink tag on a shirt that was never removed :) - 2 623ZZ bearings (but the design is parametric - I used copper bushings) The hotend is held in place by 2 3mm rods on the resting tool holder. Two magnets are glued into place as well. Put some grease between the magnets to avoid sticking them together! The kinematic coupling (tool mount) uses one 3mm rod as the lock shaft. The other rod is cut into six 10mm long pieces and each piece is glued into the tool mount. 3 round 5x3 neodenium magnets go in the 3 holes in the back of the tool backplate. The lock shaft needs a pair of holes drilled in it to slide a 1.5mm pin into place and to screw it to the gear (but glue might work on this. The pin doesn't have to be exact - I used a 1/16 drill bit and held the pin in place with superglue and a pen spring. I added a printable guide for centering the hole on the rod. Put the gear on first, assemble it Don't forget to lubricate it before drilling! The extruder is a SuperFly geared extruder (www.thingiverse.com/thing:4841682 or www.thingiverse.com/thing:4914090) and the blower is a modified Mistral (www.thingiverse.com/thing:3255518). There is definite room for improvement, like putting the fan at a 45° angle (or lower) but someone else can do that if the need is there. If you like this design but don't want the toolchanger, rather than the lock and gear, use a bolt. That way, the tool can still easily be removed for upgrades. The tool itself is where I put my heart to work. It's meant to be stiff and compact and still shove as much air through the V6 as possible so it never clogs... at least not due to heat saturation. I'm going to put this on my modified Anet A8 soon.
With this file you will be able to print Toolchanger CoreXY with your 3D printer. Click on the button and save the file on your computer to work, edit or customize your design. You can also find more 3D designs for printers on Toolchanger CoreXY.
