TOOLMAKERS CLAMP
prusaprinters
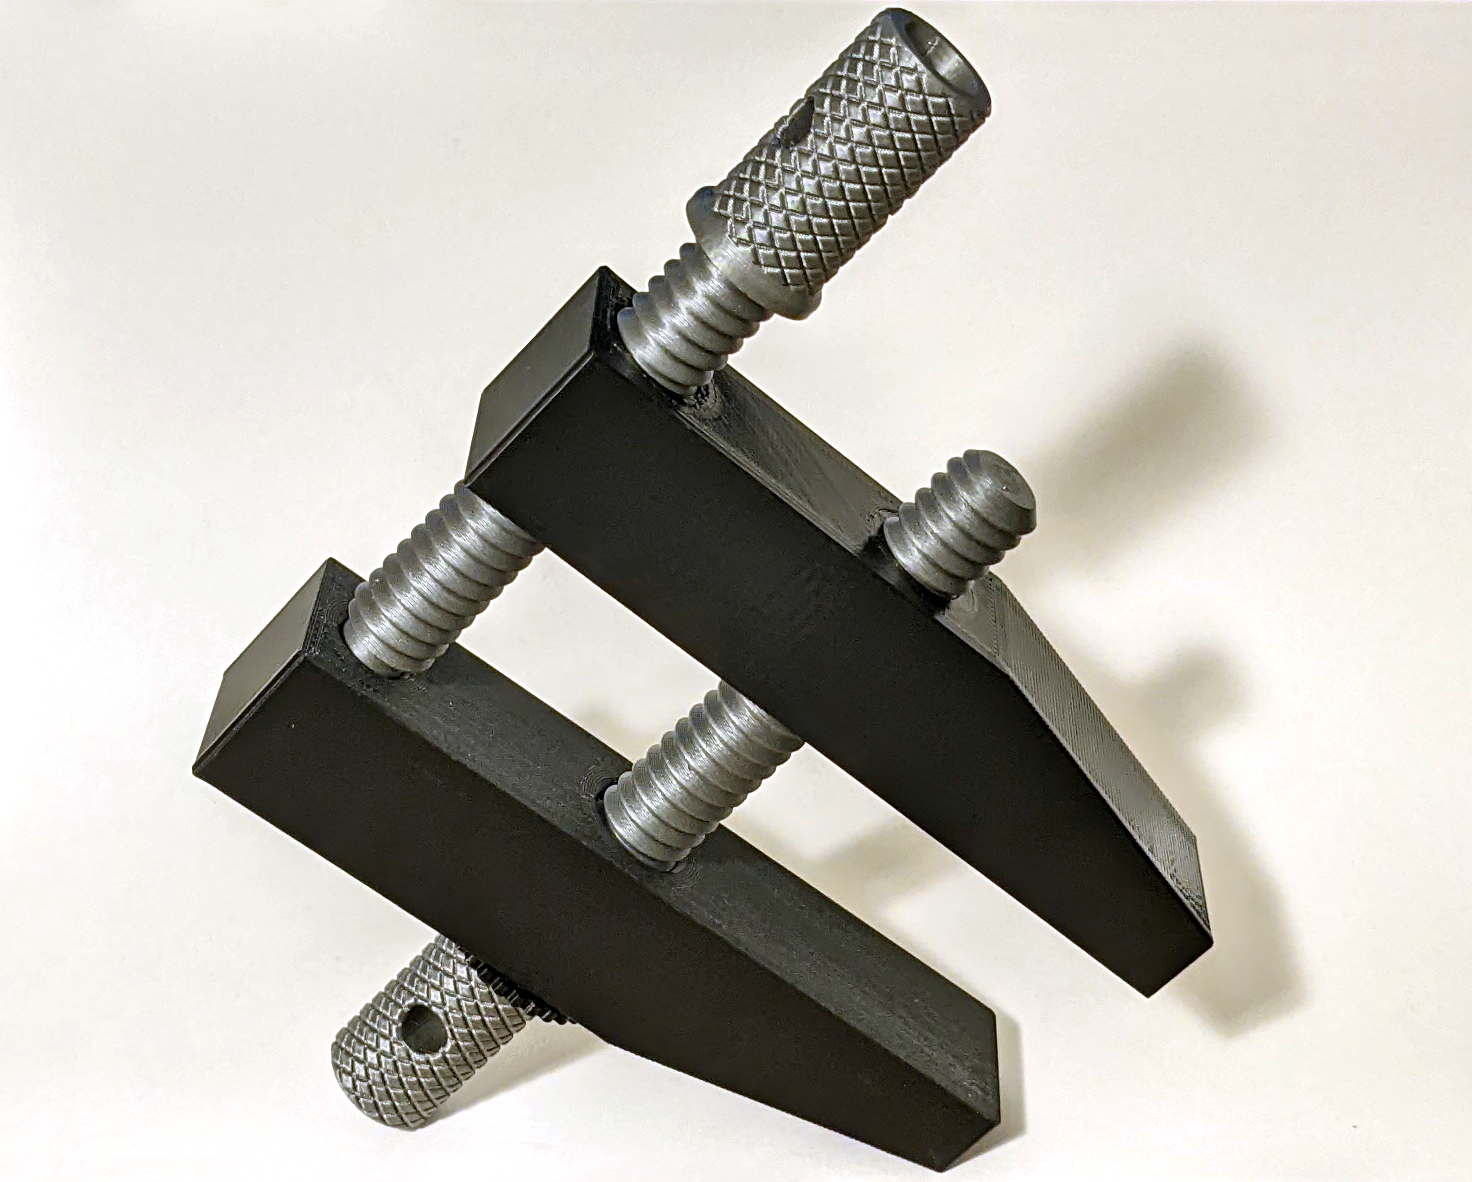
<p>My take on a toolmakers clamp.</p><p>This is the style of clamp that uses the front rod for clamping and the rear rod for leverage.</p><p><i>You may be looking for a PARALLEL CLAMP, which has both rods threaded for tightening.</i><br><i>Available here: </i><a href="https://www.printables.com/model/248073-parallel-clamp"><i><strong>PARALLEL CLAMP</strong></i></a></p><p>Narrow-tipped clamp downloads available as well.</p><p>100% printed parts. No hardware or glue needed. </p><p>No supports needed.</p><p><strong>Assembly is easy:</strong><br><strong>1. </strong>Arrange the bottoms of the clamps flat against each other and align the holes.<br><strong>2.</strong> Insert the adjustment rod (ROD1), passing through the larger hole at the front of the clamp (CLAMP1) and screwing into the threaded section of the opposite clamp.<br><strong>3. </strong>Screw in the ROD1 until it bottoms out.<br><strong>4.</strong> Slide the cap over the top of the rod handle and thread it into the clamp until it bottoms out and locks in place. (The cap flange protrudes over the edges of the clamp so you can get a grip.)<br><strong>5. </strong>Screw the tension rod (ROD2) into CLAMP2 until the tip enters the void in CLAMP1</p><p>ENJOY!!!</p>
With this file you will be able to print TOOLMAKERS CLAMP with your 3D printer. Click on the button and save the file on your computer to work, edit or customize your design. You can also find more 3D designs for printers on TOOLMAKERS CLAMP.