Top Cover Retrofit Splashguard for "3D Face shield - A4 binding sheet - easy punching" by Maciej I
prusaprinters
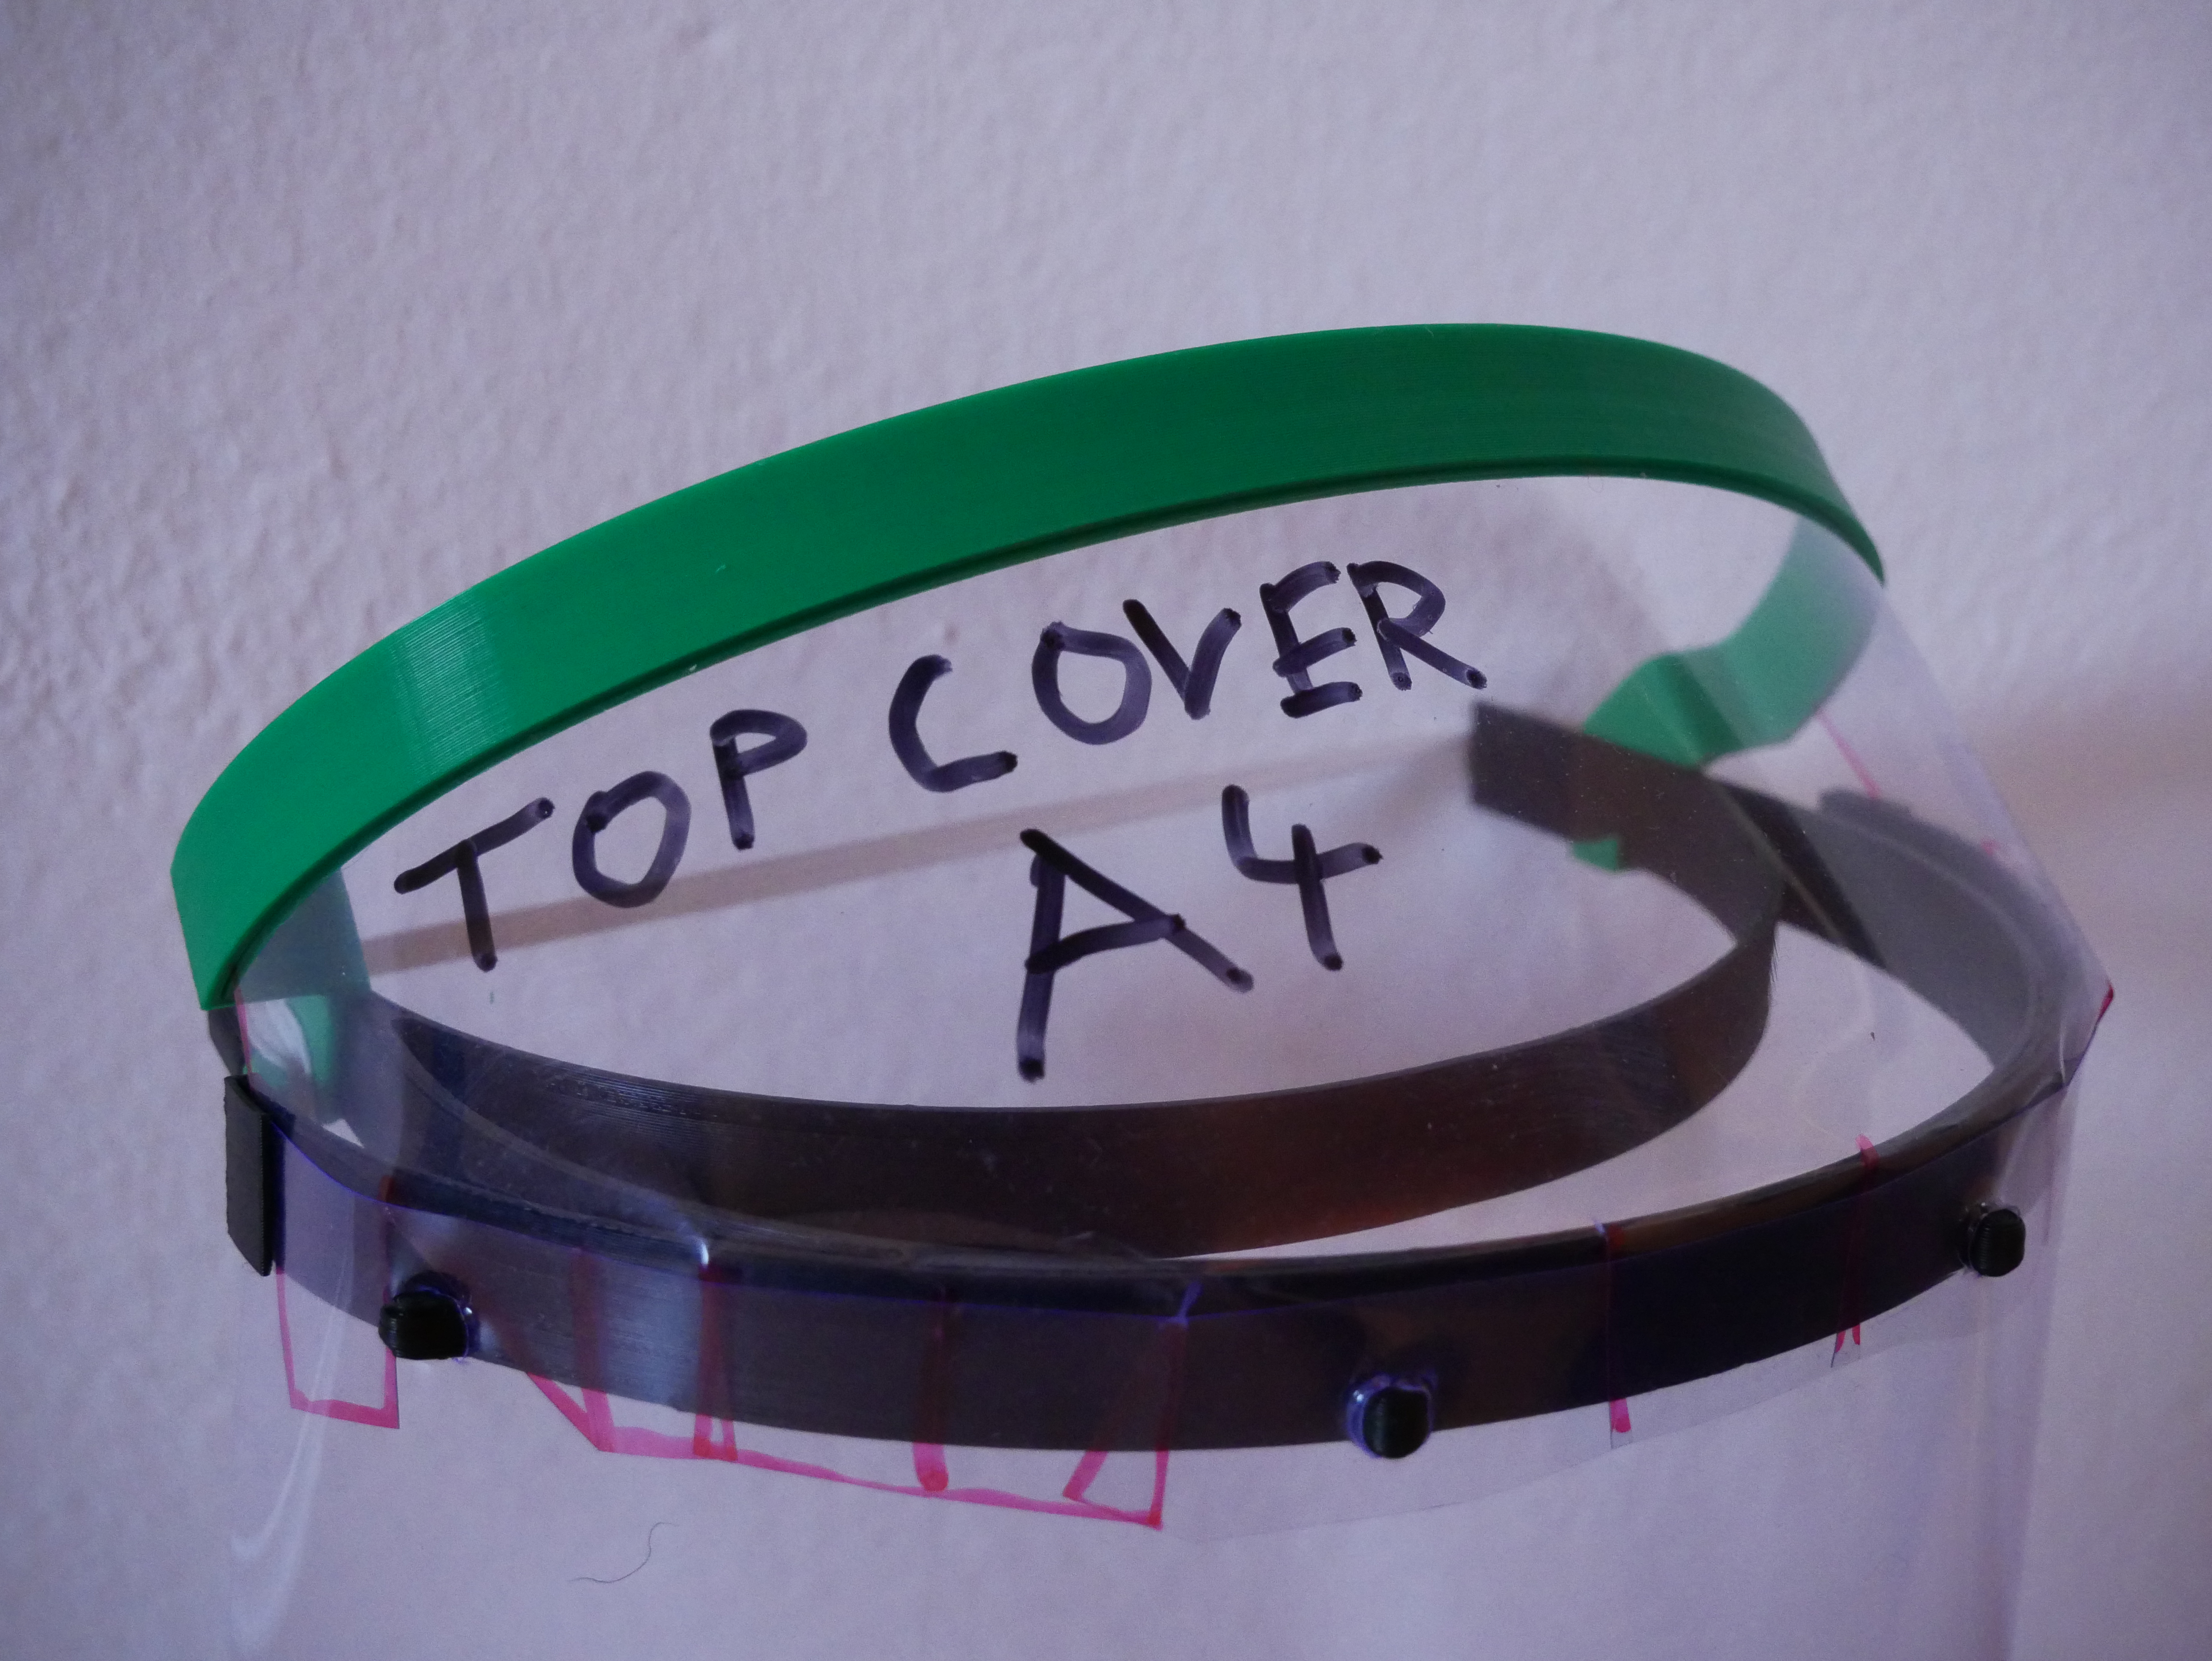
<p>Hi! These model files allow you to <strong>retrofit a Top Cover</strong> to „Face shield – A4 binding sheet – easy punching rc2_3" (by Maciej I). Also there is a file with <strong>increased wearer comfort</strong>. It has little tabs where you may fit a paper tissue.</p> <h3>A4 Top Cover Print</h3> <p>With this model you need to adjust the horizontal expansion a little bit. On my machine, a horizontal expansion of -0,1 mm works best.</p> <h3>A4 Top Cover Sheet - Method 1 with Marker</h3> <p>Step 0: Create a word file with 0 mm for all margins. Paste the Template PNG into to file and save. Can't upload a PDF here :-(<br/> Step 1: Print Template for „A4 Top Cover“ on DIN A4 paper at 100% scale.<br/> Step 2: Punch holes in transparent sheet with hole punch set to A6.<br/> Step 3: Align transparent A4 sheet on top of template.<br/> Step 4: Transfer the thick lines of template with marker pen to transparent sheet.<br/> Step 5: Cut the transparent sheet along the thick lines<br/> Note 1: You can make two top covers out of one DIN A4 sheet.<br/> Note 2: Remove marker (with solvent) before assembly, as it may stain the shield when applying disinfectant.</p> <h3>A4 Top Cover Sheet - Method 2: Print, Tape, Cut</h3> <p>Step 0: Create a word file with 0 mm for all margins. Paste the "Double" Template PNG into to file and save. Can't upload a PDF here :-(<br/> Step 1: Print Template for „A4 Top Cover“ on DIN A4 paper at 100% scale. Cut the four corners in a straight line.<br/> Step 2: Punch holes in transparent sheet with hole punch set to A6.<br/> Step 3: Align transparent A4 sheet on top of template.<br/> Step 4: Use tape to fix the template to the transparent sheet.<br/> Step 5: Use scissors to cut the transparent sheet along the thick lines.</p> <h3>Assembly</h3> <p>Insert the top cover sheet in the top cover print. Attach the top cover to the face shield and attach the headband around both hooks. Then fix the top cover sheet to the two punched holes. Last step is fixing the front shield. It keeps everything together. Assembly may be a bit tricky at first - work from one side of the face shield arch to the other side.</p> <h3>Face Shield Remix</h3> <p>The Face Shield is a remix of Maciej I. I added tabs where you can attach a paper tissue. This increases the comfort when wearing considerably. Just insert a standard paper tissue inside the tabs and fold it towards your forehead.</p> <h3>Design Notes for Remixes</h3> <p>Special about this design is that the top cover is really well connected to the shield. This is accomplished by using two holes of the top sheet on the visor, by constraining it's movement in the top part, and by fixing the top part to the visor with the headband. If you do a remix please incorporate the tissue holder - it makes wearing it way more comfortable.</p> <h3>Print instructions</h3><h3>A4 Top Cover Print</h3> <p>With this model you need to adjust the horizontal expansion a little bit. On my machine, a horizontal expansion of -0,1 mm works best.</p> <h3>Face Shield Remix</h3> <p>Just as Maciej I told:<br/> PET-G<br/> 0,3 mm l. height<br/> 0,4 mm nozzle</p>
With this file you will be able to print Top Cover Retrofit Splashguard for "3D Face shield - A4 binding sheet - easy punching" by Maciej I with your 3D printer. Click on the button and save the file on your computer to work, edit or customize your design. You can also find more 3D designs for printers on Top Cover Retrofit Splashguard for "3D Face shield - A4 binding sheet - easy punching" by Maciej I.