Top Enclosure Camera Mount
thingiverse
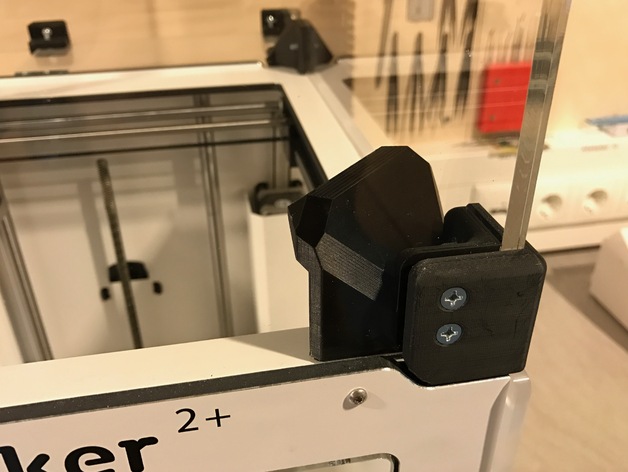
I've combined the original Ultimaker 2 camera holder to be able to fit it inside the top cage of our printer. Be sure to buy a camera with 36*36mm baseplate. Only this way you can use the provided mounting holes (M3 bolts and nuts). Otherwise use some hotglue, works fine from my experience. You can also cut away parts of your print and a grind away a thin strip of acrylic to run the ribbon cable through nice and clean. Make sure to read this first: [Attention: Be sure to use "BIG_LENS_top_enclosure_camera holder" if your raspberry pi camera has huge optics. You can then use the four bottom (!!!) screws of the camera to mount it to the camera holder. The second picture shows it quite good, I think. Otherwise your print head may crash into the front of the lens! (but only while printing at the front right corner of your buildplate) To erase the little corner, print the object on the "triangular" side and set the x-axis of your printer to around -5mm.] Print Settings Printer Brand: Ultimaker Printer: Ultimaker 2 Rafts: No Supports: No Resolution: 0.1 Infill: 30% (triangles, Cura 2.3.0)
With this file you will be able to print Top Enclosure Camera Mount with your 3D printer. Click on the button and save the file on your computer to work, edit or customize your design. You can also find more 3D designs for printers on Top Enclosure Camera Mount.