Top Notch Tippe Top
thingiverse
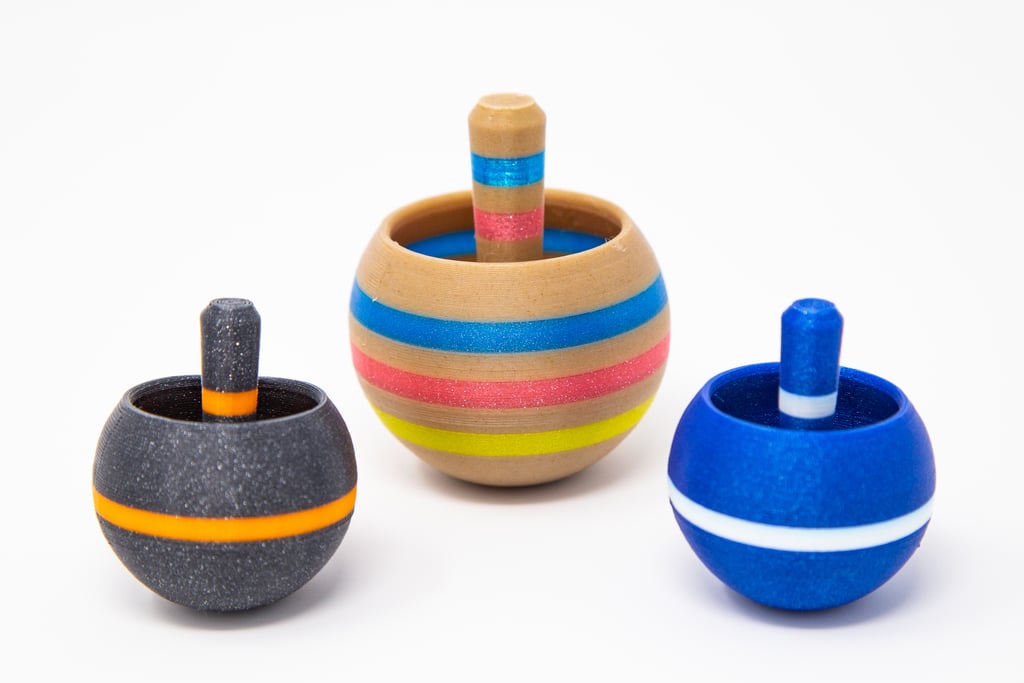
A tippe top is a very unique kind of top. If you spin it fast enough it will slowly tip over and then pop-up and start to spin on it's handle! This motion is very fun to watch and has captivated great thinkers throughout history. I have designed this model to both print easily and to invert on its handle reliably. This resulting model is the result of many design iterations. There are many factors that must be considered when designing a successfully tippe top. The most important is that center of gravity must be lower that the center of curvature of the base (the distance between them is also important - not to close and not to far apart). Other practical factors that I found important when designing this model for 3D printing were: to slightly flatten the bottom to promote the top to tip over faster and also the design of the handle. I found that if the handle is chamfered to match the tangent of the top's body this increases the friction (thereby increasing the torque) and allows the top to pop-up easier and at lower speeds. I have uploaded 4 different ways to print this model. They all result in the exact same top - but differ in how they are assembled or scaled. This will allow you to print them in the way the works easiest for you. All versions require some supports though they should just pop off easily (and in the case of the split version - the supports make it easier to remove from the print bed if you don't have a removable bed). An overview video of how I made this design and to see it in action: https://youtu.be/AQgBUaosH0Y Printing Options and Printing Tips ==================== Four different ways to print the top (A-D) have been uploaded. They all produce the same top so choose the one that is easiest for you to print. Option A - Threaded Handle --------------------- This option has two parts: a base, which is the entire spherical body, and the handle. After printing the handle is then screwed into the base. The benefits of this option is that the resulting model looks much nicer with no visible joints. The disadvantages are that (1) the handle is somewhat weaker when assembled and (2) the handle may be a bit difficult to print as it is very tall and has a small contact area with the build plate. How to print: - Print with an infill of 90% and a 0.2mm layer height - Print both parts upside down (the .stl files are already correctly oriented) - Include a small brim around the handle to help support it during the print (1 layer high and 6 outlines worked well for me). - Add supports under the center of the base. For best results customize the supports so they don't touch the rim of the base and also be sure that there are no supports in the threaded hole in the top center of the base. - During assembly add a bead of glue to the top thread of the handle. This will secure the handle as well as provide extra strength. Scaling options -- this option also prints well at 135% scale! (and probably larger - until the tolerances in the threads get too loose). Option B - Split Base (Standard Size - 34mm) --------------------- This option splits the top into two parts (horizontally sliced) and also includes a recess (and protrusion) to help make assembly and alignment easy. The main benefits of this option are that it is very easy to print and prints the quickest of all of the options. The disadvantage is that it creates a visible seam in the top (this doesn't affect the tops performance) -- this can be worked around by printing the parts in different colors to create a fun style. How to print: - Print with an infill of 90% and a 0.2mm layer height - Print the bottom part upside down and include supports around the outer edges - Print the top part right-side up and no supports are needed. - Assemble by glueing the two parts together. Scaling options: if you want to scale this larger use Option C as the tolerances can get too loose. It should be possible to print this model smaller. Option C - Split Base (Larger Size - 46mm) --------------------- This option is a larger version of Option B. The model is scaled larger but the tolerances are kept the same. All of the advantages and disadvantages as well as the printing methods are all the same as Option B. These models can probably be scaled larger as well until the tolerances become too loose. Option D - Full Model --------------------- This option is the entire top as one part. It can be printed with supports in one piece or used as a starting point to modify the design. I have printed this model (both upside down and right side up) and the results were inferior to the other options due to the supports required. I felt that printing this upside down required too many supports that were hard to remove around the handle (and caused me to break the handle accidentally). Post processing: ==================== The top should work right off the build plate (after removing supports). However, you can also increase it's performance by sanding the bottom until it is smooth and also slightly sanding the top of the handle. More Information: ==================== http://www.fysikbasen.dk/English.php?id=79&page=Vis https://www.hindawi.com/journals/jam/2012/268537/ https://youtu.be/Kwihc4kbNVA https://m4ttbit.gitlab.io/2017/09/26/tippe-top-design.html
With this file you will be able to print Top Notch Tippe Top with your 3D printer. Click on the button and save the file on your computer to work, edit or customize your design. You can also find more 3D designs for printers on Top Notch Tippe Top.