Topwater Popper Fishing Lure
thingiverse
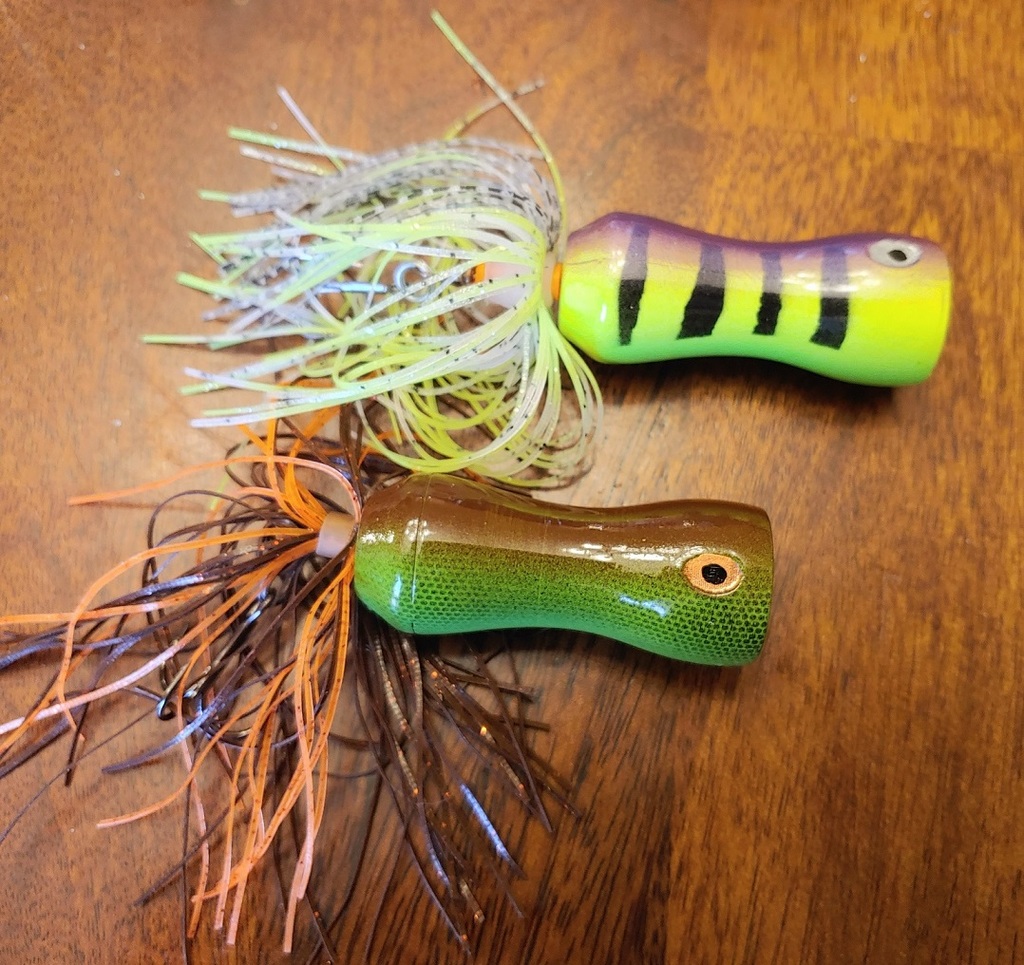
These are some floating, topwater popper lures that I designed and printed, based on some store-bought ones. They were a lot of work to get into proper working order, but look great and catch fish, at least in my neck of the woods. What you will need: =============== * Stainless Steel Wire - [I used this](https://www.afwfishing.com/afw_products/S15T-25.asp) * Split Rings - [I went with 20lb](https://www.jannsnetcraft.com/split-rings-pliers/316900.aspx) * Treble Hooks - [#4-#6 size works fine](https://www.jannsnetcraft.com/eagleclaw-treble-hooks/820216.aspx) * Silicone Skirts - [Something like this or make your own](https://www.jannsnetcraft.com/silicone-skirts/360757.aspx) * Very Small BBs - [1.5 to 2mm](https://www.amazon.com/gp/product/B07YKQJ9QG/) * Primer - [I like this stuff](https://www.rustoleum.com/en/product-catalog/consumer-brands/auto/primers/2-in-1-filler-and-sandable-primer) * Sandpaper - I use mostly 400-800 grit wet/dry stuff * Paints - Acrylic, Enamel, Airbrush, whatever * Wire Bending/Cutting Tools - Round jewelry pliers work well * UV Cure Resin - [I used this](https://www.michaels.com/signature-crafts-light-cure-uv-resin-3.68oz./10625688.html) * Time and Patience Printing: ======= Orient the lures with the flat back-end on the build plate and the "mouth" end facing up. I printed these with various kinds of PLA with a 0.4mm nozzle and 0.25mm layer height and 20% infill with at least 4 outer layers. Even then, some of them end up a touch on the heavy side and would probably slowly sink if you didn't keep reeling them in. There is a V3 that has an inner chamber that makes it lighter and easier to fill with BBs, but the V2 version works just fine too; the BBs are just suspended in the chambers created by the infill pattern. While you're printing, you'll either need to pause or space them out well across your build platform to insert the BBs in the middle of the print. This will give them their "rattle" sound that helps make them enticing to bite. Post-Processing: ============= This is where the real work comes in. After you're done printing, you'll need to prime the lure bodies and sand them down to be as smooth as possible. For me, I was happy enough with 2 coats of primer, sanded down wet with 400 grit sandpaper, then another 2 coats, and sanded down wet with 800 grit sandpaper. After that, I primed them all with white paint as a base coat. After that, I used an airbrush to paint and blend various colors to make for a variety of patterns. I used old nets, screens, etc. to do some of the scale-like effects and painter's tape for most of the stripey patterns. I hand-painted the eyes with acrylic and enamel paints. After the painting was done, I inserted the wires. I ran a straight piece of wire maybe 120mm long from the tail end of the lure through the mouth and then folded it in half to create a 180-degree bend. Then I left 3 or 4 mm of straight wire, and then made another bend at 90-degrees and then cut off the excess with only a couple millimeters left. There is a picture showing what this kind of looks like. I then carefully pushed the angled end into the other hole in the mouth of the lure, and made sure it was firmly in place. There is a J-shape built into the holes in the mouth of the lure that the 90-degree piece should "catch" in if you get it right, that will keep it from slipping out when you're reeling in. You'll want to make sure there's enough straight wire coming out of the back end of the lure so that you can make a loop behind the skirt for your split-ring and hook. With the wire in place, now it's time to coat the whole thing in UV curing resin in an indoor place using a foam brush or paintbrush you don't care about. Do this on a sunny day or us a UV curing light if you have access to one. I cured mine outdoors, and did two coats on the whole thing, with about 15-20 minutes of cure time in bright sunlight, rotating periodically so each side would face the direct sun for at least a little while. After that, I slid on my silicone skirt, and then bent the straight wire on the back-side of the lure into a circle, and then wrapped the excess around the straight part behind the skirt 2 or 3 times. There are lots of videos on youtube about how to bend wires for lure making, so I suggest looking up one of those if the description isn't particularly clear. After that, put a split ring on both the front and back side loops of the wire, and a treble hook on the split ring on the back side. With that completed, you're ready to fish!
With this file you will be able to print Topwater Popper Fishing Lure with your 3D printer. Click on the button and save the file on your computer to work, edit or customize your design. You can also find more 3D designs for printers on Topwater Popper Fishing Lure.