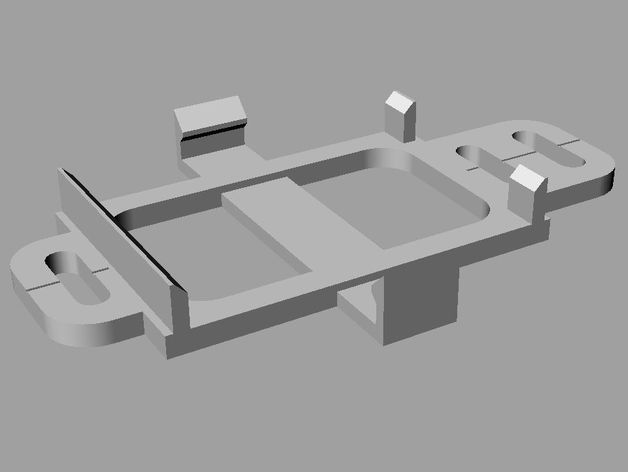
Tortoise Mount for Tortoise (by Circuitron) Switch Machine
thingiverse
This mount simplifies the installation and later removal (if required) of the widely-used Tortoise (by Circuitron) Switch Machines used for operating model railway points (also known as switches or turnouts). The slotted holes in the mount allow some side-to-side adjustment, in order to equalise the movement and pressure on the point blades in both directions. The mounting holes are along the track centre line which better suits installation on narrow roadbed. Most importantly, the Tortoise switch machine can be simply clipped in place and unclipped without disturbing the alignment. Instructions Suggested Print Settings (e.g. for Makerbot Replicator): 0.2 mm layers PLA - no raft (as raft difficult to remove) ABS - with raft (to minimise warping) Installation Instructions Install the points (turnout) on the roadbed and cut a hole or slot for the spring steel wire as per the Tortoise instructions at www.circuitron.com. Many people find that the spring steel wire supplied with the Tortoise is too thin to exert sufficient pressure on the point blades, so consider substituting 0.8 mm (0.032") spring steel wire (piano wire). Clip the Tortoise onto the 3D printed mount and carefully move the black throw arm on the Tortoise to the central position. Then, poke the spring steel wire through the roadbed from underneath and into the hole in the point/turnout tie bar. At this stage, one option is to use a spring clamp to grip the top of the wire so it, and the Tortoise, do not fall down. Align the Tortoise and mount with the track centreline and mark the positions of the slotted holes at each end of the mount. Drill suitable size holes in the roadbed from underneath and secure the mount and Tortoise using 2 x #4 or #6 screws. Note that the fixing holes are 70 mm apart, and the distance from the slot for the actuating wire to the adjacent fixing hole is 10 mm. Remove the spring clamp from above, and apply DC power to the Tortoise to check that the points (turnout) operates correctly. Adjust the side-to-side position of the Tortoise mount as required to obtain equal and firm pressure on the point blades in both positions. When everything is working, cut the excess spring steel wire from above the tie bar so it doesn't interfere with passing trains. Please use cutters designed for spring steel wire as cutters intended for soft, copper wire can be damaged by the hard spring steel wire. Note: If the Tortoise is unclipped from the mount and removed from the layout for any reason, if may be necessary to fit a new, longer piece of spring steel wire to allow the wire to be threaded through the tie-bar when the Tortoise is clipped back in position. Obviously, the new wire needs to be cut to length after reinstallation. Tortoise Jig (optional) If there are many Tortoises to be installed, consider printing the Tortoise Jig which is identical to the Tortoise Mount except that it has a cylinder of plastic in the slot where the spring steel wire normally goes. To use the jig, drill out the fine hole in the cylinder to match the diameter of the spring steel wire being used, and insert a length (50 mm approx) of spring steel wire into the hole so it protrudes from the flat side of the jig. Check that the spring steel wire is perpendicular to the flat surface of the jig in both directions, and bend the wire slightly, if necessary, to make sure it is perpendicular. In Step 3 above, use the jig in place of the Tortoise itself to mark the hole positions, prior to drilling. The reduced weight and bulk of the jig can make this step easier than using an actual Tortoise.
With this file you will be able to print Tortoise Mount for Tortoise (by Circuitron) Switch Machine with your 3D printer. Click on the button and save the file on your computer to work, edit or customize your design. You can also find more 3D designs for printers on Tortoise Mount for Tortoise (by Circuitron) Switch Machine.
