Totoro Lamp - Siri/HomeKit enabled!
prusaprinters
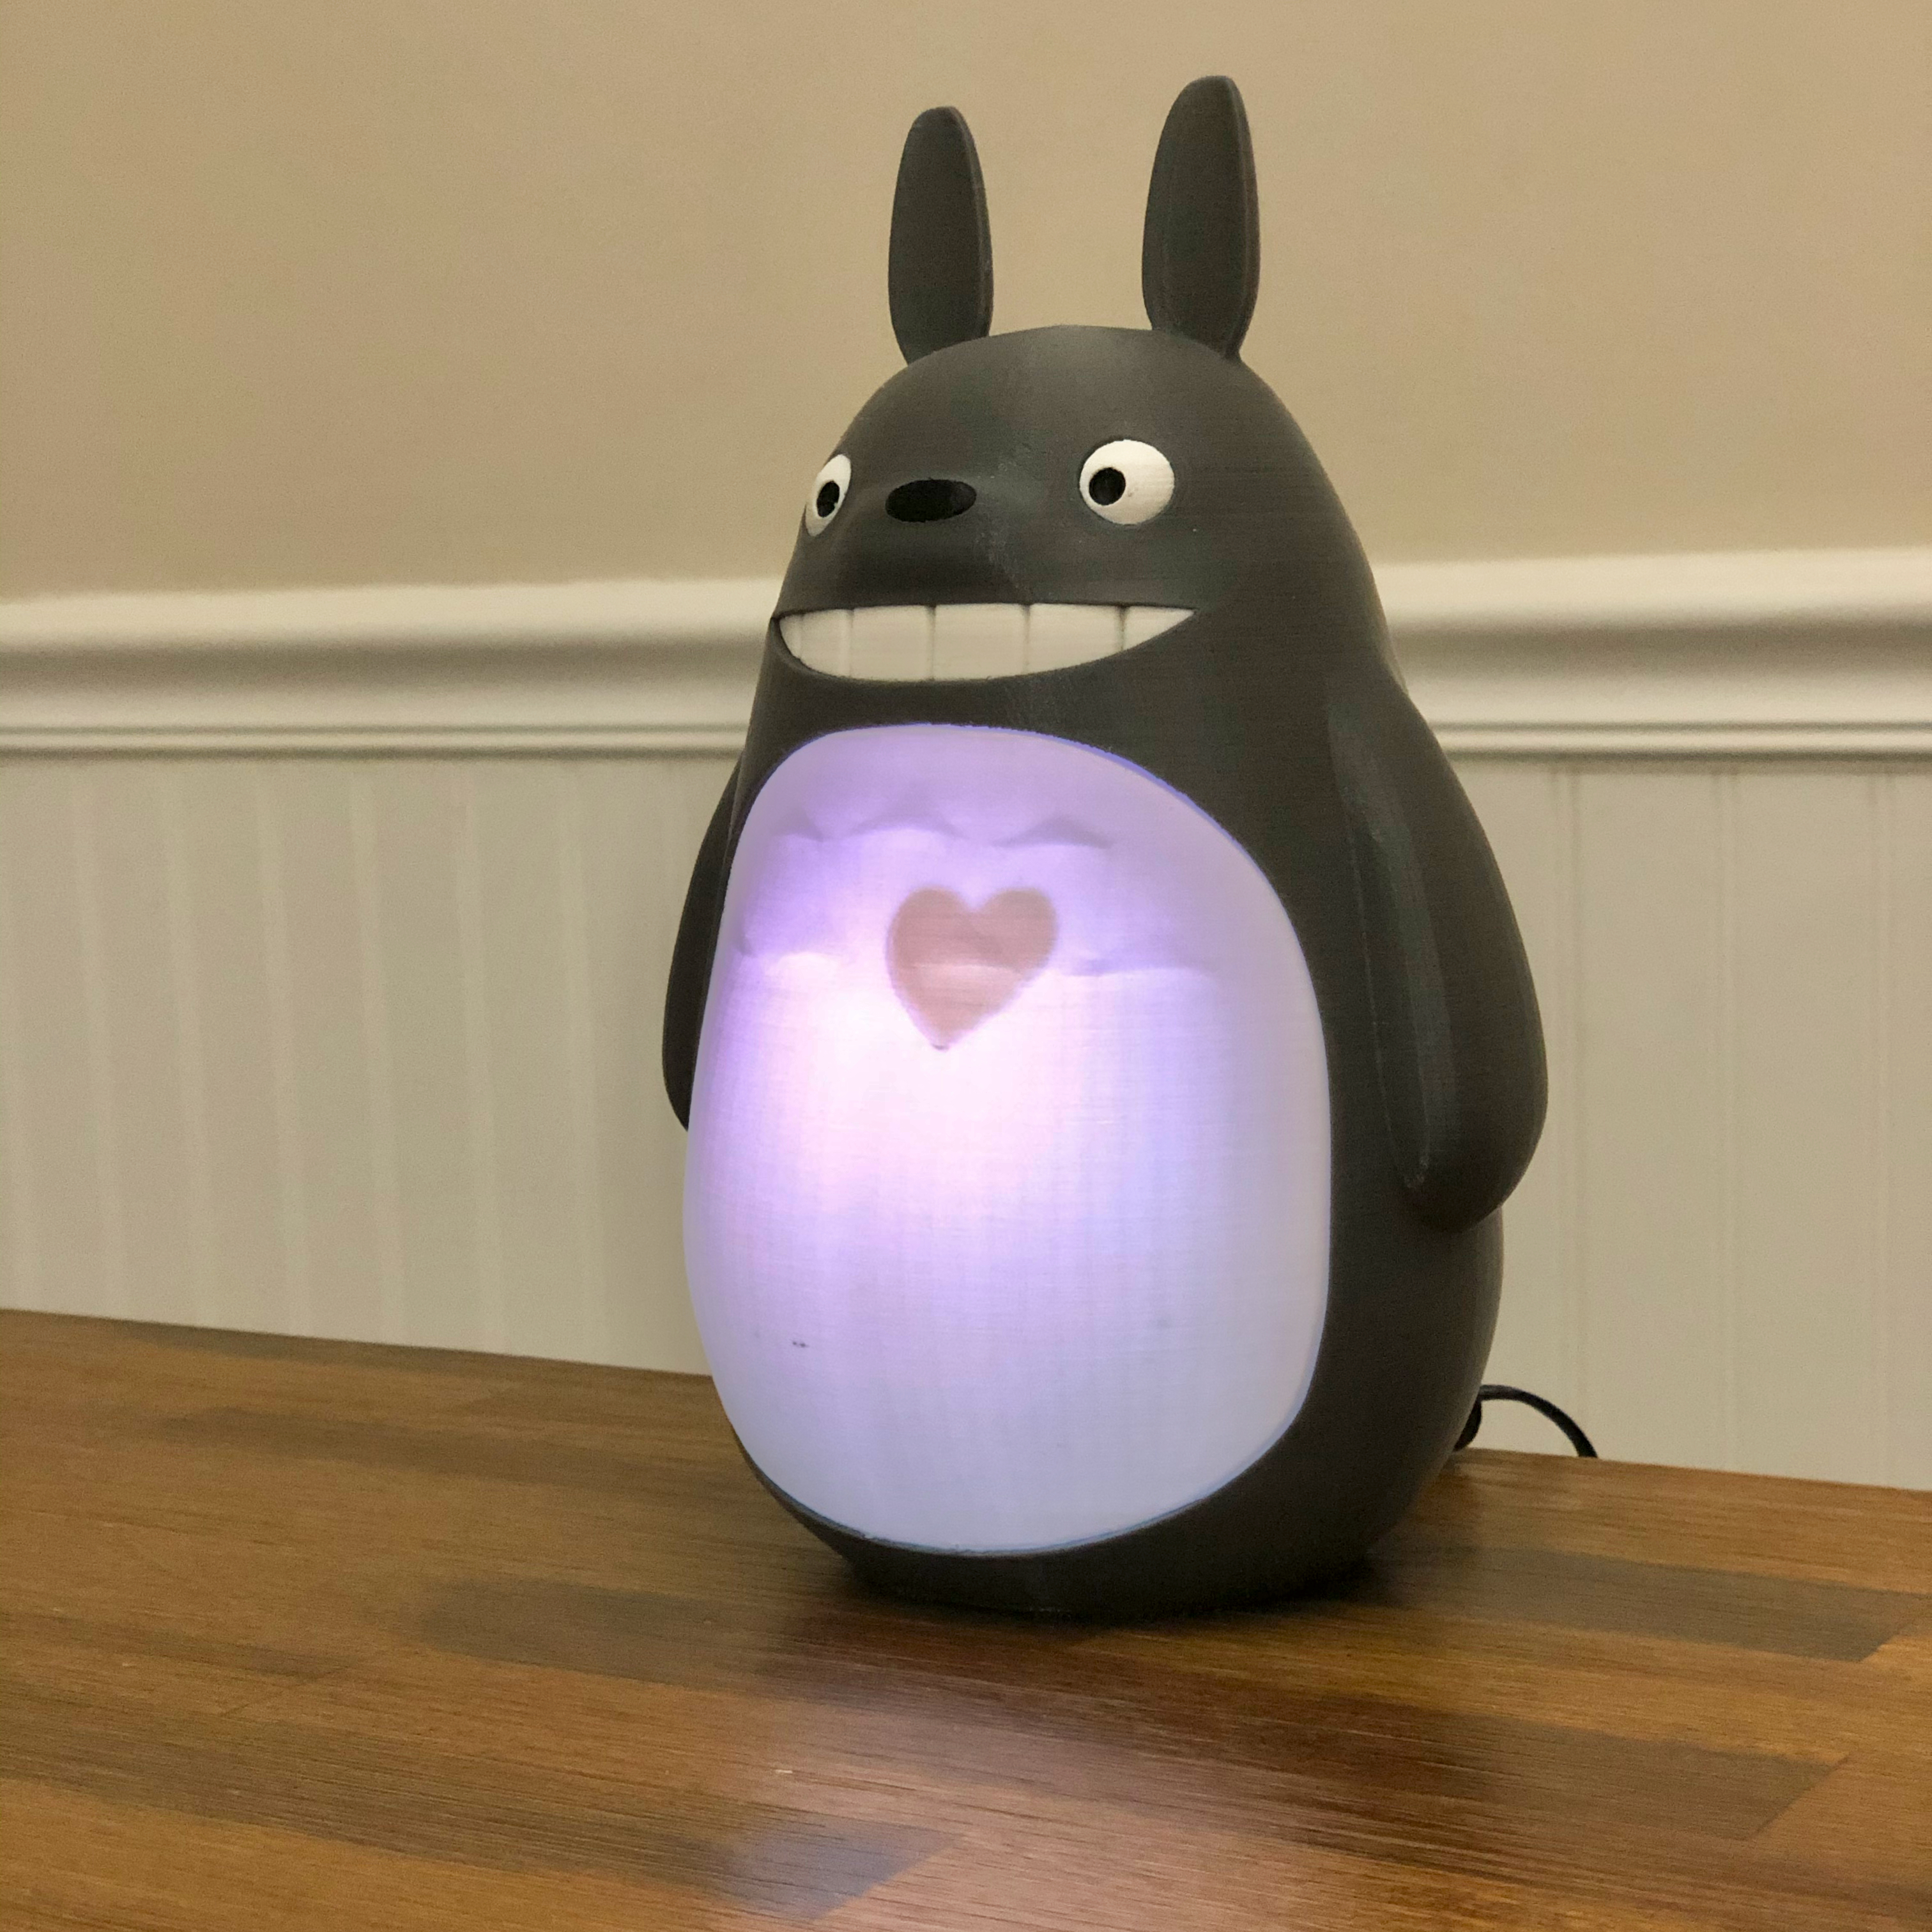
<p>This is a project I put together as a gift for my niece. I've only made the one and I was super pleased at how well it came out!</p> <p>I used the existing (Totoro)[<a href="https://www.thingiverse.com/thing:12146">https://www.thingiverse.com/thing:12146</a>] model by (Joo)[<a href="https://www.thingiverse.com/joo">https://www.thingiverse.com/joo</a>]. I painstakingly split it into multiple parts for MMU2 printing, and of course, hollowed out the "belly" to house the electronics and route the power out the back. Oh, and I added a heart by thickening the shell in that area =).</p> <p>The lamp can be controlled via Siri via Homebridge.</p> <p>Using the Home app on my iOS devices, I can easily control the color, brightness and on/off state at will with the familiar interface that I use with other devices. You can even use it in HomeKit Automations.</p> <p>Or, use the Siri commands:</p> <p>"Hey Siri, turn the Totoro Lamp on."<br/> "Hey Siri, set the brightness of the Totoro Lamp to 100%"<br/> "Hey Siri, set the color of the Totoro Lamp to [insert any color you like here!]" or<br/> "Hey Siri, set the color of the Totoro Lamp to Warm White" to get back to the normal state.</p> <p>Here's a action video: <a href="https://youtu.be/PtsIPlbNi2o">https://youtu.be/PtsIPlbNi2o</a></p> <p>This is powered by a Raspberry Pi Zero and a Unicorn pHAT which offers an excellent about of lighting for this project and with a high level of flexibility.</p> <p>I've even added a couple of bonus "colors" which are more like effect modes:</p> <p>"Hey Siri, set the color of the Totoro Lamp to Candlelight" will simulate a flickering candle inside the lamp.</p> <p>"Hey Siri, set the color of the Totoro Lamp to Ocean Boat Blue" will create a slowly undulating blue wave effect, and</p> <p>"Hey Siri, set the color of the Totoro Lamp to Razzmatazz" will create a cycling rainbow effect.</p> <p>Non-affiliate links for the Pi and LED array:<br/> <a href="https://www.adafruit.com/product/3400">https://www.adafruit.com/product/3400</a><br/> <a href="https://shop.pimoroni.com/products/unicorn-phat">https://shop.pimoroni.com/products/unicorn-phat</a></p> <p>I've published the software I wrote to control the lamp and instructions for installing it here: <a href="https://github.com/mkoistinen/unicorn-homebridge-integration">https://github.com/mkoistinen/unicorn-homebridge-integration</a></p> <h3>Print instructions</h3><p>This is a rather long print. I wanted it to look awesome for my niece, so I used 0.15mm layer heights. The multicolor body itself took something like 36 hours on the MK3/S + MMU2S.</p> <p>The closest gray I could find for the color I wanted was "Graphite Gray" from Paramount3D. I used Overture for the black and white bits.</p> <p>This is made to be assembled and disassembled as required. Once all the parts are printed, find a spare wood screw to attach the Raspberry Pi Zero mount to the back of the body cavity. Run the power wire up through Totoro's tail and into the cavity. The belly inserts firmly into the body cavity! If you need to disassemble and need to remove the belly section, blow air into the hole for the power lead and the belly shell will pop right out =).</p>
With this file you will be able to print Totoro Lamp - Siri/HomeKit enabled! with your 3D printer. Click on the button and save the file on your computer to work, edit or customize your design. You can also find more 3D designs for printers on Totoro Lamp - Siri/HomeKit enabled!.