Tow boogie 65161 motor mount for Axis 19mm
thingiverse
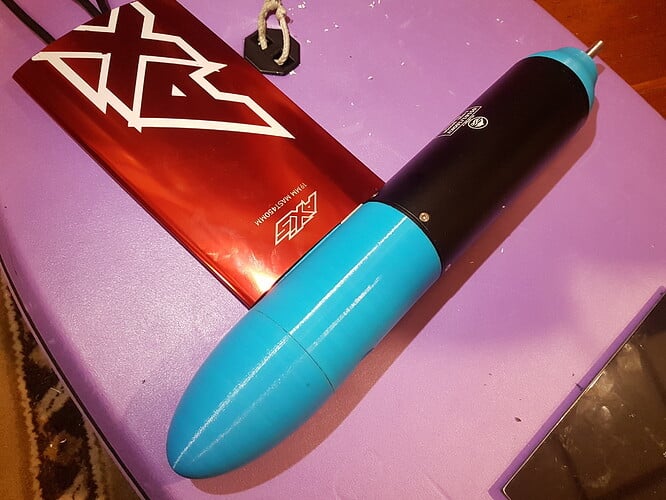
Motor mount for a tow boogie. Designed for a 19mm Axis aluminium mast and flipsky 65161 motor. I'm using this with an Axis 450mm mast cut in half (with new m8 threads tapped into the cut end). This design mounts below the mast, which allows a slightly shorter mast, and doesn't require a clamping/tension of the 3d print. It also has a relatively streamlined profile to reduce drag, with no exposed bolts/holes/gaps. The vertical load of the motor is held by a 2020 extrusion aluminium elbow bracket, mounted onto the rear bolt hole of the mast. The downward twisting force is held by the front m8 mast bolt. It seems durable - it has been fine for 500km in sometimes very rough conditions on my build. Print settings used: PETG filament 0.2mm layer height 60% cubic infill (optionally with Cura setting for 1 step at half height - making full 60% infill at threaded/nose end, and 30% at motor end) 2mm wall thickness, 1mm top/bottom. Positioned vertically on print bed with nose end upwards. For the rear mount: supports necessary for internal cable channel, but ideally no supports on the nose cone thread (tedious to remove supports from thread later). For the nose cone: no supports, so that the thread prints cleanly. Order of installation: Bolts should be stainless steel. Countersunk m8 x ~85mm Dome headed m8 x 50-60mm (full length thread) Socket head m5 x 20mm (3x) Socket head m5 x 12mm Aluminium 2020 extrusion 90 degree elbow bracket (20x20x17mm) 1. The upper mounting hole of the 65161 motor should be attached to the rear mast hole with a 2020 aluminium elbow bracket, which needs to be 20x20x17mm, using a m5 x 12mm bolt (approximate length). The 2020 alu bracket will need to be bolted to the mast's rear mounting hole with a m8 x 40-60mm bolt (fully length thread). I used a m8 with a dome head, and ground off some of the outside of the bolt so that it would fit nicely in the 2020 elbow bracket. The elbow bracket needs to be filed slightly to fit the m8 bolt. 2. Feed the motor cables carefully through the mast. Make sure any sharp surfaces are filed smooth, including the inside of the motor mount where the cables run. 3. When the motor is attached in the correct alignment and position front/back for the bracket (may need some fine tuning/filing of the elbow bracket), use three m5 x 20mm bolts to hold the motor mount to the motor. 4. If the motor is aligned straight, and the motor mount is sitting in the correct position, you'll be able to attach the motor mount to the mast securely with a countersunk m8 x 85mm bolt. 5. When the motor is securely mounted, the front cone can be screwed on firmly.
With this file you will be able to print Tow boogie 65161 motor mount for Axis 19mm with your 3D printer. Click on the button and save the file on your computer to work, edit or customize your design. You can also find more 3D designs for printers on Tow boogie 65161 motor mount for Axis 19mm.