Tower Shields - Rostock Max
thingiverse
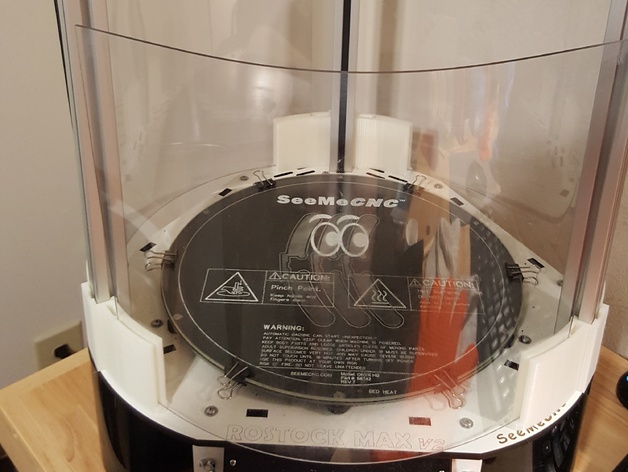
Are you thinking it's time for some shields to protect that temperamental ABS print you've tried several times without success?? Or, do you want to keep that cat away from batting at the hot end? Either way, here's a low-cost solution I baked up (literally) for your SeeMeCNC Rostock Max. I included v1 of the brackets since one of the images below shows them and someone may be interested in ones that are almost indestructible for other applications. Print Settings Printer Brand: SeeMeCNC Printer: Rostock MAX Rafts: No Supports: No Resolution: .20mm Infill: 20% Notes: You can use any plastic. I was testing some Phileex PLA. Post-Printing The brackets snap on and the shield sits in the groove. I didn't use any adhesive so I can remove the shields easily. If the effector bumps against the shield they will flex (by design). How I Designed This All in Tinkercad. What I've been using for quite some time. Various iterations being inspected by the Boss! Making Shields Are you ready to bend some polycarbonate?? Oh yeah! What's Needed (3) printed brackets (3) .093 11X14 sheets of polycarbonate (e.g. Lexan) (3) non-stick, oven safe baking sheets (I used these grill sheets) (1) 18x36 joint sheet used in hvac duct work (1) oven and various oven safe dishes The goods. Prepare the furnace! Some research reveals 300F for several hours (actually was little over an hour for me). Remove all the shelves leaving the bottom one and place the metal sheet in an arch supported by a stack of oven safe bowls. This should work, right? Prepare the poly sandwich! Remove the protective plastic from the poly sheets and lay them on top of each other with a grill sheet between each pane. All ready to bake! Bake it! Lay the sandwich evenly on the arch and start cranking the oven to 300F. I checked on the poly every 30 min until I was happy with the form. Looks about centered. Hey, I think it's doing something after 30 minutes! It's only been an hour! Ok, that's enough, look at the middle starting to rise! DING! What I thought was going to take several hours finished between 1 hour and 1 hour, 30 min. Your results may vary. Turn the oven off, leave the door open and let it cool for at least 30 min before removing. Something to consider. The grill sheets worked great; unfortunately, they left a slight imprint on the poly so if you look close enough you can see the fiber weave. Since the shields are seldom clean from the hairspray it doesn't bother me.
With this file you will be able to print Tower Shields - Rostock Max with your 3D printer. Click on the button and save the file on your computer to work, edit or customize your design. You can also find more 3D designs for printers on Tower Shields - Rostock Max.