Trinket Micro Controller Case
thingiverse
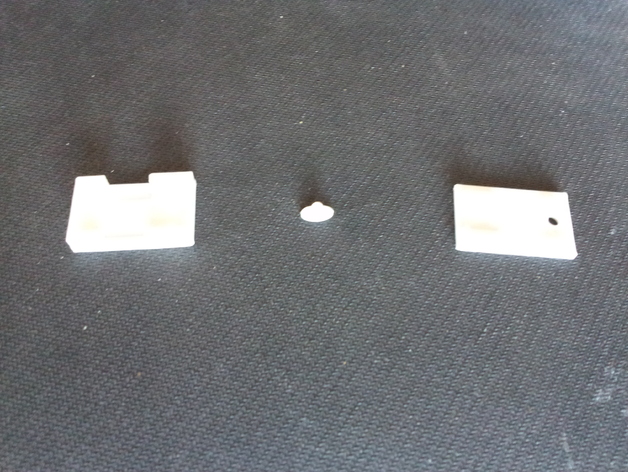
This is a compact housing for the Adafruit Trinket Arduino compatible microcontroller board (Trinket board sold separately, but not included). The key features are: 1. Minuscule size: The casing is barely larger than the microcontroller itself. 2. Effortless removal: The board slides in and out smoothly, giving users unfettered access for soldering purposes. 3. Reset capability: Trinkets need their reset buttons pressed to upload programs, but our case allows users to reset without opening it by using a conveniently located button. 4. Clearance for joints: Small trenches beneath the pinholes ensure there's ample space for solder connections to rest comfortably. 5. Side exits: Designed with side ports, this case makes it easy to insert wires or header pins. Important Notes: **Instructions** Caution: When printing, avoid generating unnecessary support material as it can be challenging to remove properly. Successful printing occurs without needing support structures. **Assembly Steps:** 1. Hold the Trinket at a slight angle and carefully guide its rear tab into the gap at the case's rear. 2. Gradually slide the microcontroller board forward while gently applying pressure from underneath. As it aligns, you'll hear the locking mechanism click into place. 3. Insert the reset button into the lid's hole, making sure it aligns with the base of the casing and not along its edges. 4. Hold the base upside down and attach it to the lid, verifying proper alignment between both parts (notably ensuring the button portion of the lid sits over the Trinket board's reset button).
With this file you will be able to print Trinket Micro Controller Case with your 3D printer. Click on the button and save the file on your computer to work, edit or customize your design. You can also find more 3D designs for printers on Trinket Micro Controller Case.