Triple LM6UU bearing extruder mount for Emaker Huxley
thingiverse
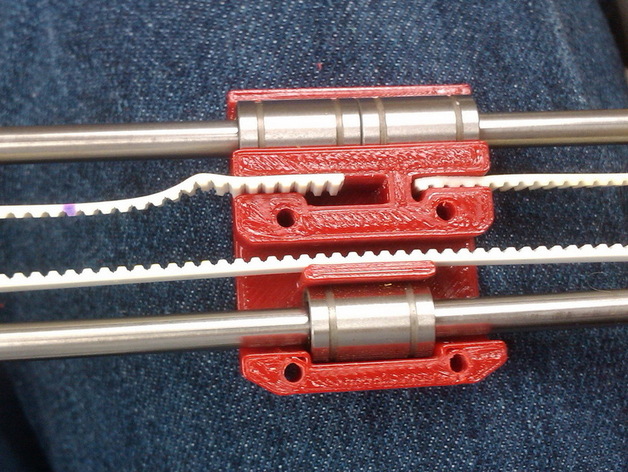
This modification to the stock Emaker Huxley extruder mount/X axis carriage takes three linear bearings instead of the stock two to reduce the slop. It also requires JM's new belt tensioning system on the X axis! See thing 14048 for linear bearing ends. Instructions Two LM6UU bearings go in the bottom cavity and one snaps into the top cavity. You might want to superglue the bearings in after you assemble the axis and slide it back and forth a few times to get things settled in. I've set things up so that the bearings are a close fit in this, so you may be able to skip the superglue. This seems to run much more smoothly than the stock one, and doesn't show any shake. You will need to cut off about 5 belt pitches to install this part. A flat blade screwdriver is useful when you are pushing the belt into the notches. FYI, if you add superglue the belt is REALLY hard to get out, but it won't slip. Don't clamp the second belt end until you have your Z shaft spacing set. Once that is done, move the motor as far as possible toward the idler and tighten a screw. Pull the belt tight, then go looser until the notches line up. Press in the belt, leaving it centered in the belt holes in the X ends. Loosen the motor mounting screws and move the motor away from the idler. Run the carriage back and forth to make sure it runs smoothly. Tighten the screw on the idler side first, then the others. Re-check for smooth running! Update from my first tear down: you don't need to glue the belt in. It stays in place reliably, but can be pulled out when you need to.
With this file you will be able to print Triple LM6UU bearing extruder mount for Emaker Huxley with your 3D printer. Click on the button and save the file on your computer to work, edit or customize your design. You can also find more 3D designs for printers on Triple LM6UU bearing extruder mount for Emaker Huxley.