Tronxy X5SA 400 Synchronized Z-Axis Motors
prusaprinters
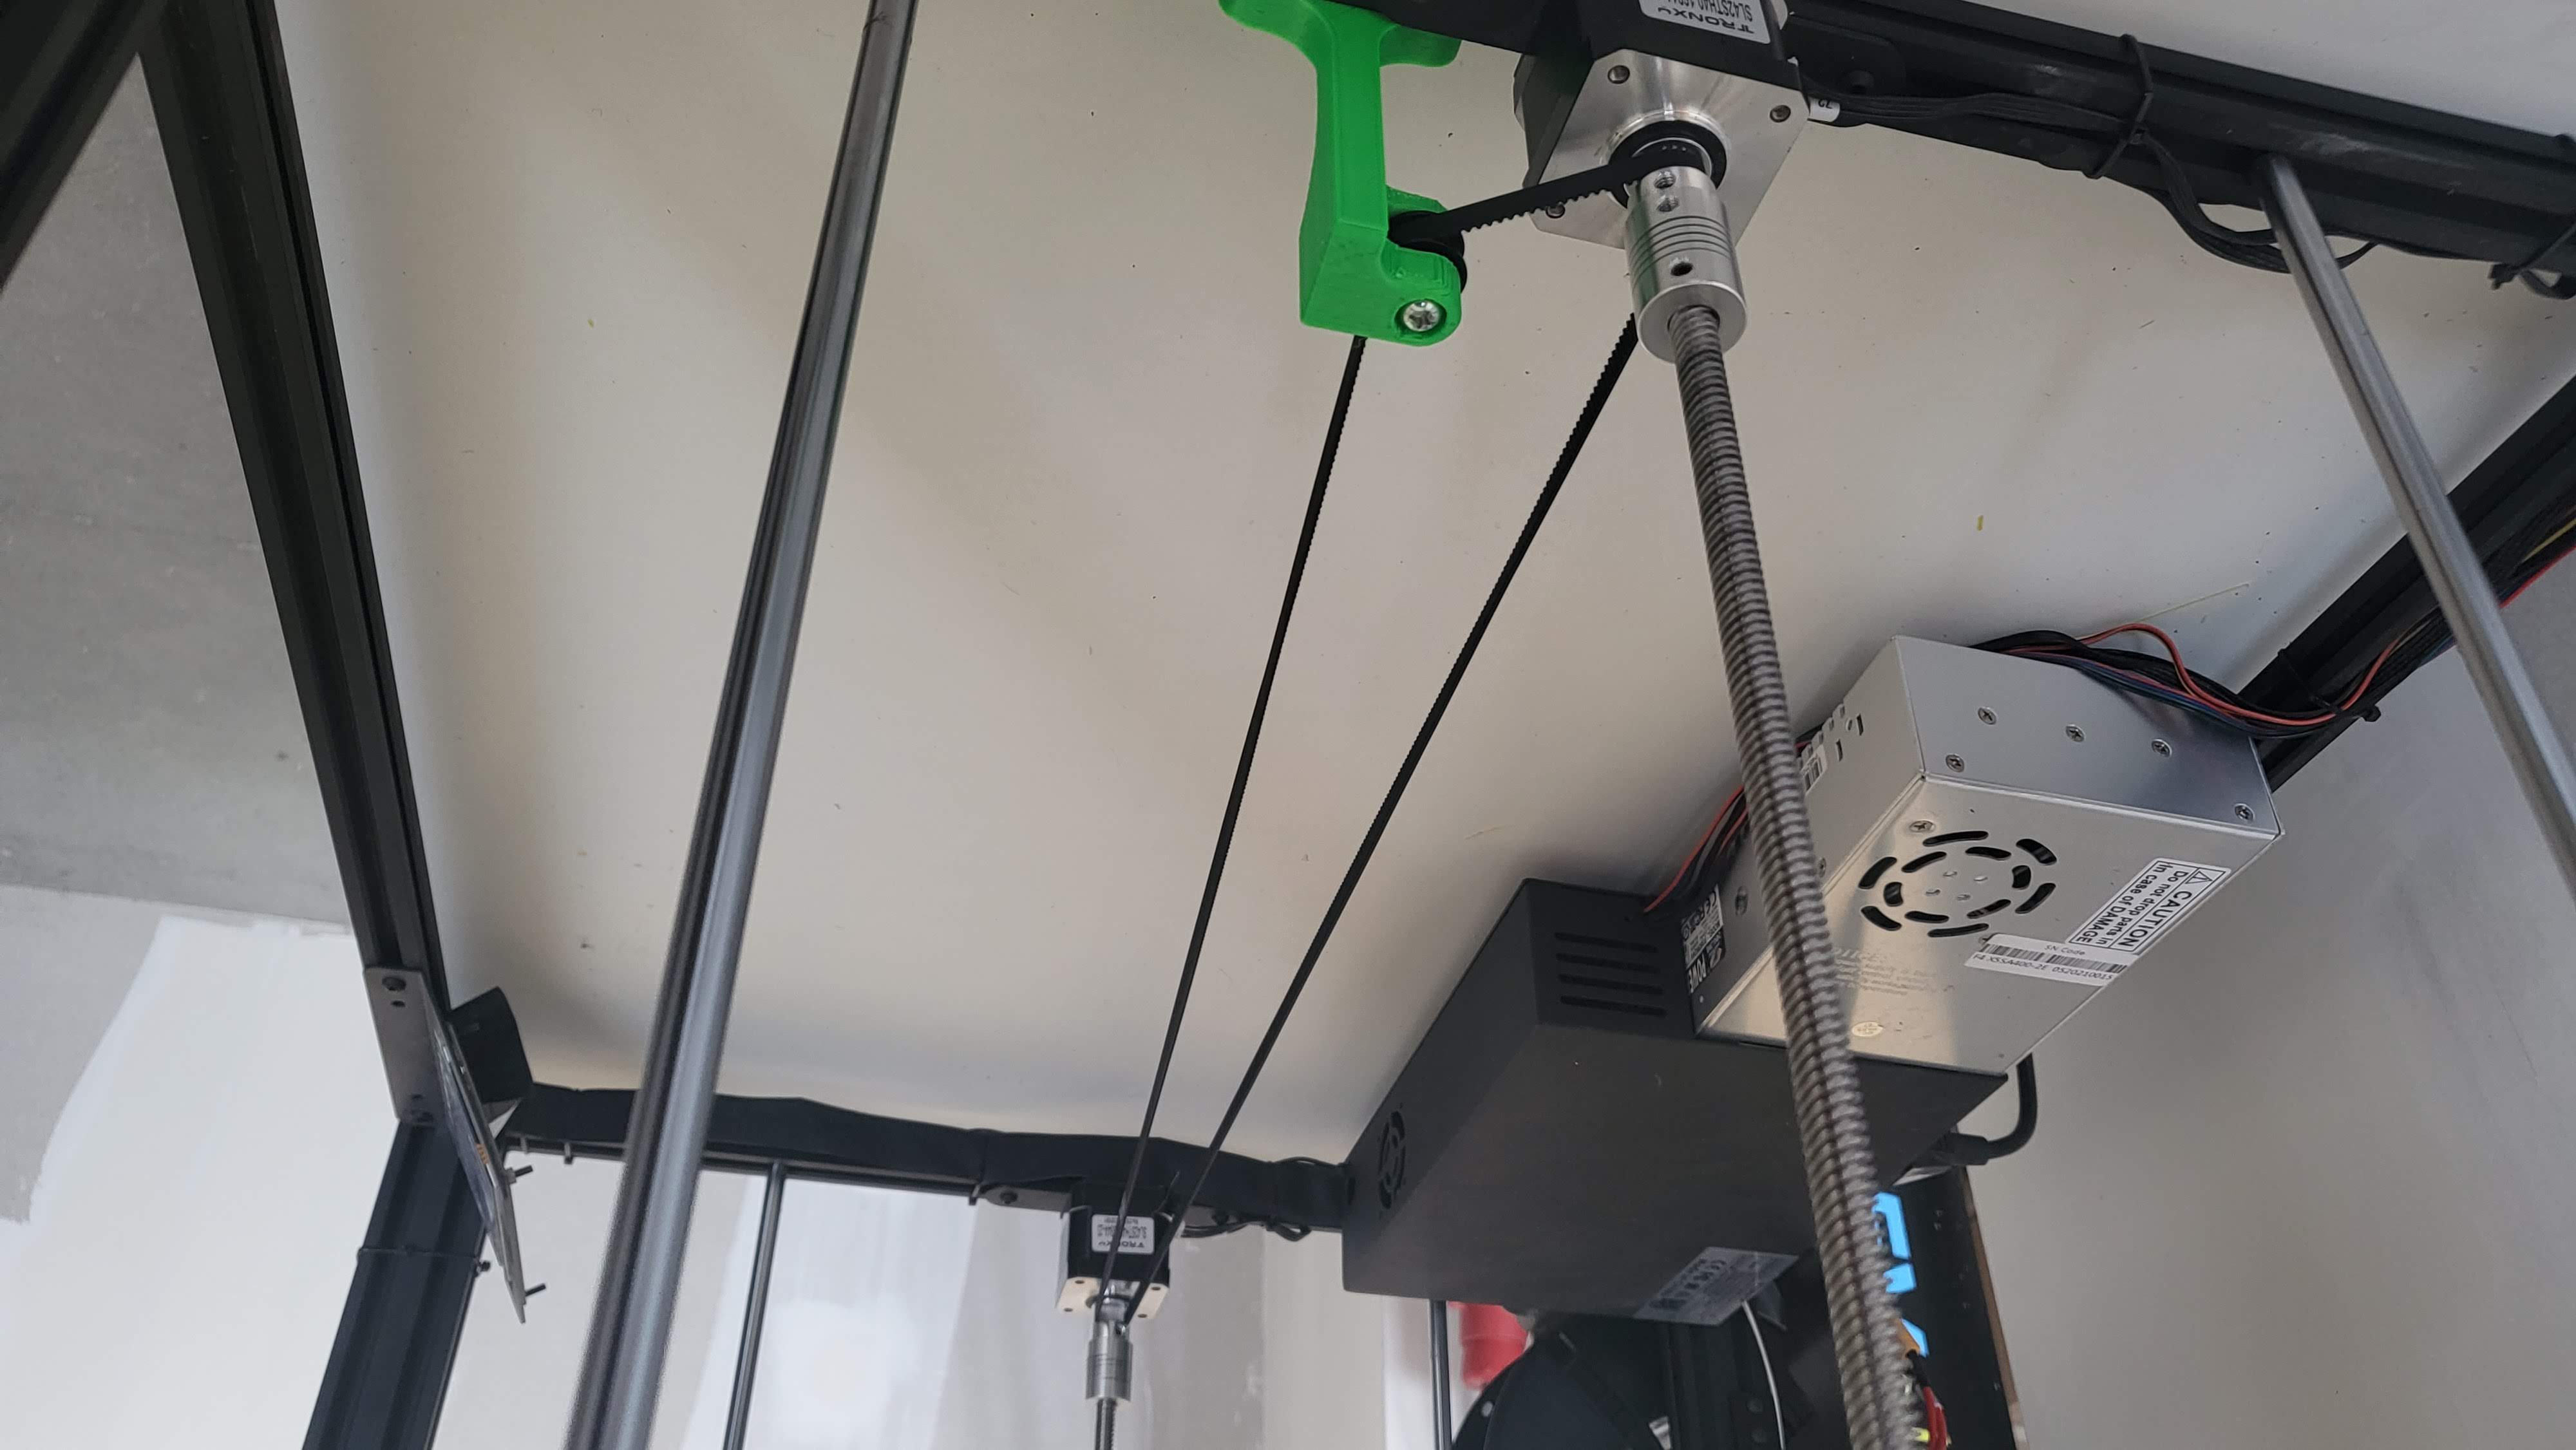
<p>This is an easy and fast mod to Synchronize the Z-Axis motors of the Tronxy X5SA-400.<br>I've not tested this but this mod should also be compatible with the standard X5SA with 300x300 bed, you'll need a shorter belt. <strong>This mod is not compatible with the X5SA-500 because it has different motors.</strong></p><h3><strong>Materials needed</strong></h3><p>For this project you'll need:</p><ul><li>1x GT2 Idler pulley</li><li>2x GT2 belt pulley (as shown in the photos below)</li><li>1x GT2 1220mm Belt (or shorter one if you try this with the 300x300)</li><li>2x M3x15 bolts with washers and T-Nut (Needed to screw the belt tensioner to the aluminum profile)</li><li>1x M5x25 bolt with nut (To screw the timing Idler to the belt tensioner)</li></ul><p><a href="https://imgur.com/aQQNrZl"><img src="https://i.imgur.com/aQQNrZl.jpg" alt="image"></a> <a href="https://imgur.com/dQ9TKAl"><img src="https://i.imgur.com/dQ9TKAl.jpg?1" alt="image"></a> <a href="https://imgur.com/swqzM2I"><img src="https://i.imgur.com/swqzM2I.jpg?1" alt="image"></a> <a href="https://imgur.com/OoxQifG"><img src="https://i.imgur.com/OoxQifG.jpg" alt="image"></a></p><h3><strong>Printing</strong></h3><p>Once you got all the materials needed you can print the belt tensioner.</p><p>These are the settings I used to print the part:</p><ul><li>Slicer: Cura</li><li>Material: Eryone PLA+</li><li>Layer Eight: 0.3mm</li><li>Walls: 1.2mm</li><li>Top/Bottom Layers: 0.8</li><li>Infill: 70%</li><li>Speed: 90mm/s</li><li>Supports: Touching Buildplate with 70 degree angle</li><li>Support Density: 15%</li></ul><p>I found that 70% of infill with PLA+ enough to not make the tensioner bend under the belt tension.</p><h3><strong>Assembly</strong></h3><p>As you can see from the posted photos, the assembly is very straight-forward.<br>I've been able to remove the motors without disassembling the aluminum profiles.<br>I removed the screws that holds the motors in place and then removed the plate where the motor is screwed on. With the bed completely at the top height the screw had enough play to let me bend it a little bit to the side without creating a permanent bend on it, so I could remove the motor from the coupler of the screw.</p><p>Then I installed the belt pulleys with the teeth on the lower side so the pulley screws would properly tighten to the motor shaft. After, I put everything back toghether but just pay attention to place the belt around the pulley so you don't have to disasemble everything one more time.</p><p>After you reassembled the motors the only thing left to be mounted in place is the belt tensioner. Just place the belt around the idler pulley, screw it to the belt tensioner with the M5x25 bolt and then screw the tensioner to the inner side of the left motor using the M3x15 bolts with the T-Nuts (The washers between the bolt head and the belt tensioner aren't essential but thery're highly recommended). One you've mounted in place the tensioner just move it until you feel the belt is properly tensioned and check that the pulleys don't skip a tooth, then tighten the bolts.</p><p>Now you have the synchronized Z-Axis on your Tronxy X5SA-400!</p>
With this file you will be able to print Tronxy X5SA 400 Synchronized Z-Axis Motors with your 3D printer. Click on the button and save the file on your computer to work, edit or customize your design. You can also find more 3D designs for printers on Tronxy X5SA 400 Synchronized Z-Axis Motors.