Trumpet Stand
thingiverse
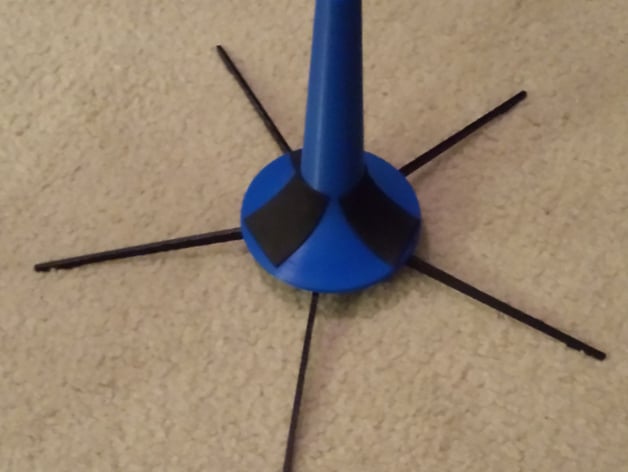
This is a trumpet stand for setting your instrument on when not in use. It holds a trumpet fairly solidly, and can store inside the bell of the horn for transport. Print Settings Printer Brand: SeeMeCNC Printer: Rostock MAX Rafts: No Supports: Yes Resolution: .2mm Infill: 25% Notes: Support material should be used for all three parts. You'll need to print 5 legs, ideally printed on the flat side for the best strength. The stand cone and screw should be printed upright. All three printed reliably with the Inland PLA I used, though ABS could also be used. I highly recommend a pair of angle-nosed pliers to remove the support material from the inside of the stand cone threads once printed--without them removing the support material will be difficult or even impossible. A word of warning: the screw piece will put your retraction settings to the test in a big way. Make sure you have them dialed in well before you attempt to print it. Post-Printing 1. Remove supports Removing supports from the screw piece and stand cone can be quite challenging. I used a pair of forceps and a pair of angle-nosed pliers, along with an exacto knife for cleanup. The hardest parts were the interior of the screw, for which the angle-nosed pliers were nearly required, and the support material beneath the hinge posts. Using a small-bladed screwdriver and a light hammer to tap the support material loose helped, followed by using the forceps to extract any remaining support material. 2. Snap the legs onto the screw Snap the hook part of each of the legs onto a hinge pin. Push on the bottom of the C of the hinge to make sure it's solidly seated, then rotate the leg downwards. If you encounter any significant resistance, don't force it down--make sure the hinge is properly seated first, try to snap the hinge together more firmly, and check for any obstructions. The most likely time for the hinge to fail is when you first try to extend the leg. The hook on the leg is a bit wider at the bottom to increase structural strength when the leg is deployed, but this can cause a few different types of cracks or breakage if the hinge isn't fully seated. 3. Protect the bell of your horn Put some adhesive-backed foam or rubber on the base of the cone to protect your bell from scratches--three large pieces arranged around the base seemed to do the trick for me. I would also recommend a band of electrical tape around the top of the cone to prevent the top of the cone from scratching the inside of your bell when placing the horn on or removing it from the stand, as well as when stored in the horn. You don't want anything too thick there or the horn won't fit well onto the cone, but one or two layers of electrical tape at the end of the cone should fit easily, and the rubbery texture will prevent any scrapes or scratches on the horn.
With this file you will be able to print Trumpet Stand with your 3D printer. Click on the button and save the file on your computer to work, edit or customize your design. You can also find more 3D designs for printers on Trumpet Stand.
