TS100 Soldering Iron Stand with Makita 18v Adapter
prusaprinters
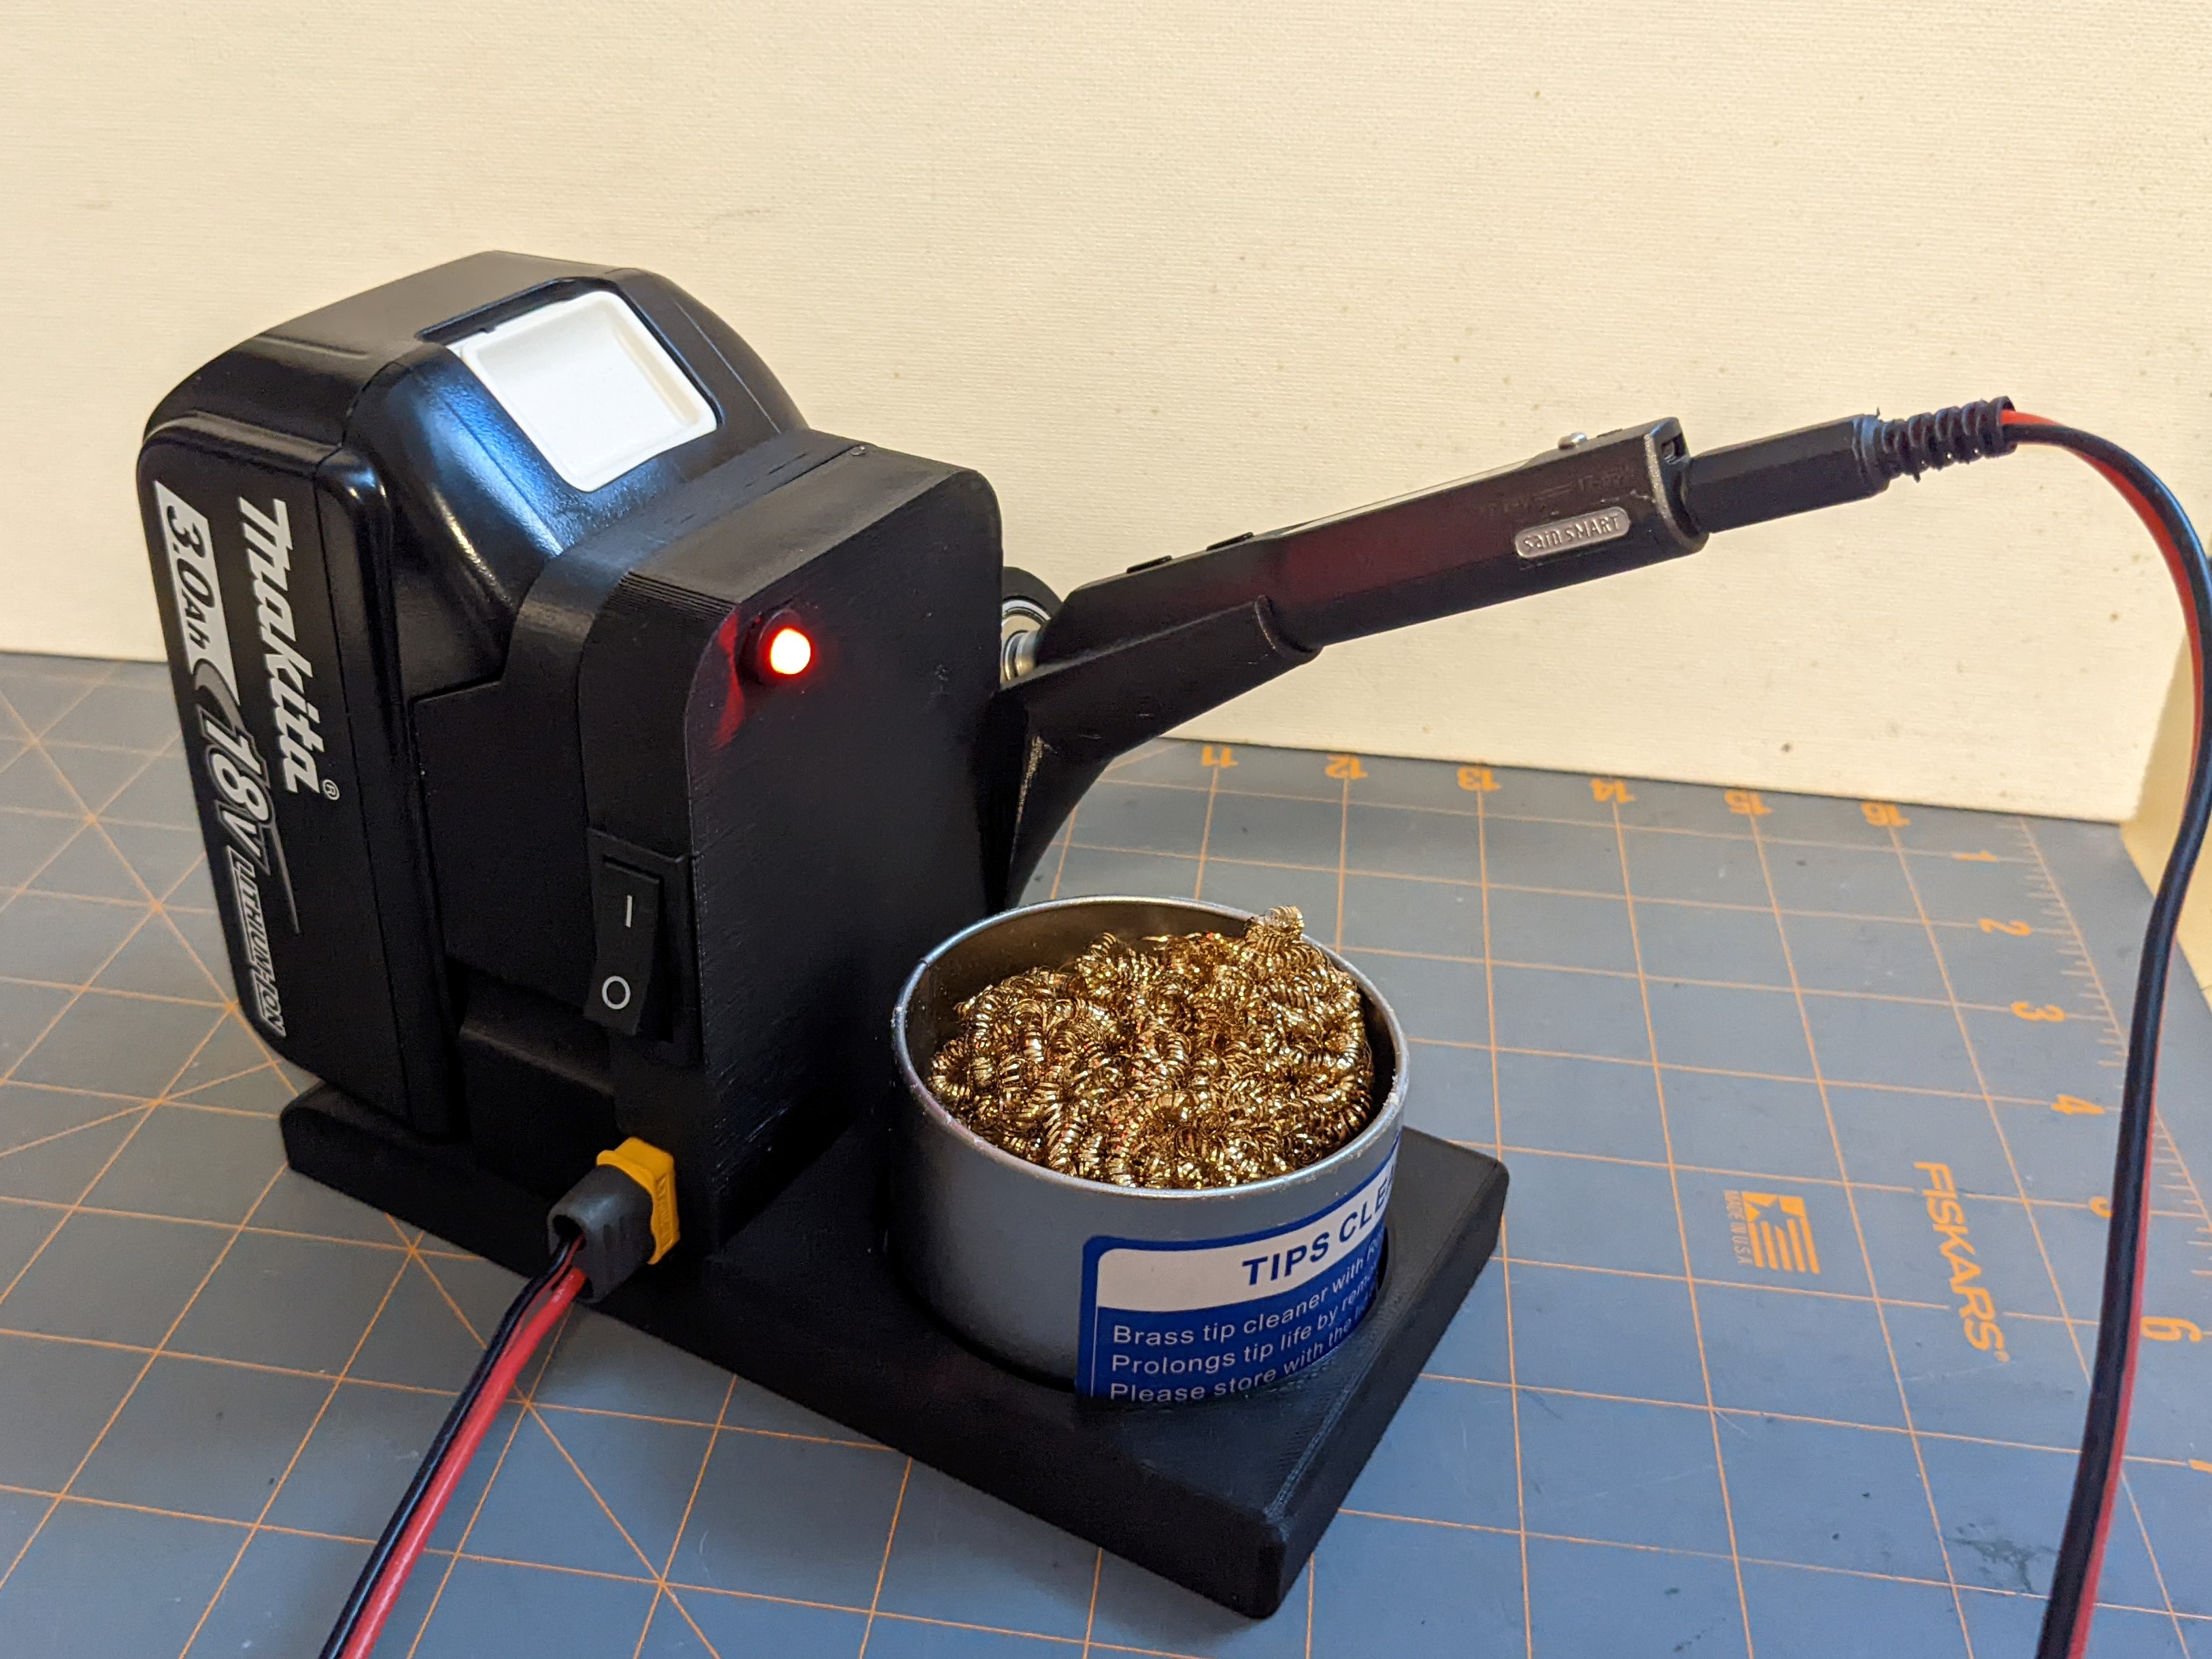
<p>A TS100 soldering station designed to hold the iron, tip cleaner brass wool, and various battery adapters. I started the design for a Makita/Bosch adapter I bought from Amazon, but switched to a 3d printed model. I am including <a href="https://www.prusaprinters.org/prints/134967-makita-18v-adapter-remix-for-3mm-bolts">my remix</a> of <a href="https://www.prusaprinters.org/prints/74366-makita-18v-battery-adapter">fablab.ee's Makita 18V battery adapter</a> and a link to the Makita Bosch one. Both will fit the stand, although I only have Makita batteries so I do not know if a Bosch battery will fit despite the adapter supporting it.</p><p>There are two versions of the stand. One with a shallow recess for tip cleaner. This one will friction hold the 68mm cleaning can listed below. The other has a 30mm deep hole for loose brass wool or other solution. Both are provided with 4 clearances to choose from for the bearing holder.</p><p><strong>Parts required: </strong><br>Links for reference only- not affiliate. They are the exact parts I used.</p><ol><li>a 608z bearing for the hot end contact point. Use of an all metal bearing is recommended although I have not tried one with plastic covers.</li><li>4 M3x12 bolts for attaching the battery adapter to the soldering stand.</li><li>XT60H-F Power connector. (XT60-F should also work, but will have to be glued in place.)<br><a href="https://www.amazon.com/gp/product/B074PN6N4K">https://www.amazon.com/gp/product/B074PN6N4K</a></li><li>1 KCD3-101 SPSD Switch to fit a 10.5x27.75mm mounting hole.</li><li>5mm red LED and holder to fit 8mm hole.<br><a href="https://www.amazon.com/gp/product/B075H8MTXZ">https://www.amazon.com/gp/product/B075H8MTXZ</a></li><li>2.7kΩ resistor</li><li>wire (I used 18awg silicon sheathed)</li><li>battery adapter - Full or Makita Part<strong> </strong>643852-2 for the printed adapter.<br><a href="https://www.amazon.com/dp/B08F3JQ9QZ">https://www.amazon.com/dp/B08F3JQ9QZ</a></li><li>Optional tip cleaner tin - 68mm diameter. <br><a href="https://www.amazon.com/gp/product/B084VMQMZN">https://www.amazon.com/gp/product/B084VMQMZN</a></li><li>Optional - any parts required to build an over discharge protection circuit. I'm simply relying on using Ralim IronOS with Low Voltage set to 5S, but there is an instructable for an over-dischareg protection circuit if you wish to include one.<br><a href="https://www.instructables.com/Making-a-Over-Discharge-Protection-for-Makita-Batt">https://www.instructables.com/Making-a-Over-Discharge-Protection-for-Makita-Batt</a></li></ol><p> </p><p><i>I plan to remix one of the printable brass wool holders to fit my stand. - 2022.07.15 Still planning to do this :-) </i></p><p> </p><p><strong>Print and Assembly Instructions:</strong></p><p>Before printing the stand, please print the clearance tests to determine which fits your bearing and filament the best. These are cut from the main model to ensure the same orientation when printing. 22.10mm diameter works for me for some generic PLA and Prusament PETG, but some other PETG I had required the 22.20mm one.</p><p>Print the stand upright with selective supports where shown. You can use automatic if you wish, but the supports in my photo are the only places where they are needed.</p><p>If you choose to use the Makita/Bosch adapter from Amazon, drill through the existing 4 screw holes and make a hole in the back for wires to feed into the Soldering Stand. </p><p>If you choose to print your battery adapter, the stand has built in supports to hold the terminal retaining plate in place.</p><p>If you choose to use a different battery adapter, here are the dimensions in mm.<br> </p><figure class="image image_resized" style="width:77.48%;"><img src="https://media.prusaprinters.org/media/prints/133937/rich_content/40e97641-6c99-404f-9776-586688ffe010/dimensions.jpg#%7B%22uuid%22%3A%223023e06c-8cb2-4217-9107-eb0ba437dd28%22%2C%22w%22%3A761%2C%22h%22%3A672%7D"></figure><p>When assembling, an XT60H-F connector will fit with slight force and be held in place without glue or epoxy once the battery adapter is secured. An XT60-F will also fit with slight force, but will require epoxy to prevent it from sliding in and out once assembled.</p><p>XT60H-F:</p><figure class="image image-style-align-center image_resized" style="width:50%;"><img src="https://media.prusaprinters.org/media/prints/133937/rich_content/3e9c5447-60f8-4703-8372-6ff1020cb506/xt60h-f.jpg#%7B%22uuid%22%3A%22e25c6b4b-a3b1-4c43-bd23-87fa081ffb93%22%2C%22w%22%3A509%2C%22h%22%3A383%7D"></figure><p>XT60-F</p><figure class="image image_resized" style="width:50%;"><img src="https://media.prusaprinters.org/media/prints/133937/rich_content/5d6aba09-0d0c-4cca-a99f-f404cacd3840/xt60-f.jpg#%7B%22uuid%22%3A%22554d253e-7f19-4fd6-8d52-bcf46f21dff0%22%2C%22w%22%3A484%2C%22h%22%3A330%7D"></figure><p> </p><p>I have not prepared a wiring diagram, but other than ensuring you use a 2.5k resister in series with the LED, the photos should provide enough information. </p><p>Please let me know if you print this. If you end up using it with a different adapter or battery let me know and I will add a note and link to your adapter.</p><p> </p>
With this file you will be able to print TS100 Soldering Iron Stand with Makita 18v Adapter with your 3D printer. Click on the button and save the file on your computer to work, edit or customize your design. You can also find more 3D designs for printers on TS100 Soldering Iron Stand with Makita 18v Adapter.