TS100 Soldering Station Case
thingiverse
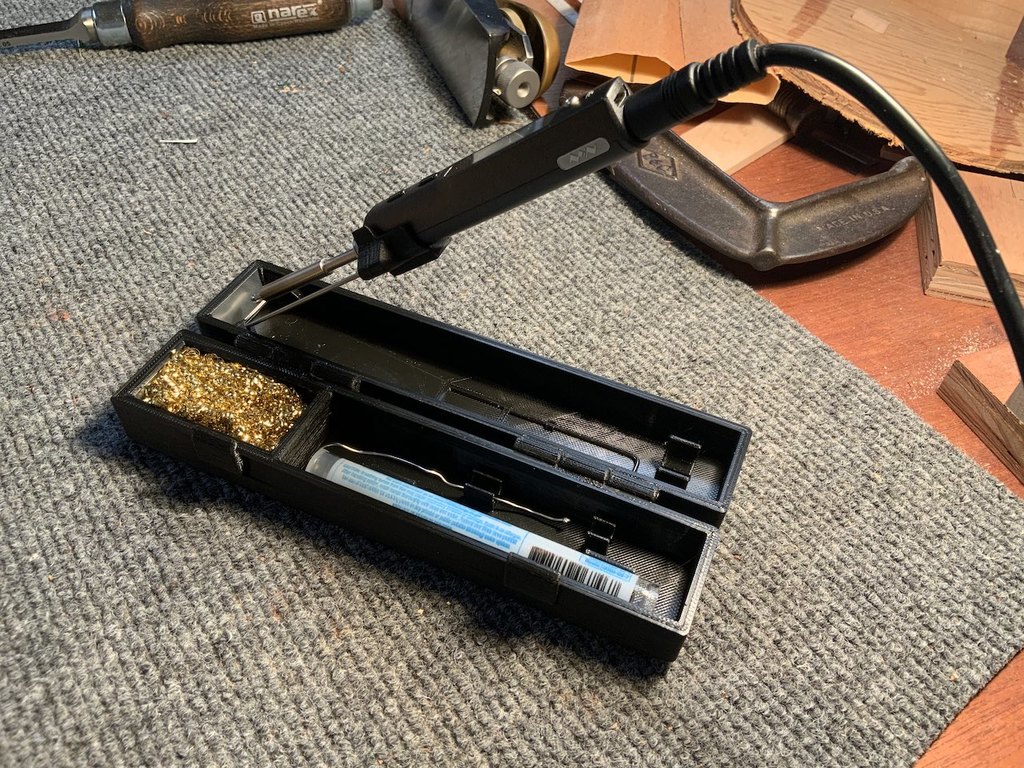
This is a case I designed for my TS100. The main thing distinguishing it from other cases is the soldering stand, which holds the iron securely without requiring the user to put the iron through a small hole. The stand is also easy to operate, since it simply folds down with the iron into the case. I also incorporated a well for brass wool. This well has a slot at the bottom so that it can be lined with metal, such as aluminum from a beverage can, to guard the bottom of the case against the iron while using the brass wool. There is another of these slots in front of the tip of the iron. Other features include storage for a tube of solder and an extra tip in the lid, as well as storage for the hex key and spare screws underneath the iron. Enjoy and feel free to comment with feedback or improved version! ASSEMBLY: Follow along with the numbered images at the end of the gallery. You will need some 1.5mm or 1/16 in steel rods for this build. I used these from Amazon: https://www.amazon.com/uxcell-Lathe-Round-Solid-Length/dp/B07KY8SB6J/ref=sr_1_4?dchild=1&keywords=1.5mm+steel+rod&qid=1627516594&sr=8-4 (1) After printing, drill out the holes in the iron rest, the sides of the case, and the ends of the two brackets to the diameter of your rods. This can be done by sharpening the end of one of your steel rods if you do not have a drill bit this size. The holes in the sides of the brackets should be drilled slightly larger to ride freely on the shaft. (2) Next, glue two 84mm steel rods into the two holes on the iron rest. (3) Once the glue has set, make a mark on each rod 69mm away from the point where they meet the rest. Glue each bracket onto its rod so that it just reaches these lines. The goal is to have 69mm of rod left exposed between each bracket and the iron rest. Also make sure that the thicker side of the bracket is facing out, which means the hole in each bracket is closer to the inside edge than the outside edge. The images should help in visualizing this assembly. (4) Once the glue has set, begin inserting a 35mm rod into one of the holes in the side of the case. As you push it through, slide the brackets onto it. Once this rod is through both sides of the case, it will serve as the hinge for the iron rest. The assembly of the iron rest is now finished. Raise it by simply pulling upward and lower it by pinching inward on the rods and lowering the rest. To assemble the halves of the case, align the hinges and hammer a rod through the holes. You can also sharpen the end of each rod and drill it through. This will leave the hinge stiff enough to support itself, which is handy. To store the screws, drill holes in the block of material left behind the iron (or anywhere under the iron) and thread them in. If using brass wool, it is recommended to cut a piece of aluminum can the width of the inside of the case and slide it under the partition between the brass wool area and the storage compartment. It will be held in place by rails in the bottom of the brass wool area. Please comment with any questions, and I will try to clarify!
With this file you will be able to print TS100 Soldering Station Case with your 3D printer. Click on the button and save the file on your computer to work, edit or customize your design. You can also find more 3D designs for printers on TS100 Soldering Station Case.