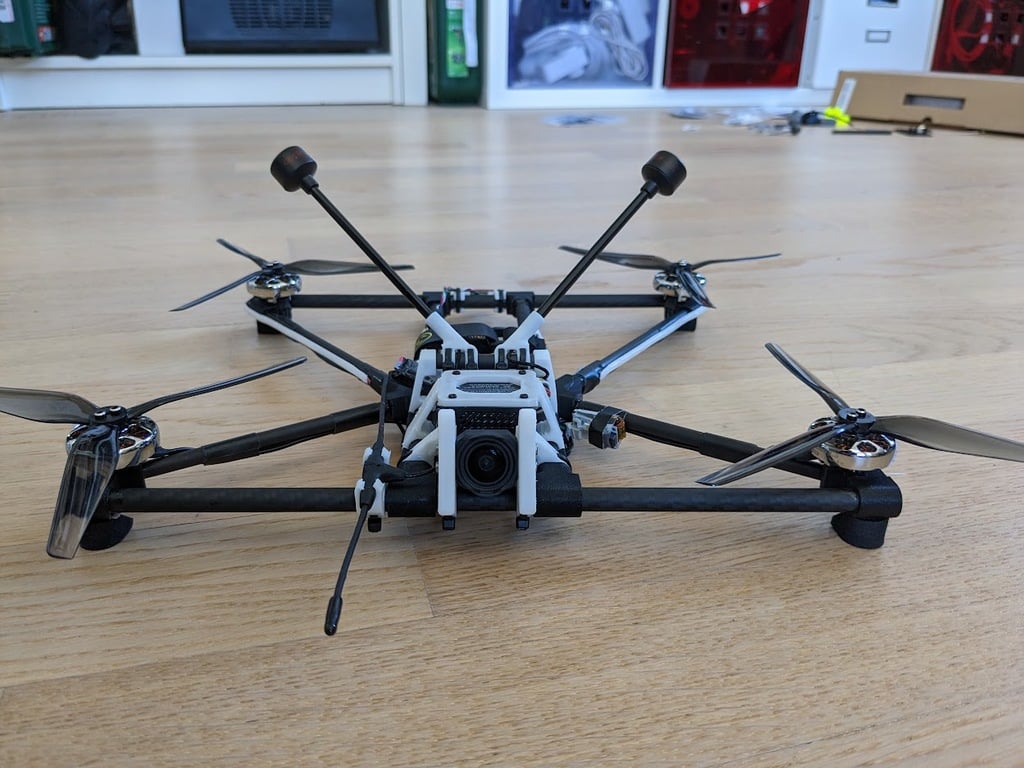
Tubular 6inch v2! Freestyle frame - superlight and superstiff - build it at home - no CNC needed
thingiverse
This is the v2 of the 6" version of the Tubular frame. The v1 was my first frame of this type, and i had an amazing time with it. Since then, the frame design has been much improved, so this version incorporates them all. i have worked hardly on making it as crash-resistant as possible - while keeping the weight down. People usually say: You're gonna have bad resonances! I'd like to ask you to reconsider when seeing the blackbox-logs with this frame :-) The braces make the difference. 6" version: https://www.thingiverse.com/thing:5368370 7" version: https://www.thingiverse.com/thing:5365636 8" version: https://www.thingiverse.com/thing:5812080 If you plan on building one or would like to get more info, there is a Discord server dedicated to this frame. You'll get all the support you need there. I'll do what i can to help. https://discord.gg/ZBEmBTNHAc There are so many different mounts and ways this frame can be adjusted to your needs - I'll gladly help you out and answer all your questions on Discord :-) ----------------------------------------------------- Hi there, what about a frame that is super light yet crazily stiff, extremely modular? A frame that you can build at home without the need of a CNC workshop? And that costs just around 20$? Well, something along these lines would probably be written on a product listing if this would actually be a product ^^ I have been designing tube-based frames around 10 years ago already, and i always felt a shame that this kind of fframe was nowhere to be seen nowadays. I am currently working on making a video about how to build the frame - stay tuned! While this frame is super stiff and light, it probably isn't really suited for a freestyle frame. I haven't crash-testet it too much, but i'm pretty sure it's easier to kill than your typical freestyle frame with 5mm+ arms. I'm mainly cruising and doing long range. Now lets check the claims: 1) super light yet crazily stiff This frame does weight around 60-80g in total (depending on the rod strength and used mounts). This includes the GoPro mount and the GPS mount. It uses 8mm and 6mm carbon tubes that can purchased in many places. Ideally they are "twilled", not "pulled". Twilling handles torsion better. But during testings i haven't found much of a difference actually. You can use the classic 8x6mm and 6x4mm rods (2mm material thickness), or 8x7mm + 6x5mm for less weight. The weight difference is about 14g (about half of the tube weight). For your first frame and heavier builds i suggest using the thicker ones. The carbon rods are glued to the plastic parts using CA-glue (superglue) and/or epoxide resin. For the connections that will take the blunt of the force i've found that epoxide is superior regarding impact resistance. I added a picture that shows where epoxide is ideally used. CA also works though. Aber gluing you'll see that it creates a crazy strong connection. For 3d-printing you can use PLA and it will work, however it'll break easier in case of a crash. Better use nylon or ideally carbon-infused Nylon (this also prints easier than pure nylon). 2) extremely modular There are many tubes all around that you can easily attach different mounts to. Want a vertically mounted ELRS antenna? Well, there is a mount for that. Basically anything is possible. I will gladly help with a certain mount if you provide me with details. There is a growing discord channel where all your questions will be answered. Link at the top. I uploaded the files for a "classic" build, with the electronics in the front and battery on the back. If you'd like to build it differently, just hop on Discord (link at the top). 3) build at home without the need of a CNC workshop Well, you only need to buy the carbon tubes, a saw and a 3d printer. 4) costs just around 15-20 bucks Carbon rods go for a few bucks per meter. And the filament also costs a few cents. So lets say 20$ in total. Important information: Length of the carbon tubes, please see the attached drawing. Cutting them roughly is good enough, a milimeter more or less is not too much of a problem. Further tipps: as carbon rods have a rather low tolerance, they can easily actually be 0,1 - 0,3mm more thick or thin than they should be. Therefore you'll most likely need to file up the difference. file as long as needed until the PLA parts can be pushed on the rods with medium resistance. They shouldn't flow freely, but also it shouldn't be too hard to move them. Otherwise the PLA will break If the PLA should break, just superglue it back together. Use activator spray to save time I added an image showing the ideal orientation for printing that will provide the best strength. Before putting on the glue: make sure that all parts are in the right place. The middle part will strongly help in doing so. in order to easily mount everything together, put in the stiffeners last place the frame on a flat surface. All motor mounts should touch the ground. If they don't, twist the frame around until they do Thats it for now, i'll update the instructions over time.
With this file you will be able to print Tubular 6inch v2! Freestyle frame - superlight and superstiff - build it at home - no CNC needed with your 3D printer. Click on the button and save the file on your computer to work, edit or customize your design. You can also find more 3D designs for printers on Tubular 6inch v2! Freestyle frame - superlight and superstiff - build it at home - no CNC needed.