Tunable harp: 3D printed with elastic bands
thingiverse
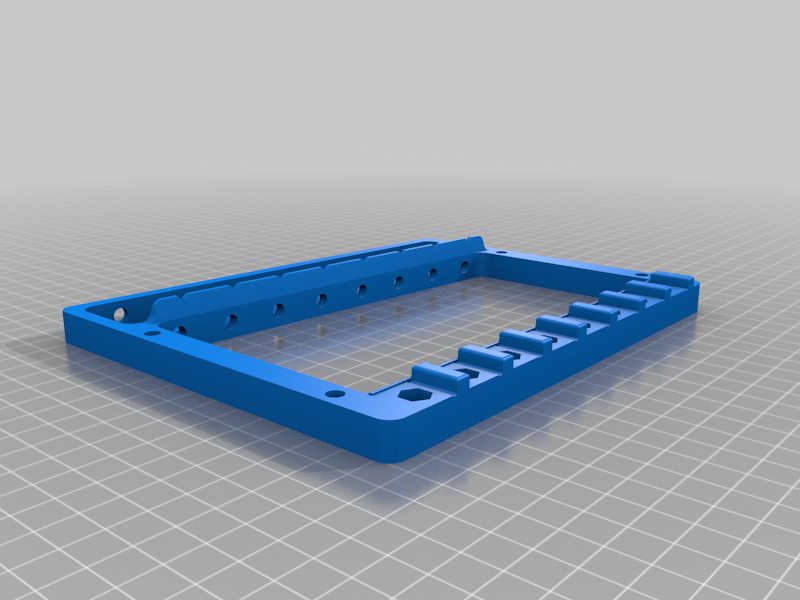
Make a working, tunable harp from 3D printed parts, nuts and bolts, and elastic bands. Good for teaching children the relationship between string tension and the resulting note. Also great fun to play! ** How to make ** 1. Insert an M5x20mm bolt into each harp runner and tighten using an M5 bolt. The bolt has a custom-made hole for it. 2. Insert an M5 nut into the base of each running. This is used to enable the tuning mechanism. 3. Place each runner into the required position and insert the M5x40mm bolt through the harp body. Tighten only enough so that the M5x40mm bolt is through both holes in the harp body. 4. Attach one end of the elastic band to the harp runner using a clamp and a wingnut. 5. Insert an M5x20mm bolt into the fixed clamp end (underneath the harp). Tighten into place using an M5 nut in the custom-made hole. 6. Attach the other end of the elastic band using a clamp and wingnut. ** How to Tune ** * Macro tuning is achieved by pulling the elastic band through the fixed clamp to roughly obtain the correct note and tightening the clamp by hand. * The movable clamp end enables micro tuning by rotating the 40mm screw. This stretches the band, adjusting the pitch. ** Items to print ** * 1 harp base * 8 runners * 16 clamps ** Additional Items Required ** * Elastic bands x8 * Cardboard box (significantly increases volume of the harp) * M5x20mm bolt x20 * M5x40mm bolt x8 * M5 nut x20 * M5 wingnut x16
With this file you will be able to print Tunable harp: 3D printed with elastic bands with your 3D printer. Click on the button and save the file on your computer to work, edit or customize your design. You can also find more 3D designs for printers on Tunable harp: 3D printed with elastic bands.