Turnable Nespresso Tower
prusaprinters
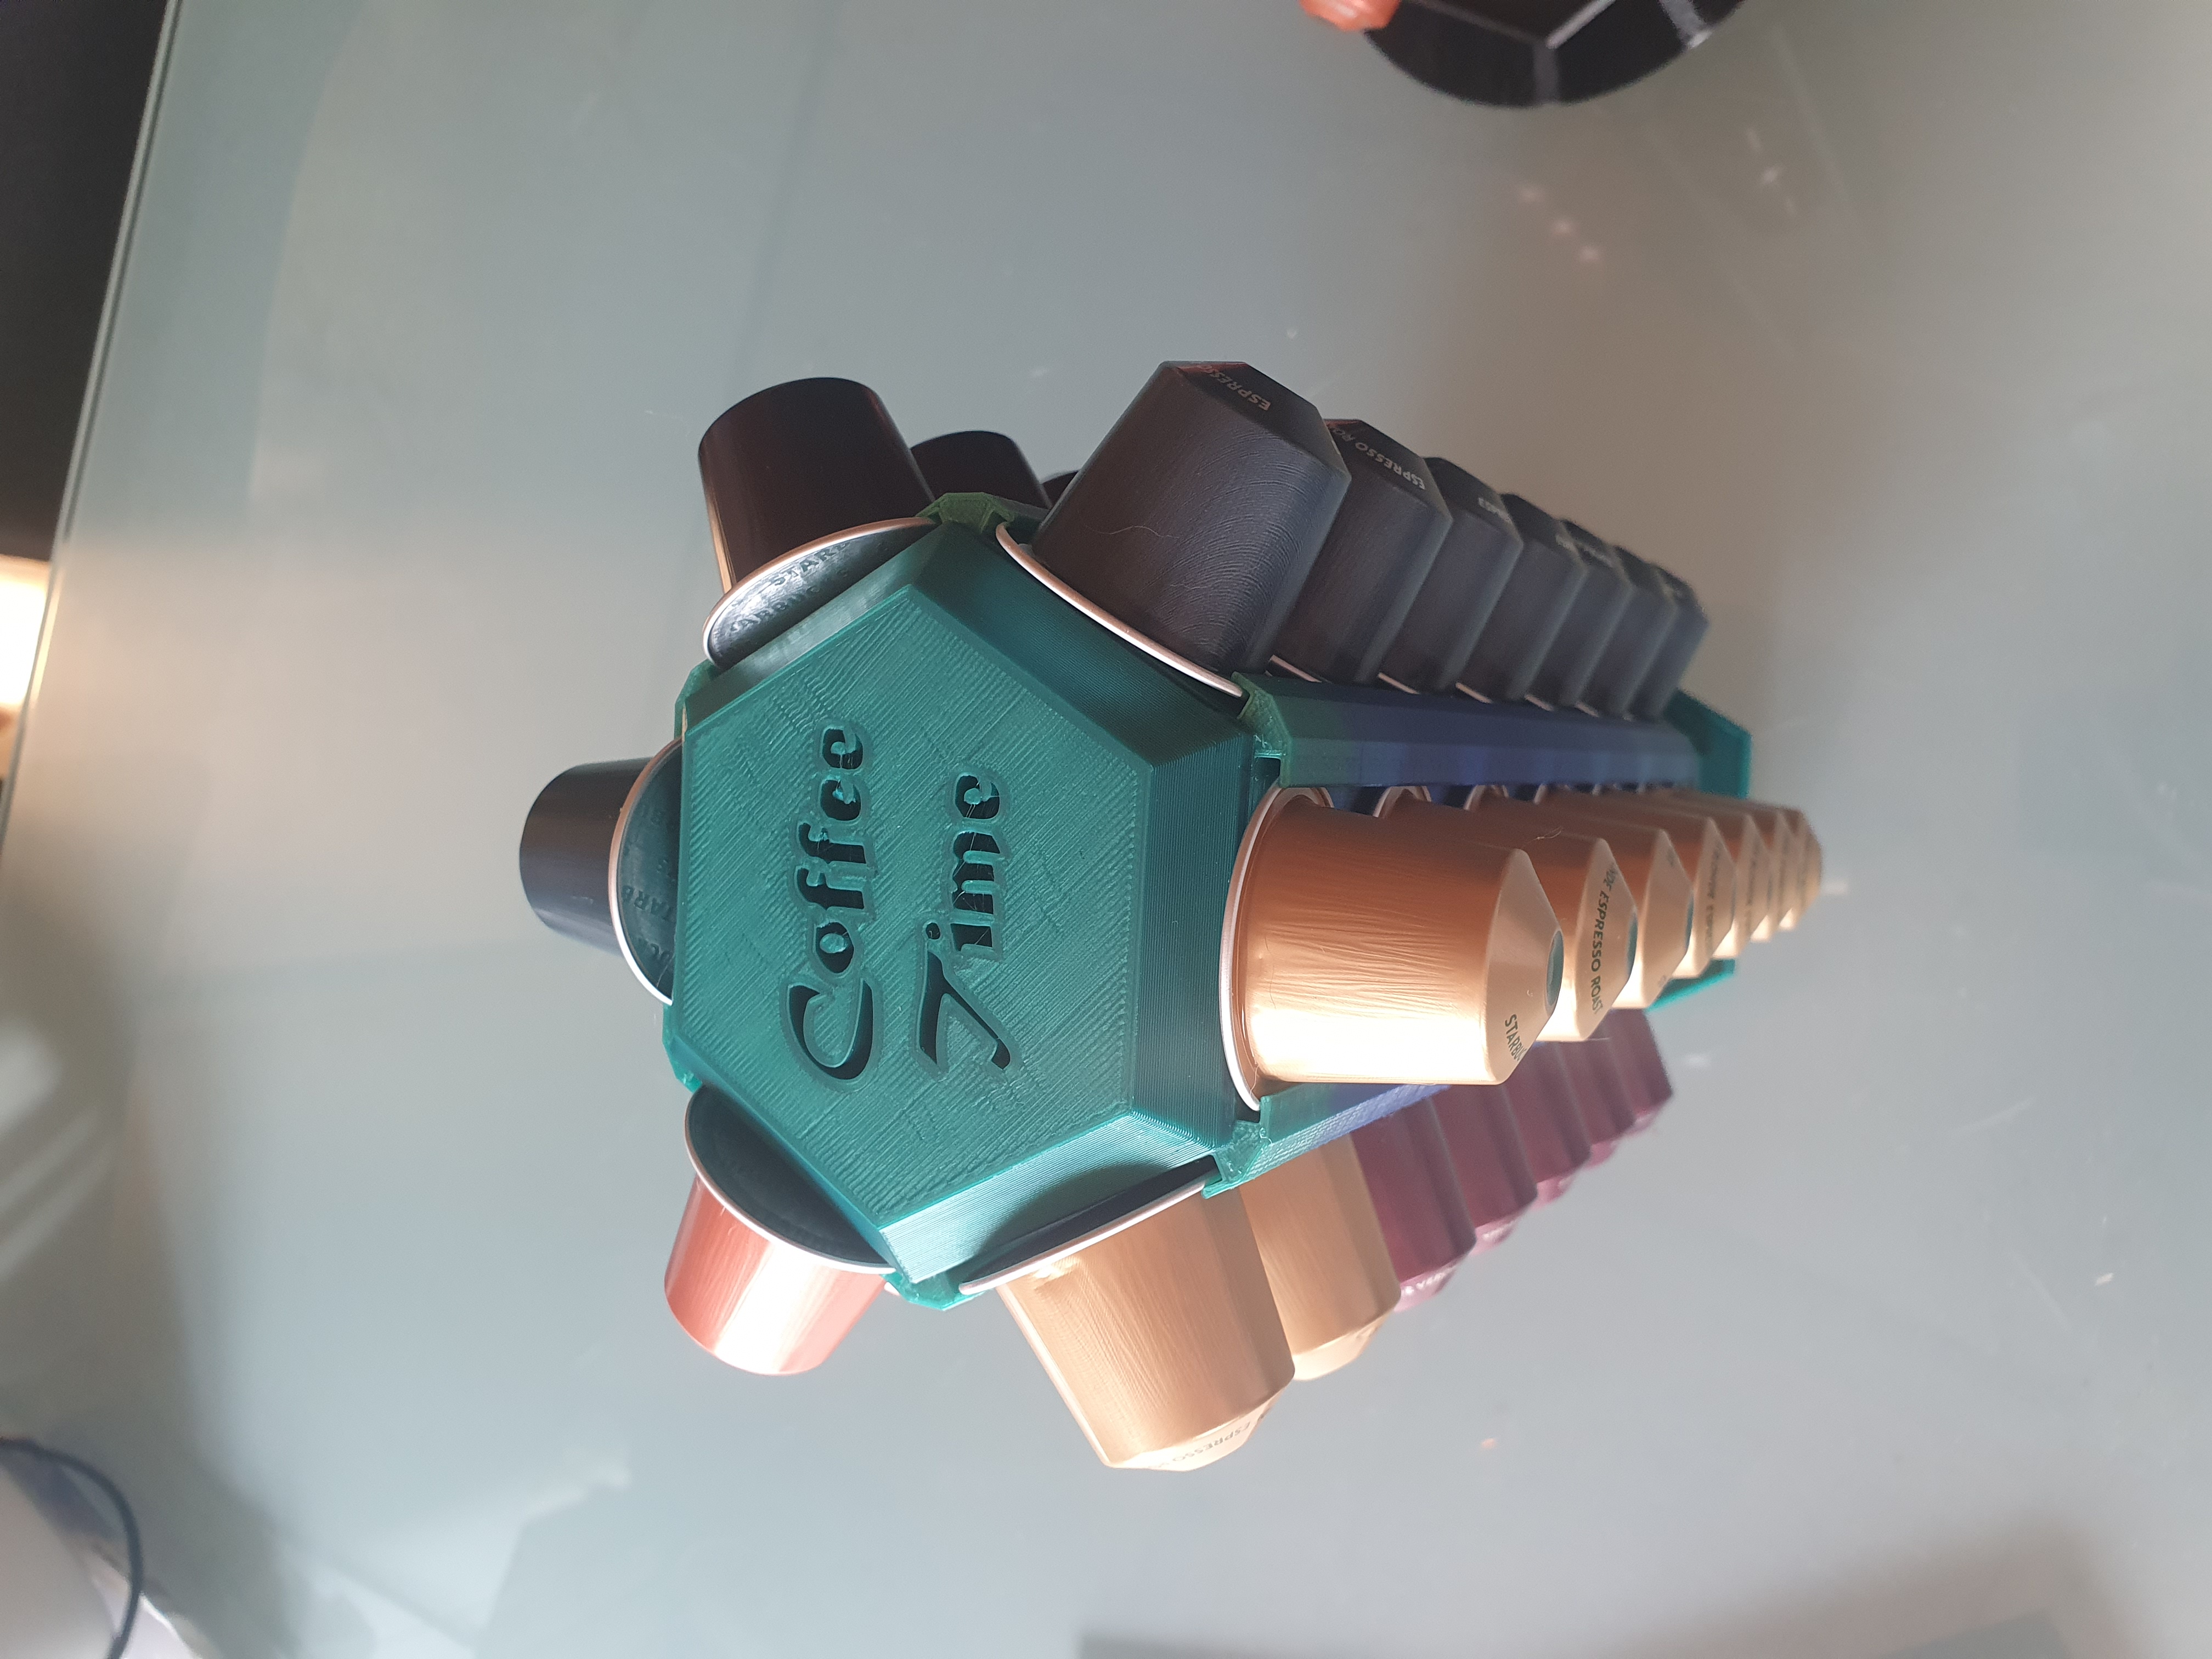
<p><strong>Turnable Nespresso Tower </strong>in two versions: </p><p><strong>Standard Version</strong> to store 42 capsules</p><p><strong>Extended Version </strong>to store 60 capsules</p><p> </p><p><strong>Optional Covers</strong></p><p>There are a few different covers you can choose:</p><ul><li>blank cover</li><li>with text: Coffee Time</li><li>with coffee cup</li><li>3 Versions with compartements for sugar bags and stirrer/spoons</li></ul><p> </p><p>All needed parts can be printed. </p><p>You just need some glue for assembling. </p><p> </p><p><strong>Printing</strong></p><p>Filament: PLA</p><p>Layer high: 0.2 mm</p><p>Infill: 15-20%</p><p>Supports: Only the Connector #1 needs supports, all other parts are printed without.</p><p> </p><p><strong>Assembling </strong></p><p>1.) Glue <i><strong>Connector #1</strong></i> to the flat side of the <i><strong>Bearing-Top</strong></i>.</p><figure class="image image-style-align-center image_resized" style="width:50%;"><img src="https://media.prusaprinters.org/media/prints/71421/rich_content/84d91c9d-140b-4b5c-b17b-f32723eda5e6/20210718_171535.jpg#%7B%22uuid%22%3A%227e7a5e58-4dd7-4aeb-88c9-5ecf56d39288%22%2C%22w%22%3A1953%2C%22h%22%3A1865%7D"></figure><p>2.) Place the <i><strong>Bearing-Rolls</strong></i> on the <i><strong>Bearing-Bottom</strong></i>.</p><figure class="image image_resized" style="width:50%;"><img src="https://media.prusaprinters.org/media/prints/71421/rich_content/50dd9688-9028-4e2e-808c-b070760e89c3/20210718_171504.jpg#%7B%22uuid%22%3A%22c891fc48-82f2-46d5-a402-443b453458c3%22%2C%22w%22%3A2227%2C%22h%22%3A2074%7D"></figure><p>3.) Put <i><strong>Bearing-Top</strong></i> on the rolls and check if it turns nicely.</p><figure class="image image_resized" style="width:50%;"><img src="https://media.prusaprinters.org/media/prints/71421/rich_content/ee5c78ed-825c-42af-b383-05754cb90380/20210718_171808.jpg#%7B%22uuid%22%3A%22783c758e-72f1-4af5-bd5d-8fa83e8d0b7c%22%2C%22w%22%3A1986%2C%22h%22%3A1783%7D"></figure><p>4.) Put the <i><strong>Bearing-Ring</strong></i> on and press down flat and gently until it clicks. Done.</p><figure class="image image_resized" style="width:50%;"><img src="https://media.prusaprinters.org/media/prints/71421/rich_content/5b97877b-b9a0-467a-844c-90c2cc2b5ead/20210718_171906.jpg#%7B%22uuid%22%3A%22ce2d0ed5-4e4b-43ba-b04f-22fbeeef407c%22%2C%22w%22%3A2203%2C%22h%22%3A2267%7D"></figure><p>5.) Now glue <i><strong>Connector #2</strong></i> to the <i><strong>Base</strong></i>. Press down completely.</p><figure class="image image_resized" style="width:50%;"><img src="https://media.prusaprinters.org/media/prints/71421/rich_content/381175e0-2601-4ec7-b85b-b193f90cb3df/20210718_172312.jpg#%7B%22uuid%22%3A%220a3e4831-5e86-46c4-a51d-325d407a119d%22%2C%22w%22%3A3024%2C%22h%22%3A4032%7D"></figure><p>6.) Add glue to the <i><strong>Base</strong></i> and put the <i><strong>Main-Body</strong> on. </i></p><figure class="image image_resized" style="width:50%;"><img src="https://media.prusaprinters.org/media/prints/71421/rich_content/0fb1ad9c-0d89-4f05-b251-f91b31330958/20210718_172519.jpg#%7B%22uuid%22%3A%22969a2e4d-03c6-476a-bb49-90bd78d6f1da%22%2C%22w%22%3A2627%2C%22h%22%3A3665%7D"></figure><p>7.) For Extended Version glue now the<i><strong> Body-Extension</strong> to the <strong>Main-Body.</strong></i></p><p>8.) Put the cover in without glueing, so it's still changeable.</p><figure class="image image_resized" style="width:50%;"><img src="https://media.prusaprinters.org/media/prints/71421/rich_content/88fd92a2-efe0-48d1-a096-aec1f90dc6f8/20210801_151144.jpg#%7B%22uuid%22%3A%22e4a5313e-235c-4503-9ed1-8196df1a1e44%22%2C%22w%22%3A3024%2C%22h%22%3A4032%7D"></figure><p>9.) Last step is to glue the <i><strong>Tower</strong></i> to the <i><strong>Bearing</strong></i>. Put some glue to the flat of the connector, take care you don't use too much glue! Put on the tower and press down gently a few seconds, to ensure it's glued really flat together.</p><figure class="image image_resized" style="width:50%;"><img src="https://media.prusaprinters.org/media/prints/71421/rich_content/3b8c4ece-b56b-4deb-97ea-23d5673b5529/20210718_173057.jpg#%7B%22uuid%22%3A%2230192711-a670-4caf-98a2-474cbf2a3a41%22%2C%22w%22%3A3024%2C%22h%22%3A4032%7D"></figure><figure class="image image_resized" style="width:50%;"><img src="https://media.prusaprinters.org/media/prints/71421/rich_content/add25c53-34fb-45e4-a7a8-6a228c381d12/20210718_173134.jpg#%7B%22uuid%22%3A%2259d33ba6-916e-42a3-af90-7d957927fac8%22%2C%22w%22%3A3024%2C%22h%22%3A4032%7D"></figure><p>Put the tower in the socket and you're ready to go!</p><figure class="image image-style-align-center image_resized" style="width:50%;"><img src="https://media.prusaprinters.org/media/prints/71421/rich_content/25fabc50-1d20-486a-a7f8-fe7a11360738/1627857000309428403875793238386.jpg#%7B%22uuid%22%3A%222684dc28-4752-468a-a99a-fda340a8d371%22%2C%22w%22%3A3024%2C%22h%22%3A4032%7D"></figure><p>Happy printing and enjoy your coffee!☕</p>
With this file you will be able to print Turnable Nespresso Tower with your 3D printer. Click on the button and save the file on your computer to work, edit or customize your design. You can also find more 3D designs for printers on Turnable Nespresso Tower.