Turok's Razor wind
myminifactory
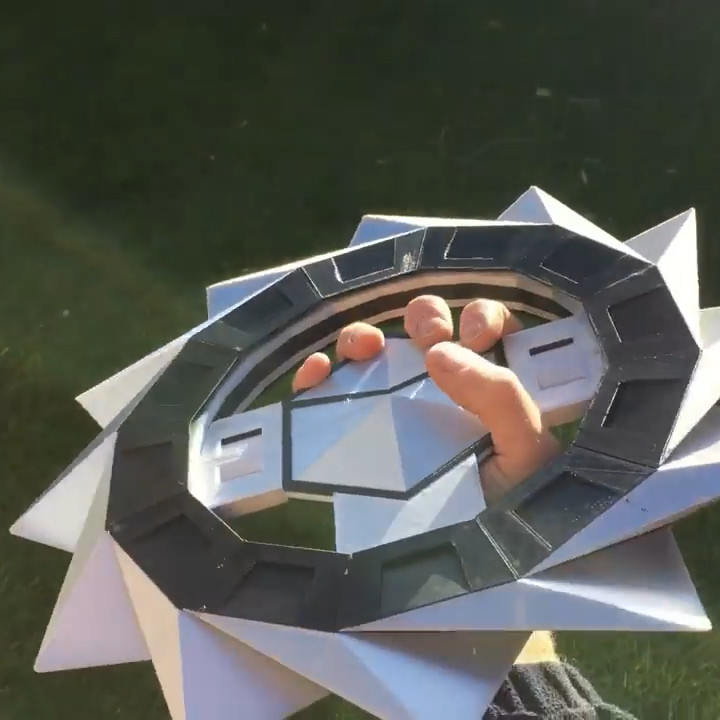
See It here https://youtu.be/SPiU2oic760 This was my first attempt at a larger item, so i welcome a remix! The model utilises a free wheel ratchet and pawl mechanism to facilitate the spinning.The ratchet drive/hub is a little under 230mm x 230mm, (a weird size I know but I wanted it as big as my bed would allow) so if your bed isn't big enough reduce the size of all parts uniformly, or split the ratchet accordingly. There is enough tolerance, that a reduction in size should not affect operation. As pictured I also printed a 40% model which still works well. In total you will need to print: 11x Plain Boss and Blades merged without supports (but I suggest a brim for stability).1x Pawl Boss and Blade merged with supports everywhere (even on model).1x Ratchet Hub and Insert Merged with supports (just touching build plate be fine). I suggest printing parts in the orientation provided, this should ensure a good finish on the 11 blades and excellent strength of the Pawl and Ratchet. Remove support material from the Pawl Boss carefully. I found a zig zag support stucture worked well as it came out like a snake bringing the deeper support material from behind the pawl with it. Assemble all parts with a suitable adhesive applied to the tabs of each boss and the underside of blades. A flat surface helps to ensure true alignment of the bosses. I suggest making up 6 and 6 and then bring the two halves together around the center hub ratchet. There is around 1-2mm tolerance on all parts. Slack enough that it should assemble easily and spin freely.Please see attached demo vid. Thanks for viewing
With this file you will be able to print Turok's Razor wind with your 3D printer. Click on the button and save the file on your computer to work, edit or customize your design. You can also find more 3D designs for printers on Turok's Razor wind.