Tweeter Repair
prusaprinters
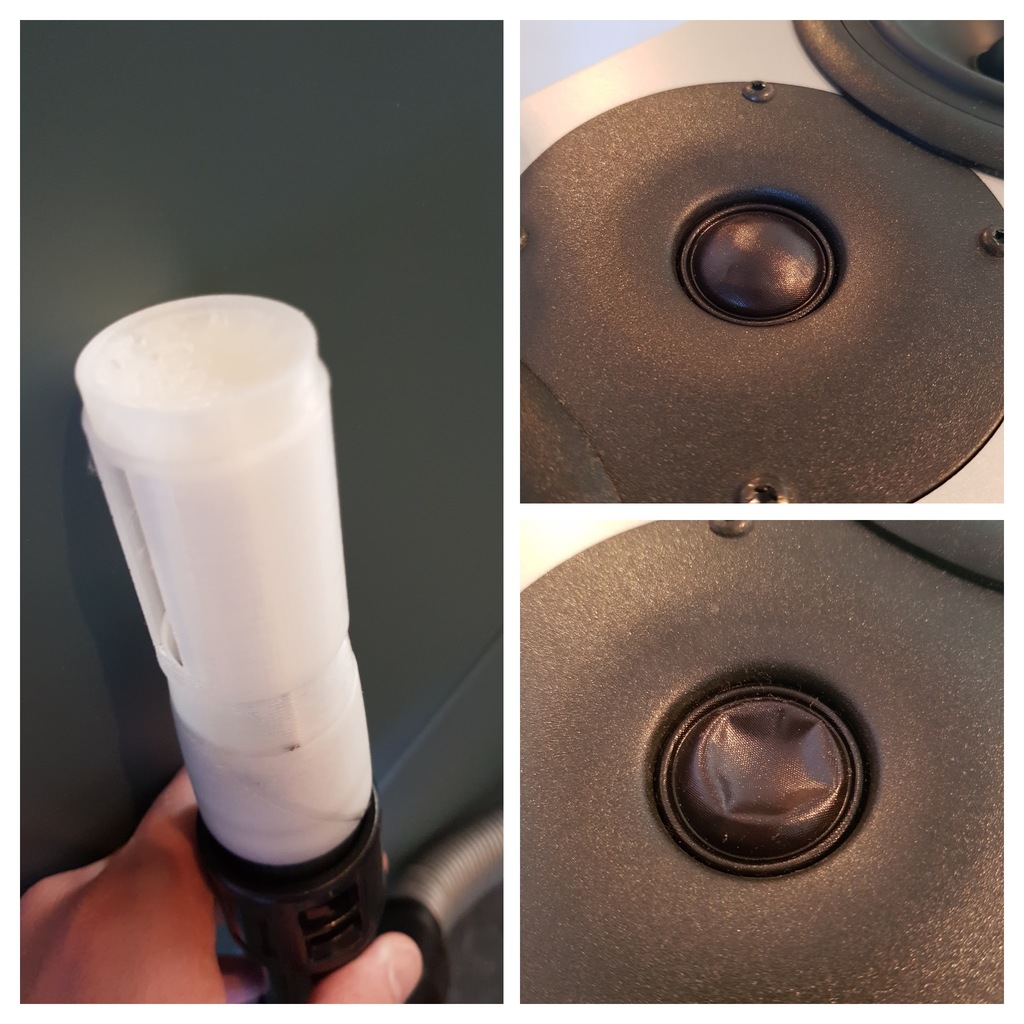
<p>Tool I used to repair my System Audio 1750 and center tweeter element.</p> <p>Depending on which layer height you print you may need to drill ( 1.5mm ) out the holes and then sand the tool smooth again. ( There is an 0.3mm thick layer below all the holes to make it able to bridge it in air. Print with 0.3mm layer height and you might not need to drill any holes since that bridge is probably not airtight, print with 0.2mm and it may get airtight and you will need to drill holes, I have not test printed at 0.3mm and don't know if it will lay down the holes successfully with only one bridge layer )</p> <p>Fusion 360 file is included so its possible to change dimension to fit your tweeter if needed.</p> <p>Consize is the size where you want the edge of the tool to lay against the tweeter.</p> <p>Conedepth is how much the tweeter extrudes from the place you intend to place the tool.</p> <p>VacumSize1 is the diameter where you insert your vacuum</p> <p>VacumSize2 is the diameter the length of Vacumdepht inside where you insert the vacuum, to give it cone shape.</p> <p>Vacumdepth Where Vacumsize2 should be applied.</p> <p>And of course, I take no responsibility for the usage of this tool...</p> <h3>Print Settings</h3> <p><strong>Rafts:</strong></p> <p>No</p> <p class="detail-setting supports"><strong>Supports: </strong> <div><p>No</p></div> </p> Category: Hobby
With this file you will be able to print Tweeter Repair with your 3D printer. Click on the button and save the file on your computer to work, edit or customize your design. You can also find more 3D designs for printers on Tweeter Repair.