Two Stage Switchblade Prototype
thingiverse
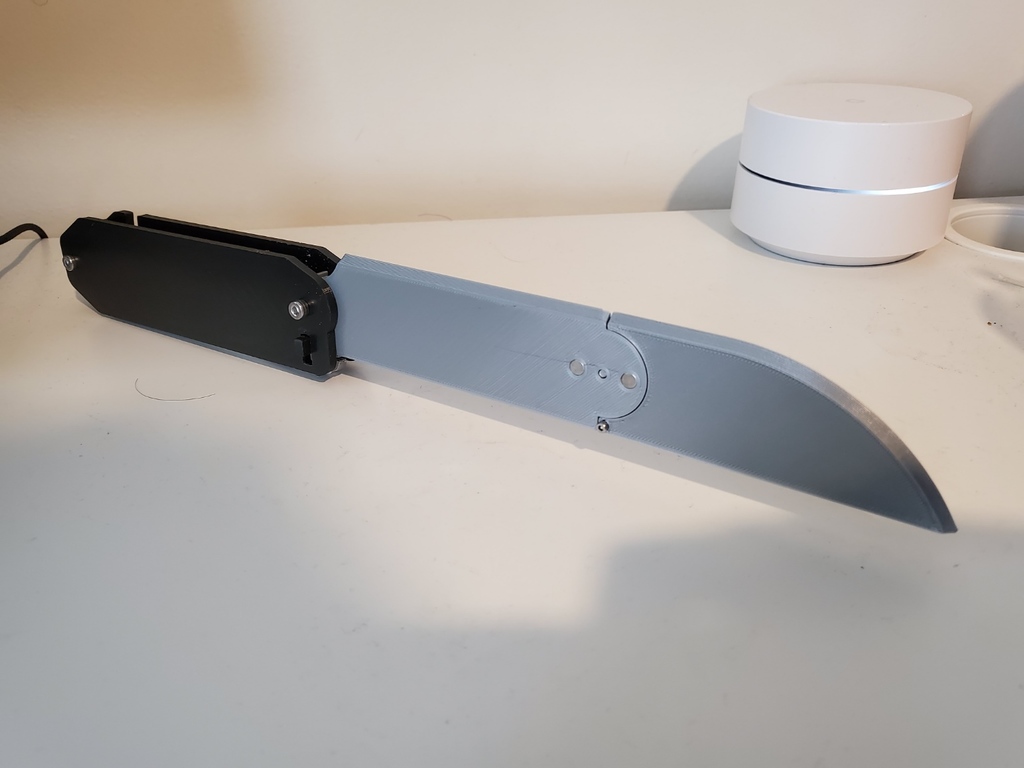
<p>A switchblade knife with a two-stage blade that roughly doubles in length when extended</p> <p>This is a work in progress and is not totally reliable!!</p> <h>Required Parts</h> <ul> <li>4x Neodymium cylinder magnets, 5mm diameter and 3mm height</li> <li>2x M4x20mm screws</li> <li>1x M3x14mm or M3x12mm screw and washer</li> <li>1x M2x6mm screw</li> <li>Medium / Large rubber band</li> </ul> <h>Assembly</h> <p>Insert two of the magnets into the holes in the ring on LowerBlade. Make the magnets orientation opposite eachother.</p> <p>Do the same for the holes in UpperBlade and ensure that the magnets on LowerBlade will attract the magnets on UpperBlade when they are locked in the open position</p> <p>With the blade facing away from you and the tip pointed up, screw the M2x6mm screw into the left side of the UpperBlade's small hole. This acts as a stop pin when the blade opens</p> <p>Connect the blade halves via the post in LowerBlade and set them to the open position with the magnets holding them together. Place the M3 washer around the M3 screw and screw it into the post on LowerBlade until the screw head and washer are flush with the top of the post. The washer should prevent the UpperBlade from being fully disconnected.</p> <p>Loop a rubber band through the hole in the tab on the bottom of LowerBlade. We will connect the other end of the band to the handle later</p> <p>Insert an M4x20 screw into the top hole of HandleBack and pass the screw through the pivot hole on the bottom of LowerBlade. It should be able to rotate freely around the screw.</p> <p>Now loop the other end of the rubberband around the post on the bottom of HandleBack. This is the tension that extends the blade.</p> <p>Insert the OpenLockPin's side tab into the slot on HandleBack with the shorter rounded portion facing the blade. It should lock into the semicircular notch on the back of LowerBlade. Place the rubberband over the OpenLockPin such that it presses the pin into the LowerBlade notch.</p> <p>Finally, attach the HandleFront on the other side of the HandleBack and fully screw in the top M4 screw and then the bottom M4 screw.</p>
With this file you will be able to print Two Stage Switchblade Prototype with your 3D printer. Click on the button and save the file on your computer to work, edit or customize your design. You can also find more 3D designs for printers on Two Stage Switchblade Prototype.