Typhlosion
thingiverse
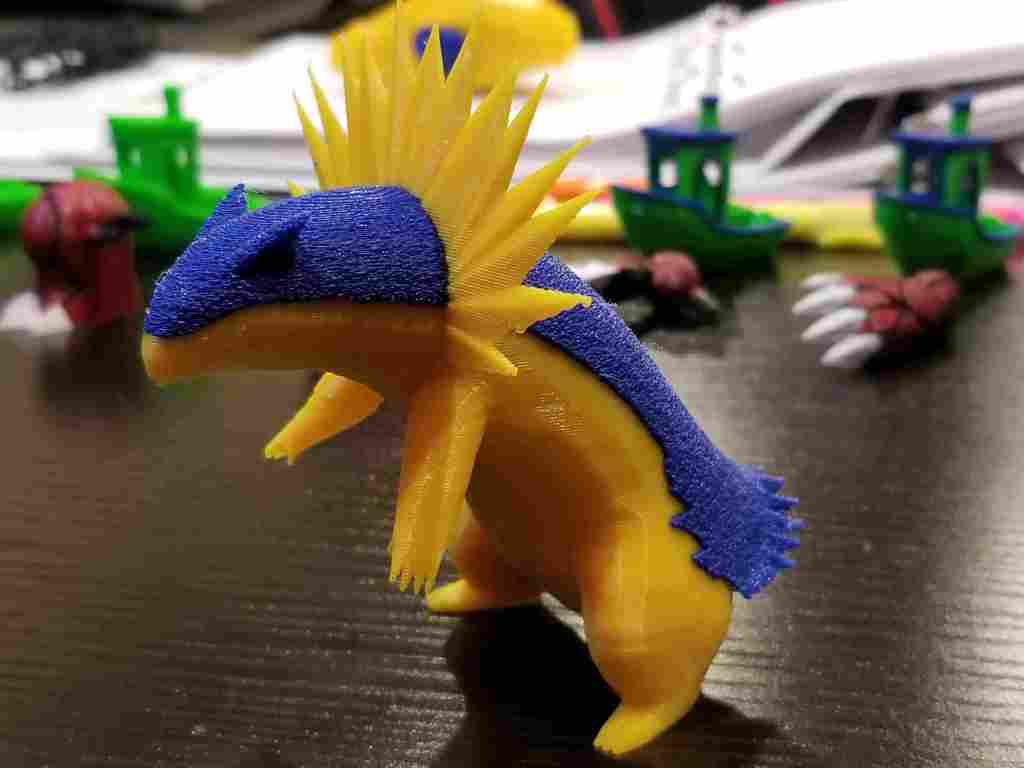
This is a remix of FriskWolfie's Typhlosion model, which was originally a one-piece .stl file. I separated the 'front fur,' the 'back fur,' and the 'flames.' The models merge accurately when arranging a dual-extrusion print. I used a super minimal stl viewer/editor (AutoDesk Netfabb, free version) to separate the pieces. Pay attention to the caution note below, because it is not a perfect edit. CAUTION: Some pieces have issues (I think it's the front fur). Experiment with the Mesh Fixes settings on your slicer to make sure holes are filled and examine the print preview post-slicing to make sure it looks correct. You may need to align pieces manually to make sure they fit correctly. CAUTION: Experiment with which of these .stl files will work together. For me, I used the original flames, original back fur, and the repaired front fur. I supplied all the files anyway just in case anybody who actually knows what to do with meshes wants to mess with it. I edited the thighs to show the extra tufts of his back fur overlapping in that area. If your slicer shows a sloppy merge of the back fur and front fur here, you might want to expand the back fur a couple mms in order to 'oversize' it over the front fur. For Dual Extrusion (with two separate extruders): I recommend printing the flames and front fur on one extruder, while the back fur is on the other extruder. To minimize color-bleeding, print the model facing either right or left. If his rear end is facing to the left, use the left extruder for his back fur color. If used in tandem with an ooze shield, this should reduce the amount of travel which that extruder would have over areas of different color, just in case it leaks. My print settings: Slicer: Cura Printer: Qidi X-Pro Material: PLA, 1.75mm Speed: 30mm/sec Layers: 0.2mm height Bed: 50degC, glue-sticked Adhesion: No raft or brim Cooling: 100%, with additional desk fan pointed at model's front side. Infill: 20% Cubic (refer to Special Settings below) Dual Extrusion: Ooze Shield, Retraction, right/left colors correspond to extruder location Supports: Tree Support (make sure the arms are well-supported on almost all sides Experimental: "Fuzzy Skin" enabled for the 'back fur' extruder for a bristly boarback look. Special Settings: I told the printer to treat all the first 87ish layers as a bottom layer, so that it gave 100% infill up to where the belly was directly above the fronts of his toes. This keeps more weight in the back and prevents him from falling forward. Then it did 20% from there upward. This applies to the 3.75inch model pictured. I plan to print this guy in his actual colors soon, and to paint the eyes and flames. I'll update this when I get it done! PLEASE give a huge thanks to FriskWolfie for having posted a Typhlosion model which isn't low-poly. It is the only model-accurate one I could ever find.
With this file you will be able to print Typhlosion with your 3D printer. Click on the button and save the file on your computer to work, edit or customize your design. You can also find more 3D designs for printers on Typhlosion.