uBITX radio project
thingiverse
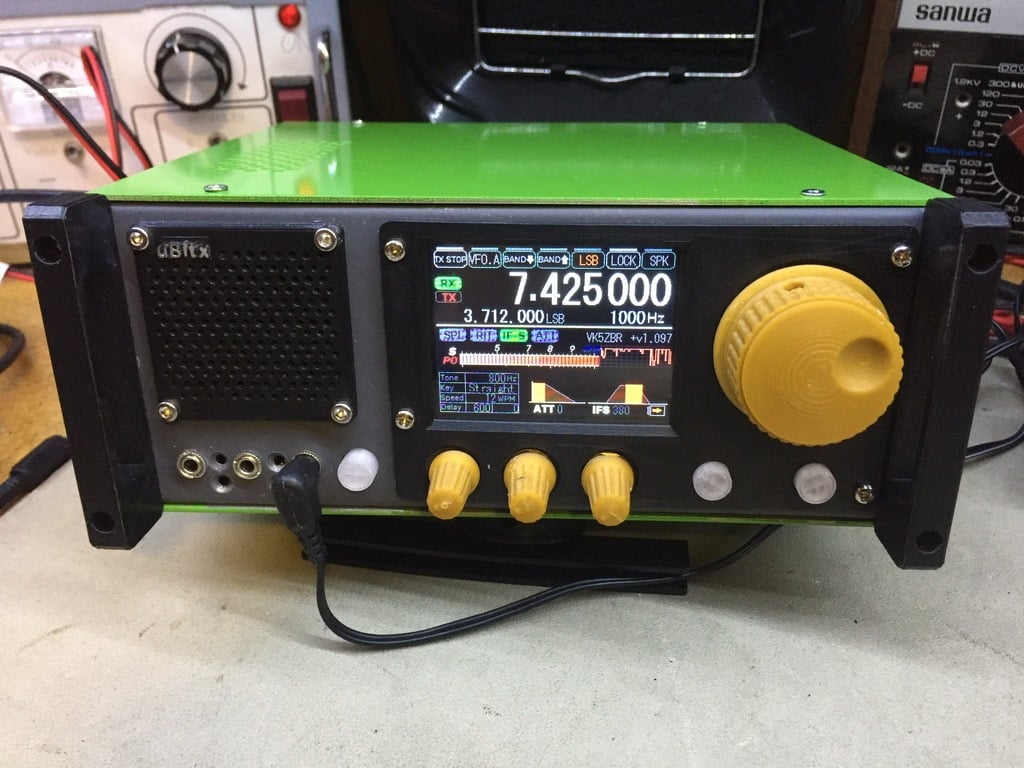
This is my ongoing uBitx project. Feel free to use parts you have a use for. I print most bits in ABS, being in the sun or car will not affect it. ABS needs brim 10mm, and a charm around your printer to keep the temperature constant. uBitx 50mm speaker grill, this version needs ironing on the top layer to make it look smooth. uBitx 50mm speaker grill 2 has no label, a blank spot for your own or the uBitx logo. Different styles of VFO knobs are available to your liking. A spacer for 50mm square mount speaker to clear cone, Nextion screen spacer to make screen flush with front. A 50mm round speaker mount/spacer. The logo just prints with a 0.4 tip but go 0.2 or 0.3 if you could bother yourself. I was lazy to change my tip. I printed the no label version face up, then wet rubbed the top with 400, 600, 1000 and a rag to get a shine. Acetone misted may come up to shiny but a scotch pad to rough it up a bit. The radio case will have protective plastic side caps to finish it off, optional front bumpers to protect the knobs. Low profile VFO knob needs a 4mm tapping for hex grub screw. I have two volume knobs, The standard Ubitx volume shaft pot and the knurled mini pots. These are designed to press on with an ABS print as ABS shrinks a bit when printing. If you're doing it in PLA but may have to shrink the print by a few percent for a tight fit. The press buttons fit on the round holes, at this stage they sit in front of momentary PCB buttons. I may have another design for a press switch when I work out what switch I will use. The end strips are to make the front and back edges look nice and protect the paint work of the metal. See photo where they go, remember the side covers draw the radio up.
With this file you will be able to print uBITX radio project with your 3D printer. Click on the button and save the file on your computer to work, edit or customize your design. You can also find more 3D designs for printers on uBITX radio project.