UConduit H-Bot 3D Printer / Reprap
thingiverse
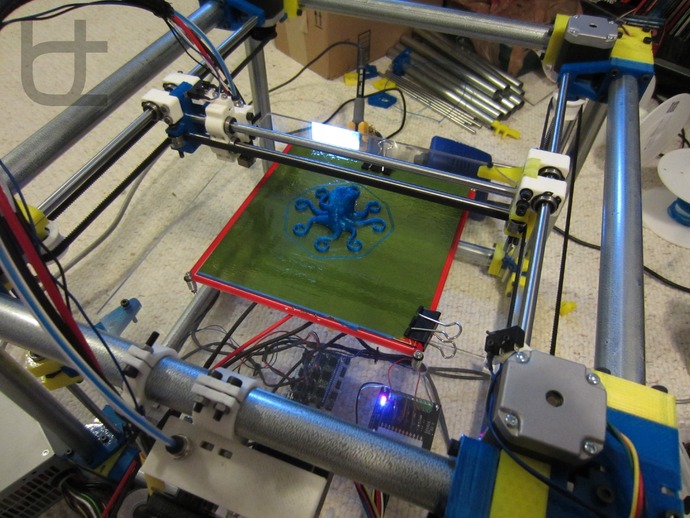
The UConduit 3D printer is an h-bot 3D printer, with a frame built from electrical conduit (steel conduit that you can find at the hardware store). The source files are hosted on github at https://github.com/iquizzle/uconduit. All printed parts are designed using OpenSCAD so that parts can be freely compiled and modified. Conduit was chosen as a frame material for its low cost ($3.50/5ft), stiffness and hardware store availability. Standard build volume is approx 250mm in each dimension. The printer is held together using o-rings and compression flanges. Each end has two rubber o-rings. There is a hard clamp and a soft clamp. The hard clamped o-ring creates a pivot point and firmly holds the conduit in place. By adding a second soft clamped o-ring on each end, vibrations are very effectively damped. As a result, the printer is not only fast, but also super quiet! Additionally, wiring can be neatly routed from the top to the bottom of the printer (using the conduit for its intended purpose!). I'm not listing this 'thing' as a work in progress. All parts have already been revised a minimum of 3 times, and have been under development since last September -- I will continue to upgrade and support this design until it is safely in the hands of the hacker community. :) I've created a google group for this printer and general hbot/corexy discussion and support:https://groups.google.com/forum/?fromgroups#!forum/h-bot-and-corexy-3d-printers A video of the UConduit in action can be viewed here:http://www.youtube.com/watch?v=73MlaBWCTPU Special thanks to Free from http://www.terawattindustries.com for support and helping with the build and supplying parts. Also thanks to ckaos for publishing his h-bot (thing:27202), which I analyzed several times during this build. Instructions Download the (beta) BOM (on github) and STL files. Print 4 top vertexes and 4 bottom vertexes, 2 x-ends, 2 z-ends, 2 leadscrew couplers, and 4 bottom plugs All other prints are supplied in the appropriate quantity in the STLs Build the frame by clamping the o-rings between the beveled cutouts and the compression flanges (detailed build guide to follow) Install the linear rods during frame build, x-rods are press fit and should be installed during frame assembly Assemble and install one x-end and then y-rods in that xend, slide the carriage onto the y-rods Install the other x-end and clamp the other end of the y-rods within Tap the j-head mount with 1/8" NPT and screw in the push-to-fit (but not all the way in) Screw the j-head mount onto the carriage (4 M4 screws) Install the stepper motors Assemble the z-ends, and loosely assemble the leadscrew couplers Thread the leadscrew through the z-end and push though the linear rod Install the assembly on the frame (press fit on top, clamp on bottom) Screw the idler into the mount Wrap the gt2 belt Instructions are limited at this point, but build guides should be available in the near future. If you'd like to start a build and run into problems, post to the google group and I can offer help. I highly recommend buying a 3mm ball end hex key for the M4 screws on the frame. The first time I built the frame, I only had a straight end and realized that I could have saved hours of struggle if I had a ball end hex! cat not included con u duit? yes, yes u con -- the only printer repeatedly endorsed by Rob Schneider. http://www.youtube.com/watch?v=VZ2HcRl4wSk
With this file you will be able to print UConduit H-Bot 3D Printer / Reprap with your 3D printer. Click on the button and save the file on your computer to work, edit or customize your design. You can also find more 3D designs for printers on UConduit H-Bot 3D Printer / Reprap.