UL2 shape mouse for G304/G305
thingiverse
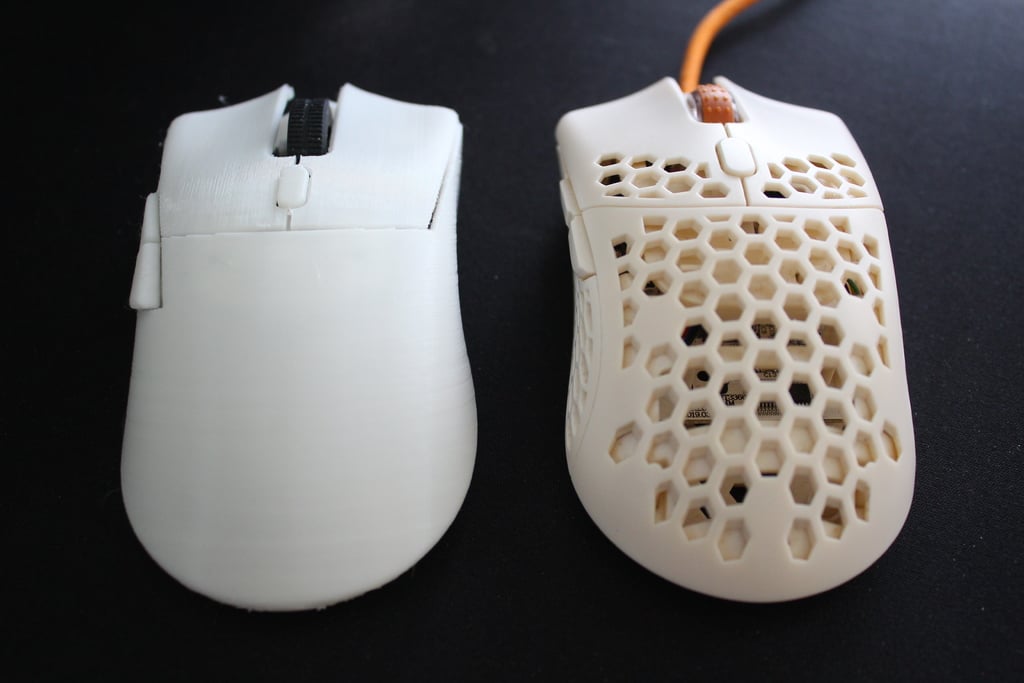
01/02/2020 - re uploaded all files, improved the design and made some qol changes, happy to call it final This is a medium quality plain shell version, for higher quality and rechargeable versions (suitable for higher resolution resin printing) + a honey comb version with reinforced mouse buttons design, you can purchase those files here - https://www.etsy.com/nz/listing/773738929/3d-printable-ul2-shape-mouse-for?ref=listings_manager_grid This is a 3D printable fully functioning wireless mouse I designed based on the shape of the final mouse UL2 that uses the G304/G305 PCB. I didn't use a scan of the UL2 as a reference to get an accurate shape but this is very similar aside from the hump being lower, sort of like an fk2 but otherwise having the sides, back and finger grooves all fit the general shape of the UL2. This is very slightly smaller coming in at 113mm long x 32mm high while having a similar width and shape as the UL2. Assembly instructions: I will keep things simple with some pics as well, if you need help with something message me and I will do my best to help. 1 - Feed in from the bottom of the PCB, through the front two of the three holes either side the encoder, the four wires for the M1 and M2 switches. Place the switches into the 3D printed platforms then solder the wires to the legs, see pics. Feed the wires back through the holes and align the platforms ready to be screwed in. https://i.imgur.com/icJkjJj.jpg https://i.imgur.com/YQHuAZl.jpg 2 - Insert the PCB (don't forget to put the on/off switch in the print first), make sure the PCB is flush with all the stand offs before screwing in the four screws, screw in the switch platforms. 3 - Insert the side button PCB 4 - Plug in a battery (MAKE SURE THE MOUSE IS SWITCHED OFF FIRST!!) 5 - Screw in the left and right clicks into the shell with the alignment piece and align the shell with the base then hook the left front corner of the shell over the inner rim on the base and squeeze the other front corner over the other side and push the rest of the shell in place and screw in using three of the large screws that screw into the base of the G305. 6 - Insert the side buttons. Done. https://i.imgur.com/Ec87zd9.jpg IMPORTANT FOR FDM PRINTING Print everything in the orientation it is in!!!!! The mouse is optimized to print in a certain orientation!!!!! If you know your way around a slicer and printer be your own judge, you may know more than me. Attribution-NonCommercial-ShareAlike 4.0 International (CC BY-NC-SA 4.0)
With this file you will be able to print UL2 shape mouse for G304/G305 with your 3D printer. Click on the button and save the file on your computer to work, edit or customize your design. You can also find more 3D designs for printers on UL2 shape mouse for G304/G305.