Ultimaker 2 Aluminum Extrusion 3D printer
thingiverse
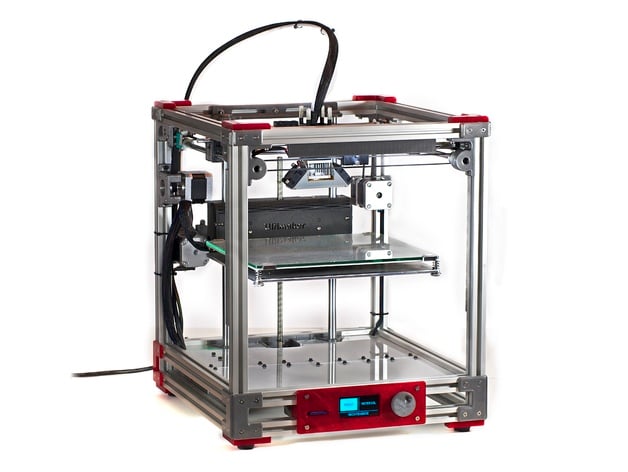
https://www.youtube.com/embed/TDfLqazCupo This is not The Greatest UM2 Clone, no. This is just a tribute. This project began as a fun way to learn AutoDesk Fusion 360. I started by importing the entire Solidworks CAD file into a new Fusion 360 project, dropped the frame (walls) from the printer, built 20x20 Misumi aluminum extrusions to wrap the printer guts and then worked to build brackets to support all the parts that previously attached to the frame. I've been printing nonstop on this new printer with the same precision and quality as my real UM2. In fact, I can use the same GCODE in either machine with identical results. A360 Source Download Link - Use this link to download a copy of the source (in your CAD flavor). Buying Parts The BOM - Click here The prices in the BOM are most likely out of date. Use the links in the BOM to find the parts. I had good experiences with all of the sellers I dealt with and found the parts to be close-to if not identical to official parts. This includes the 1.75mm version of the UM2 nozzle/heatblock. The BOM has a breakdown to buy all the parts to build the Z-axis platform/heated bed or to buy the official UM2 heated bed kit (which is actually intended for the UMO+). The cost of getting the kit is only $15 more when you calculate the PSU and lead screw Z-axis motor. There's also a small electronics board which acts as a relay for powering the heaterboard with the 24PSU and outputing 19V for the UMO. It's not needed, but an added bonus for a future project. :-) The kit is going to be easier... but it depends on how patient and adventurous you are. Build Instructions Build Instructions - Click Here Please refer to the official Ultimaker 2 assembly instructions for assembling the gantry and print head. Floor of the Printer My printer is using 1/4" acrylic that I bought from Lowes and cut on a 20x12 laser cutter. I sanded the underside to create a frosted look. I would have cut it as a single piece but the laser cutter was just a tad too small. This is why it's 2 pieces joined with 3D printed connectors and screws. I have included the CorelDraw file and the floor connectors. Update 1 Updated all Gantry parts to adjust tolerances for bearing fitment. After assembling another printer, I've found that they needed a .1mm increase. Updated Y-Axis Motor Mount to allow for room of the belt. Updated X-Axis Motor Mount to allow for screw space New files all have _v2 prefix. Deprecated files were moved to a file called "deprecated_v1.zip.
With this file you will be able to print Ultimaker 2 Aluminum Extrusion 3D printer with your 3D printer. Click on the button and save the file on your computer to work, edit or customize your design. You can also find more 3D designs for printers on Ultimaker 2 Aluminum Extrusion 3D printer.