Ultimaker Belt Tension Clips
thingiverse
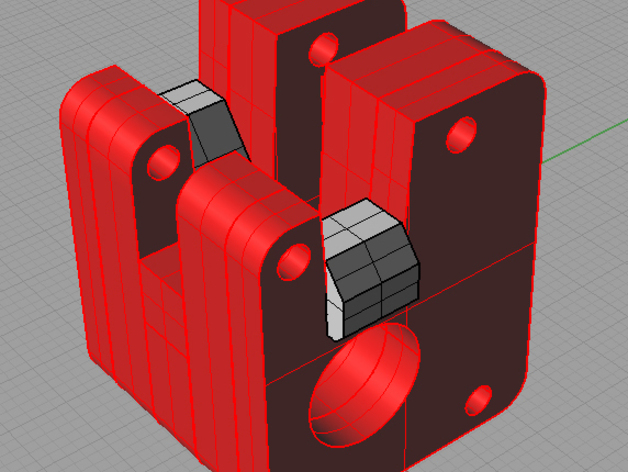
I like many printed up belt tentioners from thingverse. Most worked fine but after a while they warped and got loose. I also had issues with them hitting the heads when they did get loose and wreck 12 hour print jobs. These clips I designed use the existing belt tension design and add some height to the sides. Instructions Print 100% solid. 1) Pick a set of clips based on how loose your belts are. (I used the second and third highest for most of mine) 2) Open up claw and remove pressure bolts (see pic with red text "remove") These will no longer be needed. 3)loosen one pulley (helps in evening out the tension top and bottom) 4) Place clips on sides like in ISO render. Make sure slope is facing in.They should "snap" on and stay on their own. If not double check that they are pushed on all the way. 5) Fold down claw and place an extra bolt through the extra holes in head (blue text in REMOVE.jpg) This will keep the wood from breaking under the new pressure. I learned this the hard way. 6) Now reassemble the claw per the factory instructions. 7) Don't forget to tighten up the pulley. 8) Belt should now "Sing" if they don't try a higher clip. If you can't get the claw closed try a lower clip. The clips are in increments of 1mm in height so you may have to make your own inbetween height. Don't worry about the upside down clips...they will be kept in place by the belt and the clip tension.
With this file you will be able to print Ultimaker Belt Tension Clips with your 3D printer. Click on the button and save the file on your computer to work, edit or customize your design. You can also find more 3D designs for printers on Ultimaker Belt Tension Clips.