Ultimaker bottom fan replacement
thingiverse
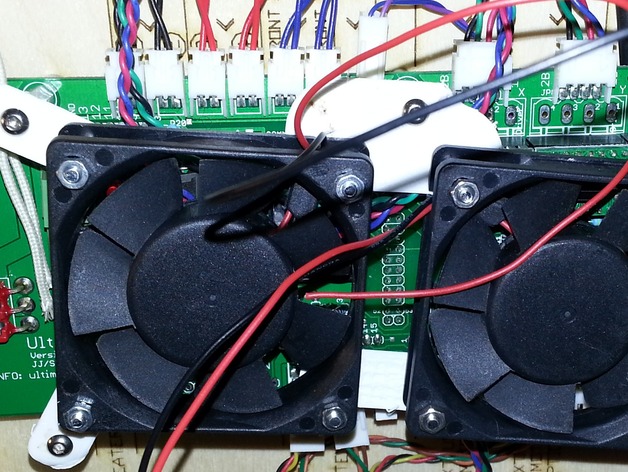
To reduce noise from the default Ultimaker 3D printer fan, replace it with two 60mm fans and simple mounts designed to bridge M3 screw holes. This quick fix is best for those who don't require extra protection for their electronics. Print feet for increased airflow beneath your printer, then print and mount the clips on the fans so that air flows towards the electronics. Connect the fans in series or parallel depending on voltage requirements specified by the fan. Remember not to worry about amps as the electronics can handle up to 3 watts. This low-maintenance solution shares the idea of effective construction without parametric design.
With this file you will be able to print Ultimaker bottom fan replacement with your 3D printer. Click on the button and save the file on your computer to work, edit or customize your design. You can also find more 3D designs for printers on Ultimaker bottom fan replacement.