Ultimaker buildplate 3 point levelling
thingiverse
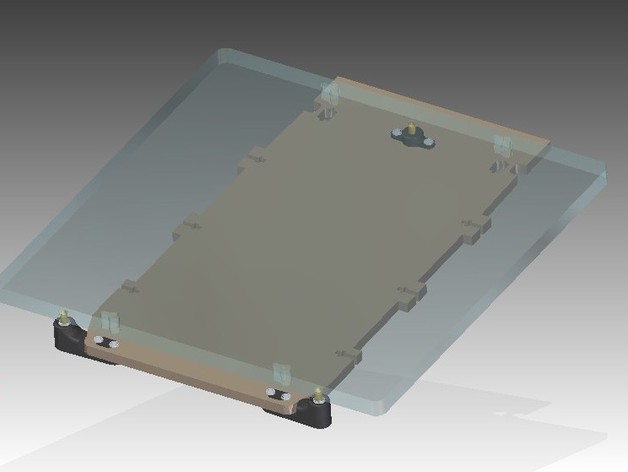
3 point bed levelling with zero force platform release Instructions Drill one 4mm hole in the center of the z-stage base plate in line of the centers of the two original cutouts. Drill two holes 3mm at 10mm left and right from the 4mm center hole. Counterbore 5mm tapped blind holes, 2mm deep in the acrylic buildplate. At rear centered, at front at +/-80mm from the center of the plate. Use the end of the laser engraved ticks to place the blind holes. The cone shaped bottom of the hole has to match exactly the tip of the supporting headless screw. Move print head to the front left and right corner and use the Ultimaker tool screw driver to adjust the platform height. Finally adjust the rear center screw. Bill of materials: 6 screws M3 x 10 6 nuts M3 3 nuts M4 self-locking 3 headless screws M4 x 10 tipped head
With this file you will be able to print Ultimaker buildplate 3 point levelling with your 3D printer. Click on the button and save the file on your computer to work, edit or customize your design. You can also find more 3D designs for printers on Ultimaker buildplate 3 point levelling.