Ultimaker extruder leveling mechanism 2-4 extruders
thingiverse
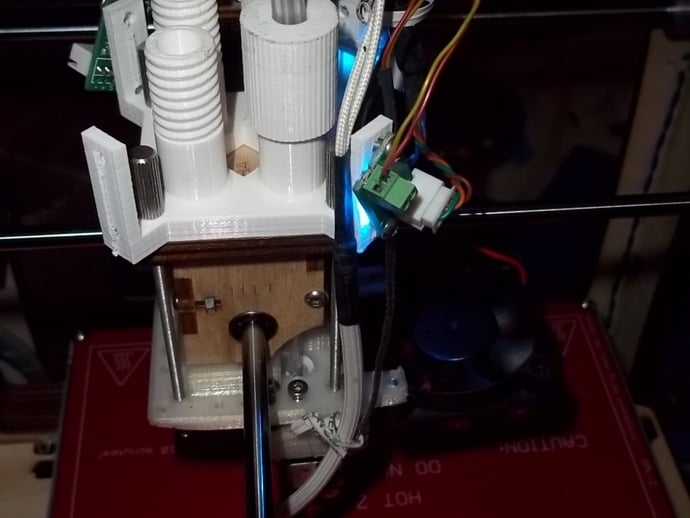
Leveling mechanism for up to 4 extruders on Ultimaker. Takes only a few minutes to level. Once leveled it doesn't need to be re-leveled for a long time. The parts that clamp over your peek insulator should be made from Taulman 618 not Taulman 645; the modified 8B piece should be made of either type of Taulman nylon, But ABS might work for the 8B piece as well. Glass Transition Temp of Taulman 618 is 49.4 degrees Celsius, Heat Deflection Temp at 66 psi is between 170 and 220 degrees Celsius http://taulman3d.com/618-specifications.html. Nylon should be printed on whale brand TUFNOL to prevent warping (I would get 2mm thick TUFNOL (also known as Garolite (LE) )http://www.mcmaster.com/#catalog/119/3609/=oa3ba2. My first attempt was done with blue tape; while the parts still worked, they were warped very much, and so I do not recommend using blue tape. I found that a good way to cut thin TUFNOL is with sheet metal cutters. Here is more information about printing with nylon http://www.youtube.com/watch?feature=player_embedded&v=Klseu2xV68o. If you dont want to use TUFNOL then you can try putting a layer of UHU glue stick http://www.uhu.com/en/products/paper-glues/detail/uhu-stic-klebestiftohne-loesungsmittel-1.html?cHash=568e237b4bf2f8dc0e7d33bc1a156a4e&step=1 glue onto kapton, this works well but not as well as TUFNOL. Bowen clamps should be used with this leveling mechanism. http://www.thingiverse.com/thing:138502 You will also need these M3 parts to assemble this leveling mechanism: 92855A316 1 Pack Metric 18-8 Ss Low Head Socket Cap Screw, M3 Size, 16 Mm Length, .5 Mm Pitchhttp://www.mcmaster.com/#catalog/119/3092/=o6pheb 92855A313 1 Pack Metric 18-8 Ss Low Head Socket Cap Screw, M3 Size, 12 Mm Length, .5 Mm Pitchhttp://www.mcmaster.com/#catalog/119/3092/=o6ph7r 92125A1401 Pack Metric 18-8 Ss Flat Head Socket Cap Screw, M3 Size, 30mm Length, .50mm Pitchhttp://www.mcmaster.com/#catalog/119/3107/=o6pfrm 92095A185 1 Pack Metric 18-8 Ss Button Head Socket Cap Screw, M3 Size, 20 Mm Length, .5 Mm Pitchhttp://www.mcmaster.com/#catalog/119/3107/=o6pflz 94125K472 2 Pack Metric Compression Spring, Ss, 9.4 Mm Overall, 5.5 Mm Od, .50 Mm Wirehttp://www.mcmaster.com/#catalog/119/1222/=o6pfc1 93625A100 1 Pack Metric 18-8 Ss Nylon-insert Hex Locknut, M3 Size, .5mm Pitch, 5.5mm Width, 4mm Heighthttp://www.mcmaster.com/#catalog/119/3171/=o6pf41 Instructions Video 1 http://www.youtube.com/watch?v=UzU_xE-ybN8&feature=youtu.be Use five 16mm M3 screws to attach the top clamp and bottom clamp onto PEEK insulator and Teflon insulator. Force M3 screws through the 3 leveling holes until screws can move up and down easier. Video 2 http://www.youtube.com/watch?v=d2TOdjurEGY&feature=youtu.be Line up extruder with 8B leveling mechanism and thread it in reverse using 20mm M3 screws (thread from bottom of extruder clamps through bottom of 8B leveling mechanism) then remove 20mm screws; they will not be used on the part, they are only for threading. Video 3 http://www.youtube.com/watch?v=UPlNBXPSSFg&feature=youtu.be Screw 30mm M3 screws into the 3 holes you just threaded into your 8B piece, but this time screw them in the correct way (from the top part of 8B down). Line up leveling clamps with springs and 8B(the 30mm bolts now sticking out of the 8B leveling mechanism), then attach 3 locknuts to the ends of your 30mm M3 screws to keep the part together. The part is designed to slide up and down the three 30mm M3 bolts when force (leveling action) is applied. Screw in 12mm M3 clamp screws through 8B (from the front) Video 4 http://www.youtube.com/watch?v=5eUo65rU3BA&feature=youtu.be To level mechanism: use the three 30mm M3 screws to level and to pull upward, and two 12mm M3 screws to push down. Unscrew clamp screws (12mm ones) before leveling up. And loosen leveling screws if you want to use the clamp screws to push down. Here is a Ultimaker Z-axis end-switch fine-adjuster http://www.thingiverse.com/thing:11033 for this you will need to tilt your z end-stop at an angle so that the screw from the Z-axis adjuster will hit your end-stop and not miss. Video 5 http://www.youtube.com/watch?v=qpcgEXU9cpc&feature=youtu.be An example of two leveled extruders
With this file you will be able to print Ultimaker extruder leveling mechanism 2-4 extruders with your 3D printer. Click on the button and save the file on your computer to work, edit or customize your design. You can also find more 3D designs for printers on Ultimaker extruder leveling mechanism 2-4 extruders.