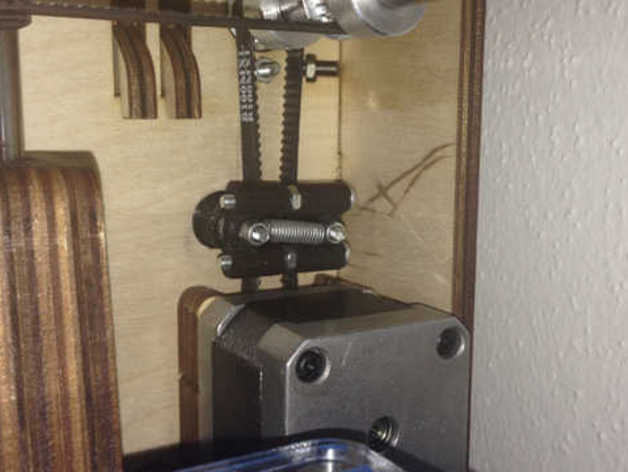
Ultimaker Short Belt Tensioner
thingiverse
Tired of tightening the short timing belts so often? Here's the snap-on floating belt tensioner. The tightener can move freely along the belt. Flanges on the roller parts keep the assembly from falling off. Attach small pieces of felt to the faces touching the steppers or the walls if you encounter rattling or rasping noises. Instructions Print at 0.1mm layer height, 1.2mm wall thickness and 20% infill. Clean bores after printing to let the sliders move smoothly along the guide bar screws. Tighten the roller screws to a loose fit to let the ball bearings move freely. Check for smooth-running of rollers and sliders before attaching the tighteners to the belts. Snap on the belt tighteners onto the short belts and make sure the flanges are embracing the belts at the side facing the walls. If the belt is too close to the wall, re-adjust the pulleys to have 1-2mm clearance from the walls. The rollers should barely touch the walls but not scratch them. Bill of materials: 2 slider (printed part) 2 roller (printed part) 2 ball bearings 10x6x3 2 screws M3x30 2 screws M3x16 2 nuts M3 2 nuts M3 self-locking or M3 + Loctite 1 tension spring 10mm (not too strong...) Hint: Save the nuts and glue the guide bar screws into one slider part. Update: Minor changes to roller part. Flages extended to prevent tensioner occasionally falling off. Larger bore for screw head to fit an additional washer for reduced friction between the roller and the screw.
With this file you will be able to print Ultimaker Short Belt Tensioner with your 3D printer. Click on the button and save the file on your computer to work, edit or customize your design. You can also find more 3D designs for printers on Ultimaker Short Belt Tensioner.
