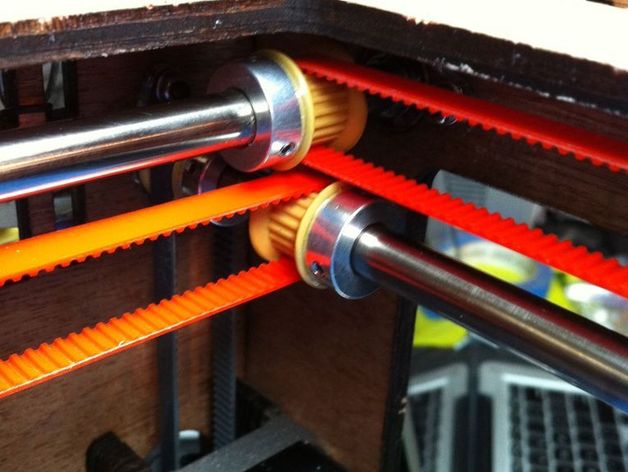
Ultimaker Timing Pulleys
thingiverse
This is a thing describing how to make timing pulleys for an Ultimaker style printer. It describes how to combine inexpensive polycarbonate plastic MXL timing pulleys with aluminum spacers to make a robust timing pulley for an Ultimaker style printer with 8mm outer shafts. Instructions 1) Take your spring clamps, remove the rubber sleeve from the clamp end, and grind a notch in the center of the clamp end. This notch should be deep enough so that the clamp can overlap an 8mm shaft by at least 3mm. 2) Drill and tap your aluminum spacers for your set screws. I used M3 set screws for my pulleys. IMPORTANT: Since the inner diameter of the bore on a spacer is much larger than 8mm, you will need 3 evenly spaced set screws to make sure the set screws do not force the spacer sideways and tear them off of the pulley. 3) Rough up one flat face of the aluminum spacers with sandpaper. Do this in two directions for a crosshatch effect. You need to ensure there is a rough surface for the epoxy to adhere to. Do not use a file. Bits of aluminum will adhere to the file and reduce its effectiveness. 4) Clean both the pulley and the aluminum spacer with alcohol. Remove all debris from the roughing up, and all dirt and oil from the surface. Usually alcohol is not used to prepare surfaces for epoxy, since it causes epoxy to spread into cracks, but this is desired in this case. Wait until the spacers and pulleys are completely dry to avoid excessive spread. 5) Mix and apply the epoxy to the outside of the timing pulley flange. Apply an even coating, a bit less than 1mm thick, but avoid the surface right next to the bore hole. There should be enough epoxy pushed aside to form a small fillet around the outside, but not enough to reach and block the tapped holes for the set screws. 6) Take the 8mm shaft and place the pulley on it, epoxied flange facing up. Then place the aluminum spacer on the shaft, roughened side facing down. 7) Clamp the pulley and spacer together while they are still on the 8mm shaft. Make sure the edge of the clamp passes well inside the circle of the bore. 8) Remove the clamped pulley and spacer from the 8mm shaft. Use a paper towel with alcohol to clean off any epoxy that got on the 8mm shaft. 9) Use a cotton swab moistened with alcohol to clean epoxy from the inside bore of the pulley and spacer. Do not over moisten the swab so that alcohol drips from it. Use as little alcohol as will effectively clean the epoxy. Do remove all excess epoxy in the bore. If epoxy has gotten into a set screw tapped hole, take the pulley and spacer apart, clean off all the epoxy, then start over. 10) Set the clamped pulley and spacer aside and let the epoxy harden for 6 to 8 hours. A few tips: Use a slow setting epoxy. This gives you ample time to clean off excess epoxy, or to abort entirely if epoxy gets into a set screw tapped hole. I used 30 minute epoxy. Also, make sure you tighten the set screws very evenly. You want to make sure the spacer is not being pushed off to one side by an overly advanced set screw, or it will rip the spacer off of the pulley. Tighten each set screw just a little at a time. Make sure that no one set screw is exerting much more or less pressure than another one at any given time. The set screws do not have to be very tight to hold very fiercely, and they will easily deform non-hardened steel shafts. I am currently using 10 pulleys of this construction on an Ultimaker style printer currently in operation at the TX/RX hackerspace in Houston, Texas. This construction seems very strong and secure.
With this file you will be able to print Ultimaker Timing Pulleys with your 3D printer. Click on the button and save the file on your computer to work, edit or customize your design. You can also find more 3D designs for printers on Ultimaker Timing Pulleys.
