Ultimaker Z-Axis Adjuster
thingiverse
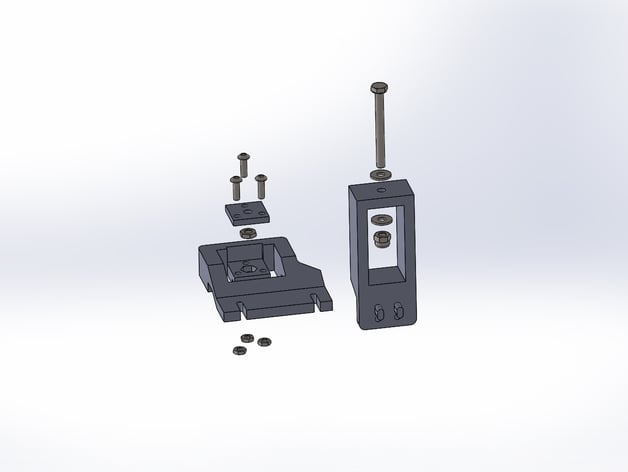
This version aims to be more strong and durable. 3 mm screw is replaced by a 4 mm, which is screwed into a nut and not in plastic. Thank you to Maybites for its good design ! Instructions Look for mounting scheme it is sufficient to itself. You will need 3 M3 x 10 screws and 3 nuts, One M4 x 40 screws two washers and a locknut. I also attached a STL of a brace for those who have already printed this http://www.thingiverse.com/thing:22819 and did not want to do it again;-)
With this file you will be able to print Ultimaker Z-Axis Adjuster with your 3D printer. Click on the button and save the file on your computer to work, edit or customize your design. You can also find more 3D designs for printers on Ultimaker Z-Axis Adjuster.