Ultimate Back Scratcher - 4 Modes!
prusaprinters
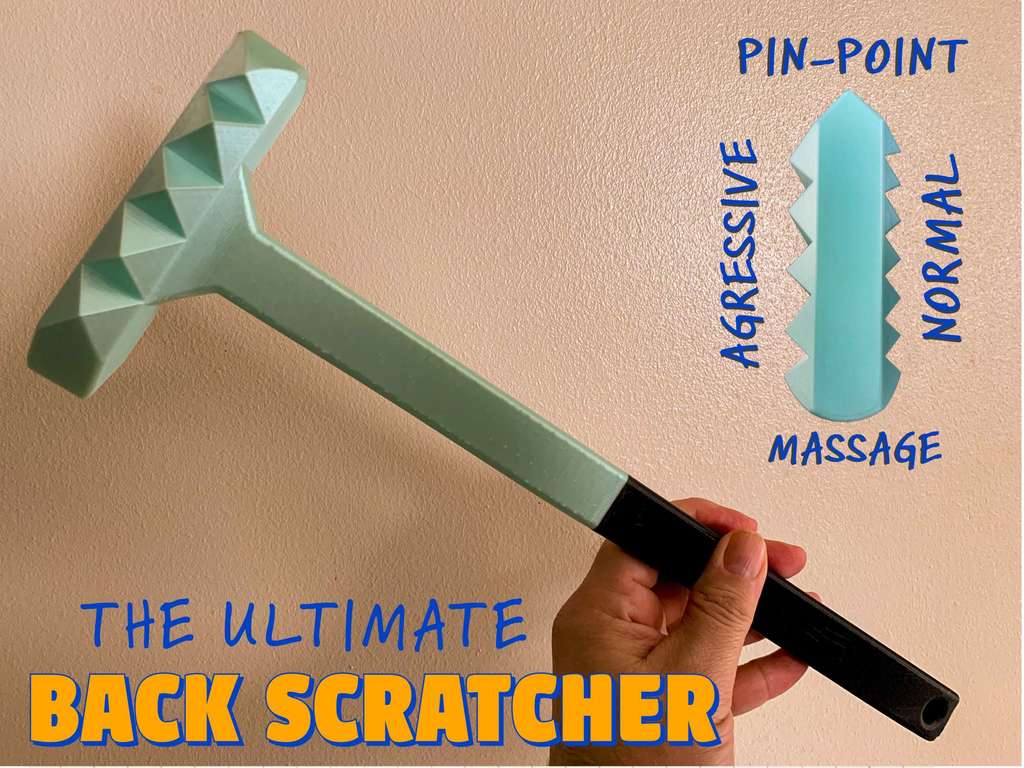
<h3> The Ultimate Backscratcher</h3> <h3> Let's face it, you're itchy! You're skin is crawlin! Help has arrived.</h3> <h3> Features</h3> <ul> <li>FOUR MODES:<br/> <strong>Normal</strong> - A good ol' scratch<br/> <strong>Aggressive</strong> - For when you just got done rolling around in fiberglass insulation<br/> <strong>Pinpoint</strong> - Ooowie I got an itch!<br/> <strong>Massage</strong> - For rubbing your neck or back in a muscle that may be sore.</li> <li>Sloped handle shape to dig into your back better.</li> <li><p>Hole so you can hang it up</p> <h3>Overview</h3> <p> <figure class="media"> <oembed url="https://youtu.be/gW2SiobzWd4"></oembed> </figure> </p> <h3>Print Settings</h3> </li> </ul> <p><strong>Printer Brand:</strong></p> <p>Prusa</p> <p><p class="detail-setting printer"><strong>Printer: </strong> <div><p>I3 MK3S</p></div><strong>Rafts:</strong></p> <p>No</p> <p><p class="detail-setting supports"><strong>Supports: </strong> <div><p>No</p></div><strong>Resolution:</strong></p> <p>200</p> <p><p class="detail-setting infill"><strong>Infill: </strong> <div><p>20 (100%) on connection</p></div><br/> <strong>Filament:</strong><br/> Hatchbox PETG Mint <br/> <p class="detail-setting notes"><strong>Notes: </strong> </p><div><h3>Printing Notes</h3> If you are an aggressive back scratcher you'll want to strengthen your print. The points on the scratcher are nice and sharp so they feel great even over a shirt. Careful on a bare back or you may want to hit the points with some sandpaper if you like a bare back scratch.</div></p> <p>There is a picture in this post that has the tips Illustrated. Check it out.</p> <h3> Orientation</h3> <p>Print the base with the head down standing upwards. Print the handle with the hole side down printing upwards. If your print bed doesn't support the height you'll have to print on the side and then you would most likely need supports.</p> <h3> Modifiers</h3> <p>The two ends where they connect need reinforcement since you will be putting pressure on your back. If you don't have re-enforcements it's likely the connector could break. This can be done by putting a support modifier block over the area you want to have a different infill. I recommend a 100% infill for this area. Extend the block into the handle a bit so it has extra strength. It won't add much time since the handle isn't that wide. (see the printing pic.)</p> <h3> Assembly</h3> <p>Use a good amount of super glue on both pieces and put together. I don't recommend a gel glue because it's thicker and it may not seat correctly. The tolerances are not tight or loose so you will need to glue it.<strong>Tip</strong>: You may want to use your slicer software and just make a small print of both sides of the connection so you can practice gluing them without having to print out the whole thing.</p> </p></p></p> Category: Hand Tools
With this file you will be able to print Ultimate Back Scratcher - 4 Modes! with your 3D printer. Click on the button and save the file on your computer to work, edit or customize your design. You can also find more 3D designs for printers on Ultimate Back Scratcher - 4 Modes!.
