Ultimate Desktop Hydroponic Garden
prusaprinters
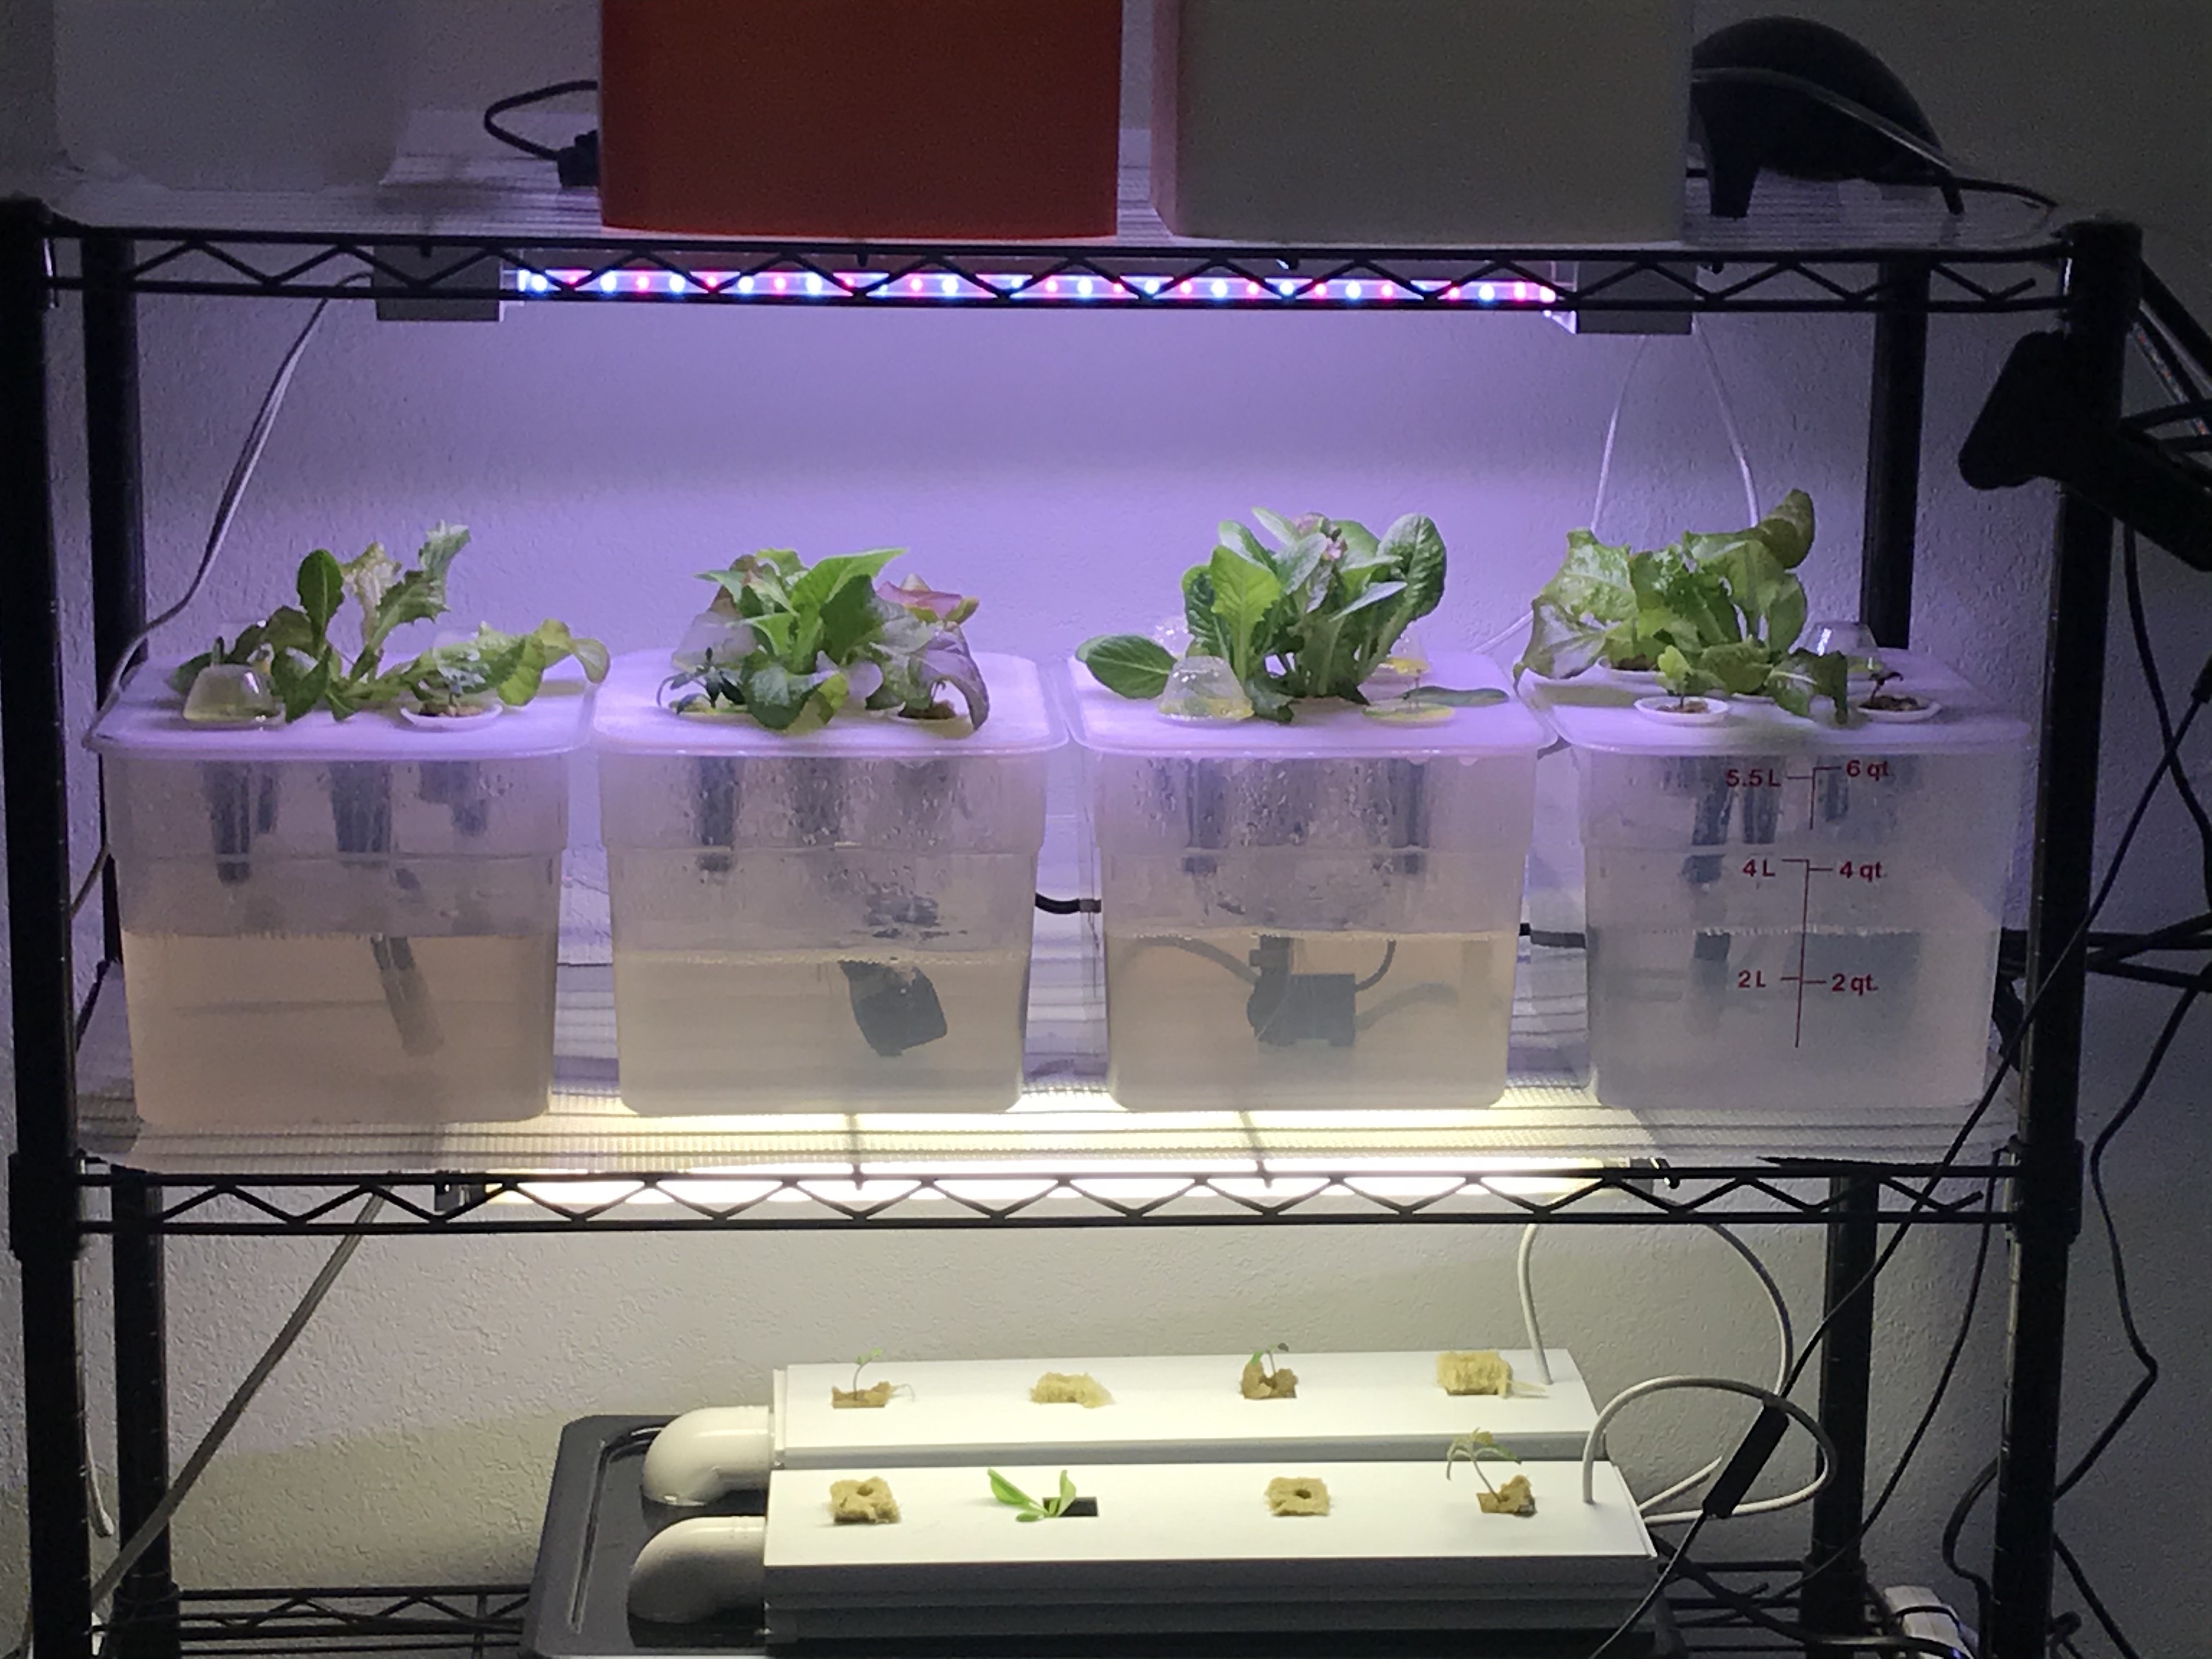
<p><strong>Overview about the design</strong></p><p>I designed this to be square so I can get as many as possible on a shelf and grow the most plants possible in a small space. I designed the water reservoir to hold enough water so you should only have to top it off once a week or so making it less work. This was also designed to be easy to clean, just take it apart between plantings and rinse out the container and the lid. It used standard 1.5" net cups or Aerogarden pods also work well. </p><p>There are two versions one entirely 3d printed and one with a base you buy and just print the lid. The choice is yours.</p><p><strong>Version 1</strong></p><figure class="image"><img src="https://media.prusaprinters.org/media/prints/61386/rich_content/a5eed769-99a2-4376-9418-d9efbb48a742/version1.jpg#%7B%22uuid%22%3A%226c2bbebf-f37f-401e-92fb-3a45549823b6%22%2C%22w%22%3A4032%2C%22h%22%3A3024%7D"/></figure><p> </p><p><strong>Version 2</strong></p><figure class="image"><img src="https://media.prusaprinters.org/media/prints/61386/rich_content/19781361-b2e5-4ba4-a34f-3fc187f1c516/withairpump.jpg#%7B%22uuid%22%3A%2273ea7db6-21a7-4eef-8173-9be5a2f69c4c%22%2C%22w%22%3A4032%2C%22h%22%3A3024%7D"/></figure><p>Version 2 uses a 6QT Cambro container Like this one <a href="https://www.amazon.com/6SFSPP190-CamSquare-Storage-Container-Translucent/dp/B08X27SBKT">https://www.amazon.com/6SFSPP190-CamSquare-Storage-Container-Translucent/dp/B08X27SBKT</a></p><p>Once you decide what option you want to go with there are 4 different configurations</p><ol><li><strong>You can use a water pump and 1/2 tubing to pump the water / nutrient mix to the plants</strong>.<ul><li>This method uses more electricity(6 watts) than air pump but provides more water flow</li><li>This method can probably be scheduled to just run a few minutes then off for a few minutes</li><li>I use a 50GPH pump like this one (it was the smallest I could find) <a href="https://www.amazon.com/gp/product/B07W59D21M/ref=ppx_yo_dt_b_asin_title_o02_s00?ie=UTF8&psc=1">https://www.amazon.com/gp/product/B07W59D21M/ref=ppx_yo_dt_b_asin_title_o02_s00?ie=UTF8&psc=1</a></li></ul></li><li><strong>You can use an aquarium air pump to pump the water / nutrients to the plants with the use of the airAdapter</strong><ul><li>This method uses less electricity (3 watts) but pumps less water and should be run constantly</li><li>This method should provide more oxygen to the roots.</li><li>A small air pump seems to work fine but if you want to run multiple off a single air pump you might want to go for a bigger size.</li></ul></li><li><strong>You can create a aquaponics setup and put fish in the Botton with the water and the fish waste will be pumped up and fed to the plants</strong><ul><li>This method uses same amount of electricity as the second option</li><li>But you don’t have to use chemical fertilizers on the plants it is all natural fish poop instead.</li><li>Just don’t forget to feed the fish.</li></ul></li><li><strong>You can use a fogger in the bottom reservoir to create a thick fog to provide water and nutrients to the roots.</strong><ul><li>This one uses the most electricity about 28 watts</li><li>This one seems to work best for small seedlings</li></ul></li></ol><p> </p><p><strong>Assembly:</strong></p><p>Assembly is easy print the lid and print or buy your base. Then get a 1/2” tubing and cut it to length. </p><p>This should reach from the pump or airAdapter to the lid. The Lid was designed to accept the 1/2” tubing.</p><p>Then Insert the tubing into the lid and the other end into a pump or the airAdapter. If you are using an air pump </p><figure class="image"><img src="https://media.prusaprinters.org/media/prints/61386/rich_content/d1beec5a-026c-4872-bcf2-d4c570cafc22/airadapter.jpg#%7B%22uuid%22%3A%2288f648cc-1bae-4c0d-80dd-5df126f8e8e9%22%2C%22w%22%3A3024%2C%22h%22%3A4032%7D"/></figure><p>You will also have to insert the air tube from the pump into the end of the airAdpater.</p><p>(The tube should go to the bottom of the container. I just lifted it up here to get a better picture)</p><p> </p><p><strong>Testing:</strong></p><p>to test I would recommend printing several and running them side by side to compare the results and don't forget to post your results. </p><p><strong>Results:</strong></p><p>so far I have had really good results with all methods. I am still trying to determine if one works better than the others. I would love to hear your feedback.</p><figure class="image"><img src="https://media.prusaprinters.org/media/prints/61386/rich_content/f21ce824-5aec-42a0-9134-54bfc9c2967a/sideview.jpg#%7B%22uuid%22%3A%22e9cef0a0-97f0-47a7-b797-9c6d5c26d3bd%22%2C%22w%22%3A4032%2C%22h%22%3A3024%7D"/></figure><p> </p><p><strong>Improvements:</strong></p><p>Do you have any ideas for improvements? Let me know</p><p> </p><p><strong>Update: 4/5/2021 </strong></p><p><strong>2 New Lids for Cambro buckets. </strong></p><p>Added a single 2" netpot lid. for use with Cambro container. </p><p>This lid has water coming in from 4 sides and I made the corners a little deeper so you get a tighter fit with this lid. </p><p>Added a 9 hole 1" rockwool cube lid for seed starting. This one also has water coming in from all sides. </p>
With this file you will be able to print Ultimate Desktop Hydroponic Garden with your 3D printer. Click on the button and save the file on your computer to work, edit or customize your design. You can also find more 3D designs for printers on Ultimate Desktop Hydroponic Garden.