Ultimate Ender 3 V2 Nozzle Brush
prusaprinters
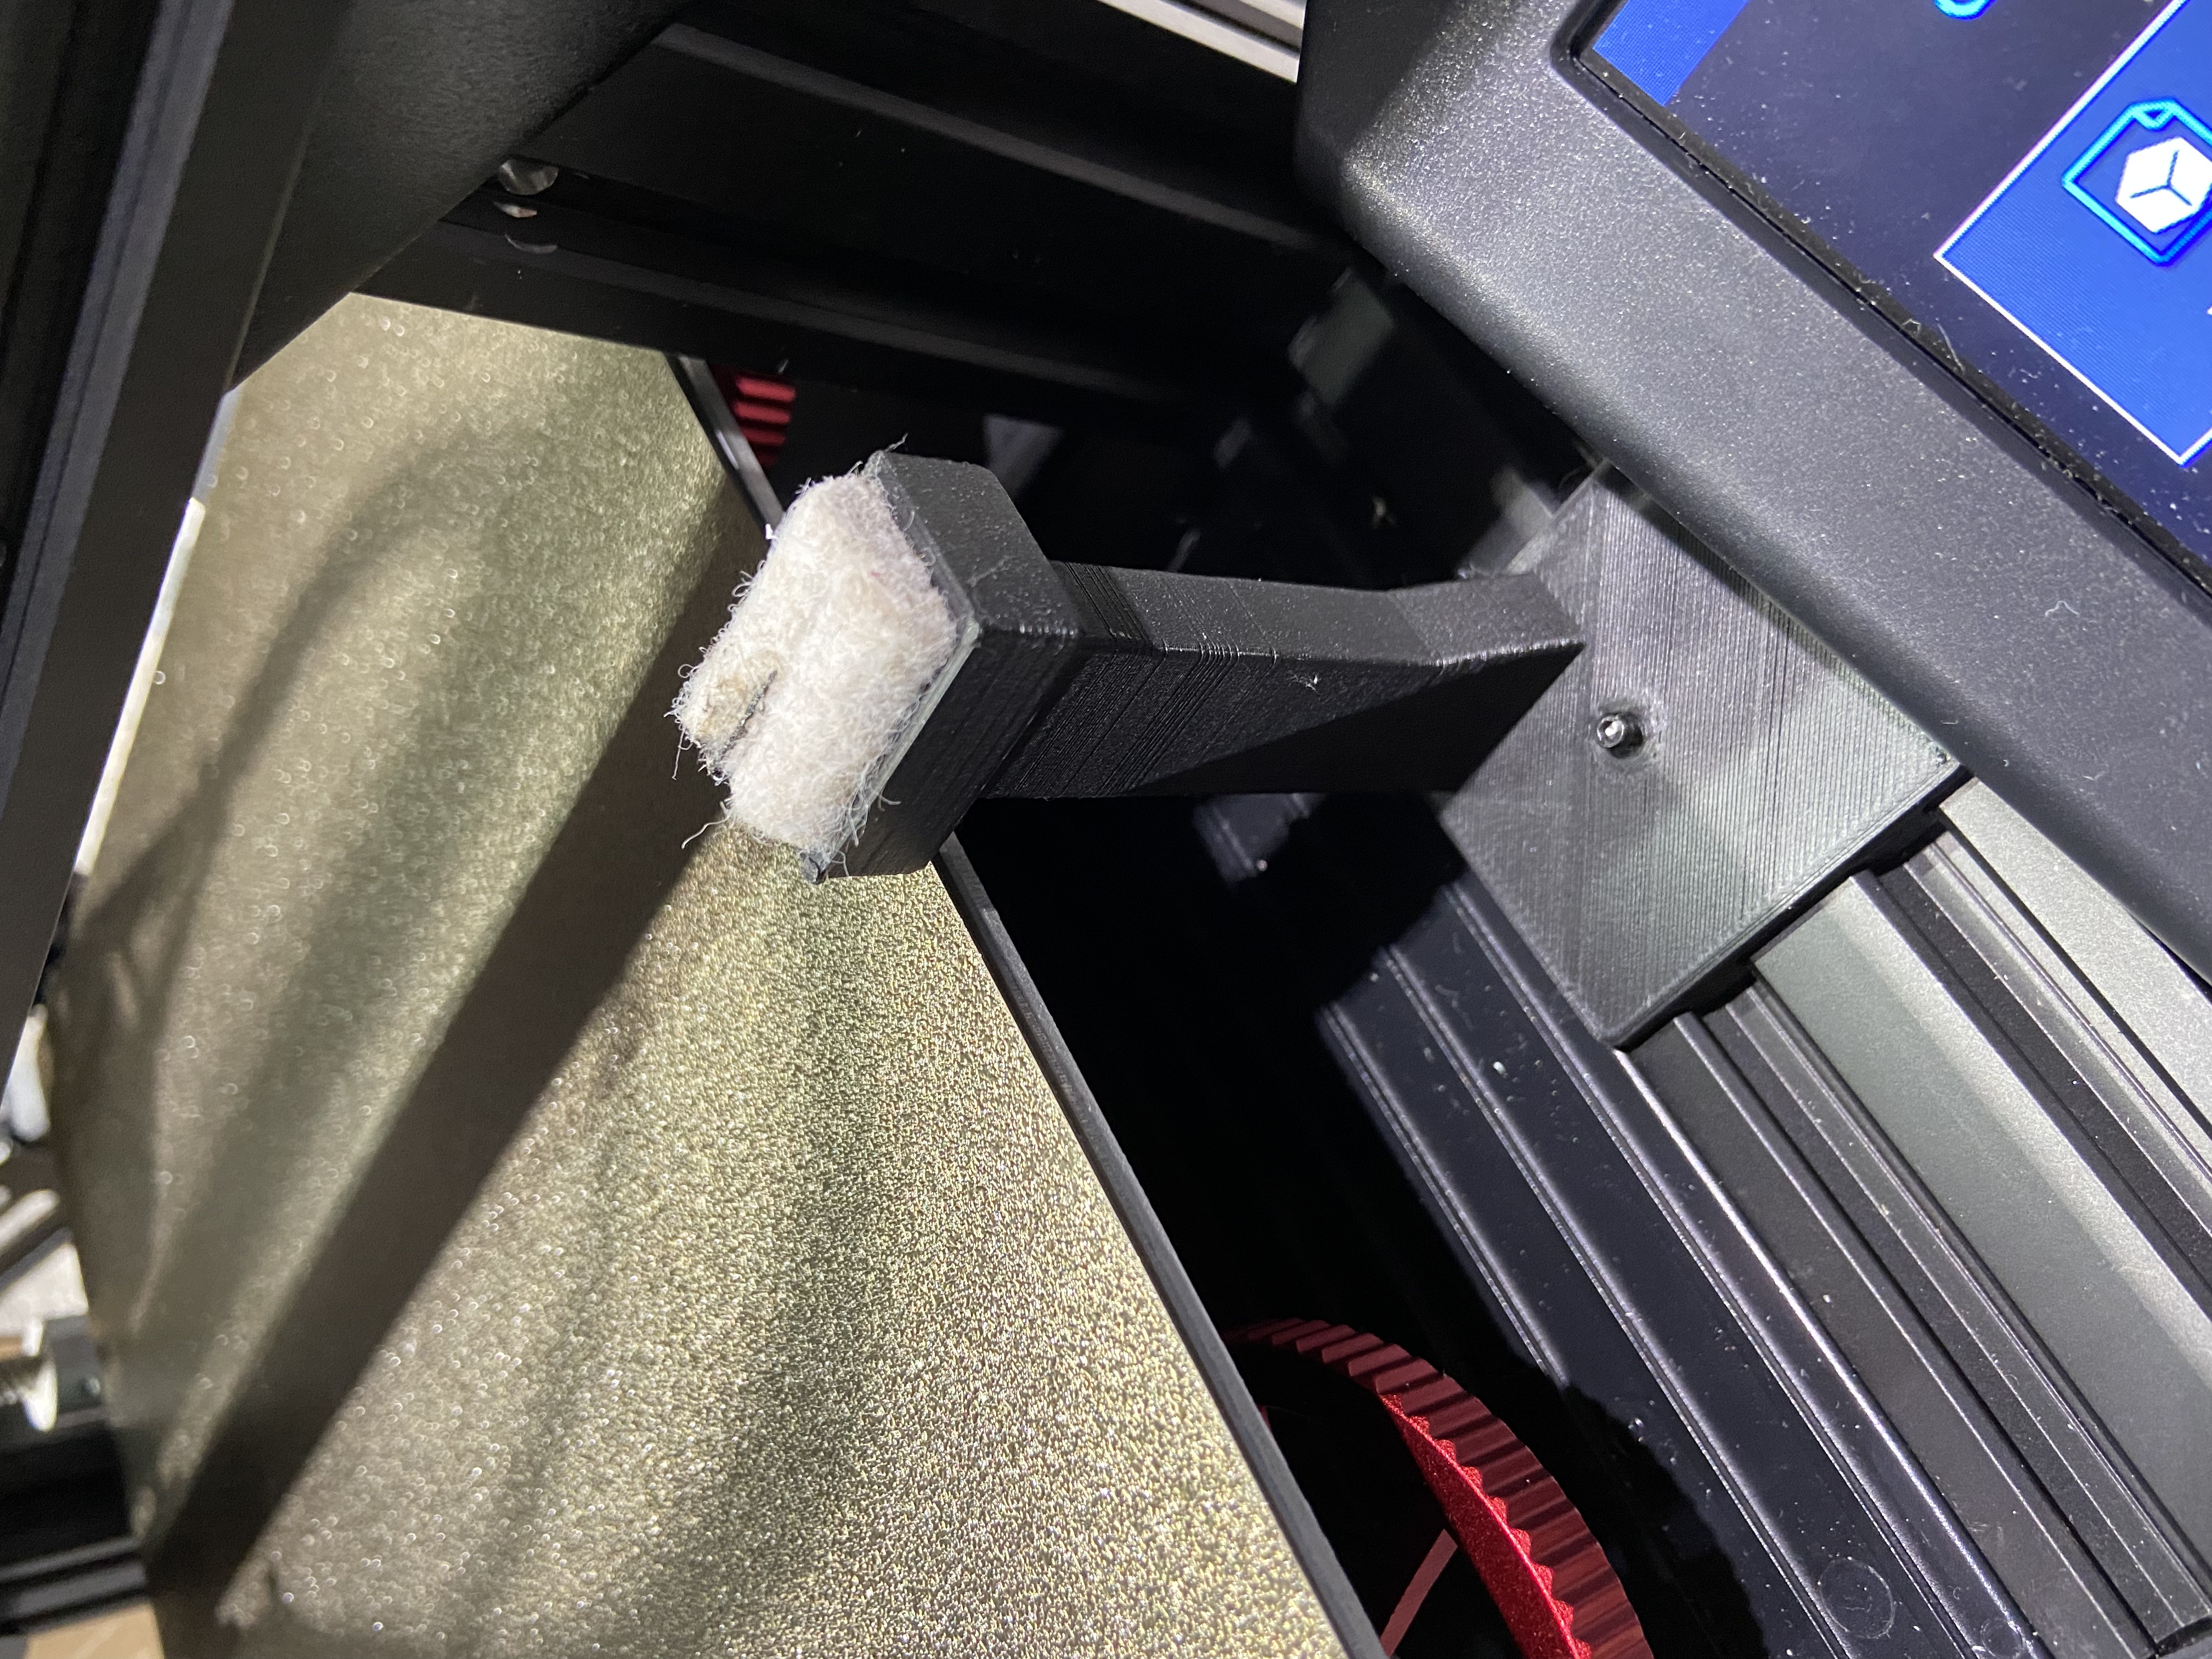
<p>I looked around for a good Ender 3 V2 nozzle brush that was fixed so that I could have the nozzle clean before each print automatically but couldn't find one, so I designed this. It mounts to the rails on the right beside the LCD. There is an M2 set screw hole to fix the cleaner base to the rails so it doesn't move (I suggest using this). You use custom gcode to either clean before your print or whenever you want.</p><p><strong>7/8 Felt Pad Head</strong></p><p>The head supplied is designed for 7/8 felt pads you can get at any dollar store or amazon. I used these because I couldn't find any 1" felt pads. Fold the pads over onto themselves and and stick them in the holder.</p><p><strong>Assembly</strong></p><p>It's printed in two parts. The base and the head. I made the head removable and or interchangeable incase someone wanted to use a brush head or a different type of head. You can glue the head to the base or the head has an M2 screw hole. There is alignment pins to help. Mount the assembled brush to your rails. Move it down just enough to line up with your nozzle. (You'll need to manually bring down your print head and move it over enough to see). Secure a screw through the base onto the frame. If you are scared of scratching your frame, put some tape there first. This will ensure the brush doesn't move.</p><p> </p><p><strong>Nozzle Alignment (DO THIS BEFORE GCODE)</strong></p><p>Ensure that you <i>manually</i> align your nozzle first using the LCD for the Z axis before using the custom gcode. The nozzle head should just brush itself between felt. Make sure your nozzle isn't too far down. You want to brush off just the tip under your silicone cover. Record the Z axis height you got from your LCD. Unless you have a lot of print head mods you should be close to what I have.</p><p> </p><p><strong>Gcode</strong></p><p>I added this gcode at the beginning of a print after the nozzle is warmed up. It works great to remove the strings from the nozzle. You can customize if you wish. Since the brush is so far over you can only get a few mm of wiping but it works well.</p><pre><code class="language-plaintext">;*** Start Nozzle clean *** G0 Z20 ; Add a few mm to your recorded Z axis height here G0 X245 ; G0 Z17.5 ; Recorded Z height here G0 X238.0 ; G0 X245.0 ; G0 X238.0 ; Give it a little swizzle G0 X245.0 ; G0 X238.0 ; ;*** End Nozzle Clean ***</code></pre><p>This will bring the nozzle over top the brush, lower down, shake its rump a bit and head back over leaving all strings behind in the felt. Add it to your slicer before your print, after the nozzle is warmed up or in a custom command in Octoprint. </p><p> </p><p><strong>Print Instructions</strong></p><p>Layer Height: 0.2mm</p><p>Infill: 15-20%</p><p>Use supports on the head and base</p><p> </p><p><strong>Credits</strong></p><p>Thanks to MakersMashup for the amazing design of the <a href="https://www.printables.com/model/16293-ultimate-nozzle-brush">Ultimate Nozzle Brush</a> to which the head was based on.</p><p> </p><p><strong>Disclaimer</strong></p><p>Always take great care when sticking anything near your nozzle. Make sure you take your time to get it just right before sending it. Either way, I am not responsible for your actions :)</p>
With this file you will be able to print Ultimate Ender 3 V2 Nozzle Brush with your 3D printer. Click on the button and save the file on your computer to work, edit or customize your design. You can also find more 3D designs for printers on Ultimate Ender 3 V2 Nozzle Brush.