Ultrasonic Levitator
thingiverse
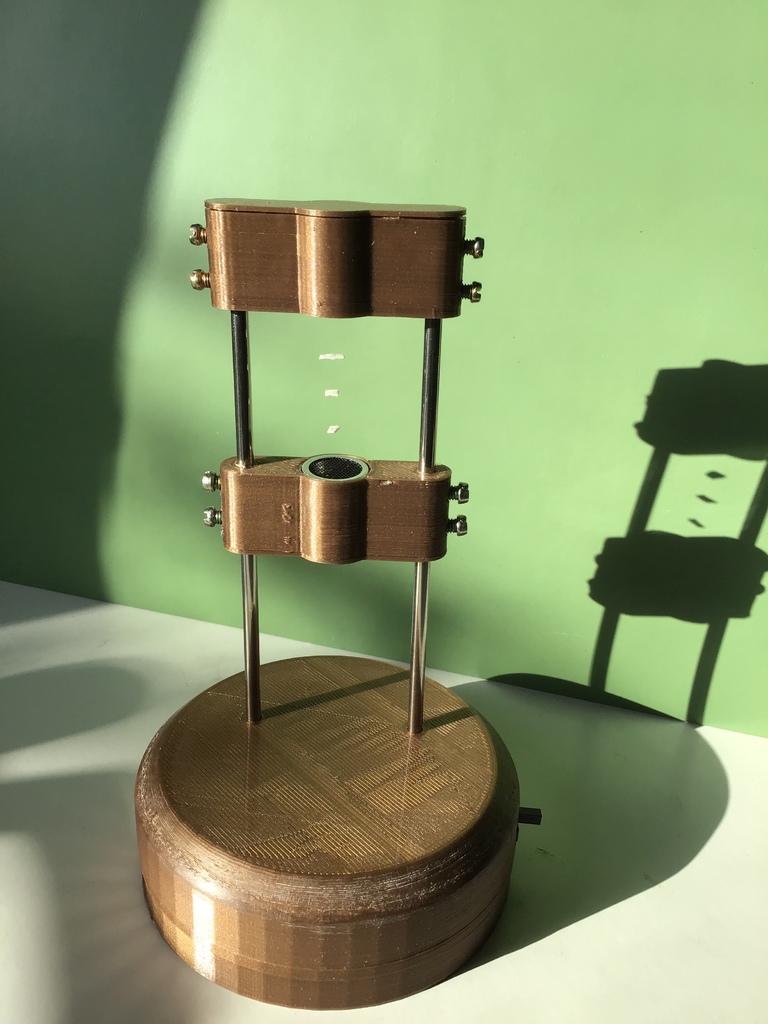
Please note that the base in the pictures is an early version and it has been redrawn. The levitator works by creating nodes in the air with a 40 kilohertz standing wave. We know that a sound wave is a moving wave of pressure/ compression and the opposite rarefaction. This device has two transmitters (other devices use a transmitter and a reflective surface) set at the exact distance apart so that the waves are summed. The nodes are created at the minimum or null point of the wave, it appears it is possible to float or levitate small pieces of polystyrene within the nodes. My version of the ultrasonic levitator was based on this fun project https://makezine.com/projects/micro-ultrasonic-levitator/ and I’m indebted to the author for this work. One thing that struck me most was that this could have been made 40 years ago at least, ok without the micro controller but with a simple circuit to generate a 40kHz square wave. I have designed this simple circuit/ 3D printed frame for a few reasons and I hope you can see it’s not just a rehash for the sake of it. 1. To seriously reduce the power consumption and use a PP3 battery. 2. To facilitate a simple calibration method using just a multimeter to adjust frequency. Having a variable oscillator allows you to set the exact peak power out the transducers have a tolerance of +/-1kHz and a very narrow bandwidth. 3. To facilitate simple calibration using a multimeter again to adjust the phase or standing wave ratio. Ultrasonic levitator assembly The circuit can easily be made using the custom PCB I have given an A4 pdf, if you are inclined to make your own PCBs. I have made mine using toner transfer and etching with ferric chloride. Or you could use strip board, see picture, I got a bit carried away with cutting tracks under the driver ic's hopefully you can see where I bridged them and not make the same mistake. All components are very cheap and readily available. The mechanical adjustment and signal feed is facilitated using conductors from 15 amp choc block. I soldered conductors to the back by fixing them to 4mm wood dowel, cleaning with fine wire wool and soldering direct. See picture. Fit the metal rods in the base and a transducer housing to the top of the rods to get the spacing parallel. Fix the transducers and contacts with hot melt glue or two part epoxy (takes longer) . Ultrasonic levitator adjustment (see film) The levitator (when correctly tuned) will only consume about 30-40 milliamperes which should deliver at least 10 hours operation time from a standard PP3 battery. The quiescent current of the circuit is about 4 milliamperes. To tune the levitator circuit you will need a : 1. Multimeter capable of reading millivolts with clip type probes. 2. Small screwdriver or pot adjustment tool (tweaker ) Place the meter across the shunt resistor R2 on the side of the PCB and connect the ultrasonic transducers and battery. R2 is purely for making this measurement without breaking into the supply circuit and can be done any time. Tip for best results place a rag or cloth between the transducers. Turn on the circuit and adjust the pot VR for maximum current, (the pot has more range than I would like but this was necessary to allow for a broad range of frequencies produce by different manufacturers of the CD4093, I used Phillips and Fairchild) you are reading millivolts on the meter but the millivolts reading corresponds to milliamperes through the resistor. At the peak it should read about 40 milliamperes but 30-40 is reasonable. You may see smaller harmonic peaks but keep going until you reach the above value. Remove the rag and slide the bottom transducer up and down you should see slight peaks and troughs in the current. Set the current for the minimum value with the transducers around 30 millimetres apart. Each peak will be just over 8mm from the last which corresponds to the wavelength of the 40Khz sound wave in air. Fix the screws and it is adjusted. If you set the distance closer around 20mm you will find you can tip the levitator on its side and keep the levitated object in place. This demonstrates that the pressure applied by the antinodes is on both the top and the bottom of the object. Sound tweezers. https://youtu.be/qmqra95md7s
With this file you will be able to print Ultrasonic Levitator with your 3D printer. Click on the button and save the file on your computer to work, edit or customize your design. You can also find more 3D designs for printers on Ultrasonic Levitator.