UltraWide Retro Computer Terminal
thingiverse
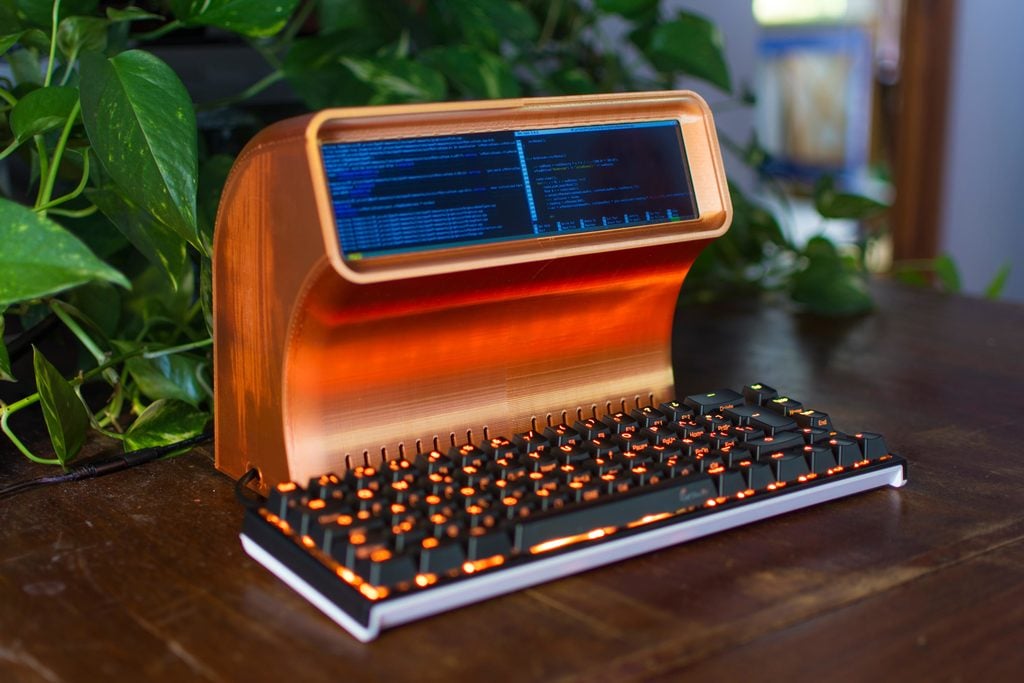
This is a small desktop computer terminal designed around an ultrawide 8.8″ 1920 x 480 LCD, with a rather exotic 4:1 aspect ratio. As this exceeds my 3D printer bed size, I had to figure out a way to split the design in two parts, and how to assemble them effectively. The design allows to run it with a Raspberry Pi 4 or a Jetson Nano 2GB; the mounting of the SBC is quite modular. It uses M3 standoffs and nuts (I used nylon), and custom printed parts to hold it all. The standoffs are pressure fitted into the print, making it very easy to swap SBC, and also very easy to stack new components. The design also makes it easy to mount the mipi hdmi board behind the LCD, keeping the build tidy. You will need hdmi ribbon cables with angled connectors, which you can easily find in AliExpress or similar sites. The build also offers an optional mount for a particular USB speaker, that has worked ok for me, also found in AliExpress. I printed this on an Ender 3. It barely fits on a 220mm x 220mm bed. The trickiest part to print is the back door, as it warps easily; I had best results printing it belly down (the inside part of the door facing down), requiring a lot of supports. The main body parts are quite easy to print as pictured, but the side curves are never quite clean enough this way (with or without supports, both have drawbacks). You can probably print it upside down, but it will require a lot of supports (and take much longer); I never tried this approach. The two main parts are held together with M2.5 screws and nuts, some of them are quite tricky to screw in, but it's doable with a tiny or gooseneck screwdriver. If the print is a little warped, the two parts may not align very well around the middle, and it becomes visible especially around the screen area. There are a couple holes on each side to help align the two parts around the screen, I used cut parts from paper clips for this (very visible on the yellow rendering pic), but what you need for this will greatly depend on your printer and chosen material. I use an UBS-C power extension switch to turn the computer on and off. The LCD is an 8.8" 1920 x 480 IPS, get it [here](https://www.aliexpress.com/item/4001115081190.html?spm=a2g0s.9042311.0.0.274263c0kalljT). The design is built to fit the "A board" as shown in the pictures. The LCD is held tightly by the print, no screws or glue required. The keyboard in the photos is a "Ducky one2 mini". I also use a power switch (to be fit in the hole on top left) to be able to turn off the LCD independently from the SBC (as this LCD sadly doesn't seem to support blanking / sleeping). It's a simple 8mm metal latching push button, which opens/closes the LCD 5v power line that's fed from a 5v pin from the SBC. The LCD board comes with a micro-usb socket for power, and I found it easier to power it this way. I bought a micro-usb male plug / jack for this, making simple connections to the SBC 5v pins and putting the power switch inbetween. This was designed over quite a few months during the Covid-19 pandemic, you can read more about it [on my website](https://uri.cat/projects/modern-retro-terminal) and on my article in [Creative Stack](https://creativestack.substack.com/p/making-modern-retro-computer-terminals). You are free to print this for your own use, but please respect my work and don't try make money off it.
With this file you will be able to print UltraWide Retro Computer Terminal with your 3D printer. Click on the button and save the file on your computer to work, edit or customize your design. You can also find more 3D designs for printers on UltraWide Retro Computer Terminal.