UMP Gryphon
prusaprinters
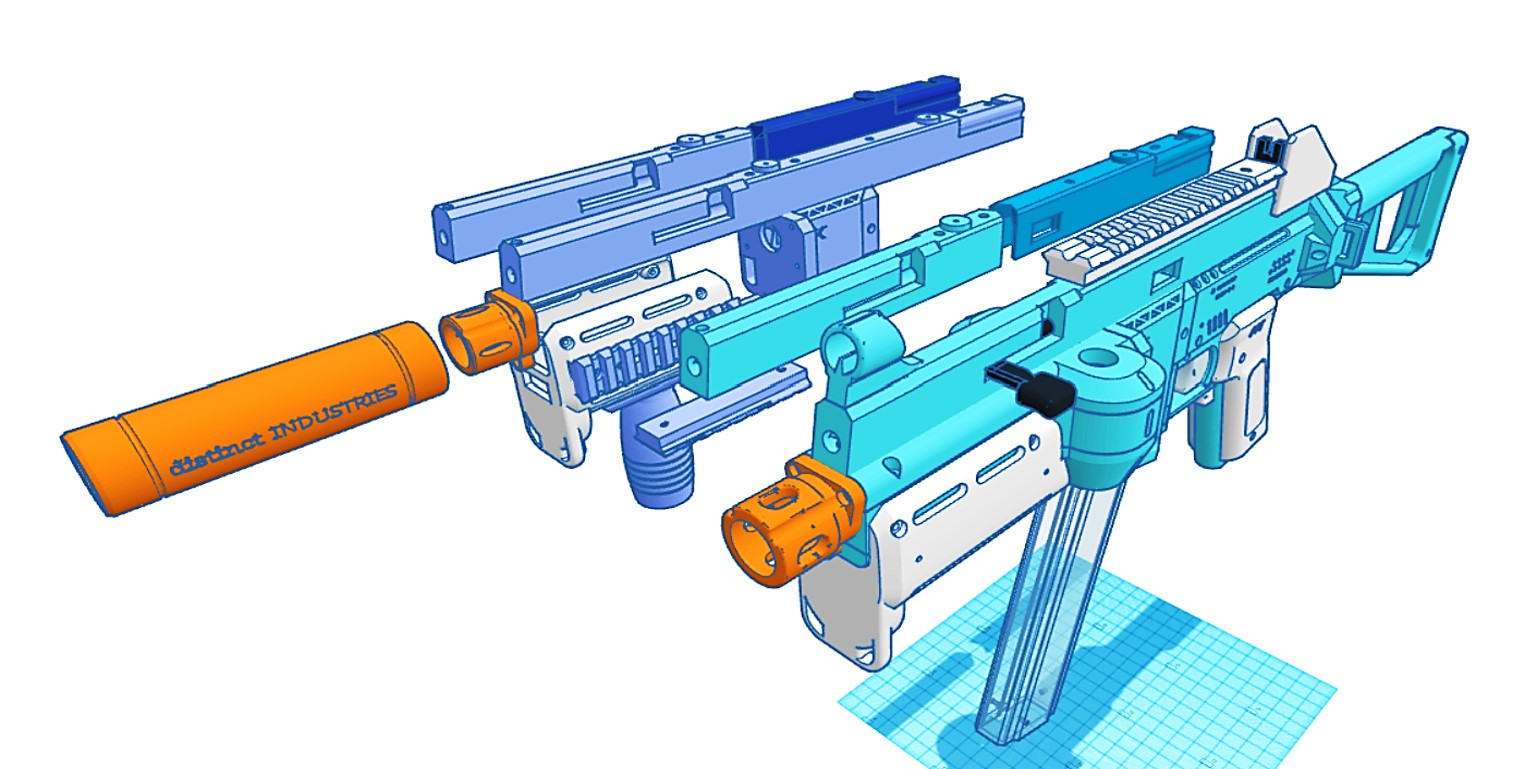
<p>This UMP is an assembly of multiple files. Some original and remixed by the fantastic designers of Flygonial (original Gryphon), ehdrien (remixes and Gecko), ECnerf (AKA eric1218/EC of Phalanx S1) and some of my own original files as well as remixing their files to work with each other or to best suit the UMP Gryphon dimensions. All real credit goes to these original authors and I am a mere mortal that pales in comparison to them.</p><p>Most parts will follow the assembly of a regular Gryphon. I have also made a series of adjustments for ease of wire management, printing, strength, comfort, etc. See image of table with file details.</p><p>This can be made with three volt meter options: in the top section, in the front of the handguard or without one. The charging handle can operate without the volt meter if you just want the slaps novelty.</p><p>Beyond regular screws or M3 hardware from the core Gryphon parts, all the top section uses Nerf style screws and/or hot glue (front sight and rear sight shrouds. The sight pieces are the last to be installed after you have confirmed everything else works. You will need an extension spring that controls the action of the charging handle/rod. There is a hole that you can thread into the rod. Then the other end of the spring utilizes the same front screw that will hold the top section to the body. You want to make sure that the end ring on the extension spring is securely held down by that screw. You mount the spring first, then the handle. The charging rod is designed so you can lay the flat side down for printing. That side has a hole for a screw that attached the charging handle. You will use a screw driver or even your fingers to rotate and pull the charging rod back enough so that it lines up with the open hole in the top section so you can add the screw. You will need a simple 2 prong momentary tactile button switch that is 6x6x7. One wire goes to the volt meter, the other goes to a direct positive or negative from the battery. The other wire from the volt meter then goes to the alternate direct wire to the battery. Pressing the charging handle enough will activate the button and complete the circuit for the volt meter.</p><p>The top section has different versions and additional options for smaller printers. If you have something like a CR10, printing it in one piece is the best. Print with no supports except for the small wall area where the charging handle travels. Support block out where the charging rod resides and travels. Parts are oriented how they will fit on the blaster and not really for printing. Follow original print instructions from Flygonial (here on printables) or EC (search for Stryfe UMP on thingiverse) or ehdrien's remixes (on thingiverse). Most parts are printed with little to no supports. I was able to print most pieces with 3 walls, top and bottom and 10% gyroid infill and it's very strong. It will result in a very lightweight blaster. You can definitely beef up more as you want.</p><p>I marked non-commercial, no derivatives mostly because you can contact the original authors if you wish to remix or check their original licensing.</p><p>UPDATE: Added more detailed wiring diagram to help people.</p>
With this file you will be able to print UMP Gryphon with your 3D printer. Click on the button and save the file on your computer to work, edit or customize your design. You can also find more 3D designs for printers on UMP Gryphon.