turtle - extremely simple four legged robot
thingiverse
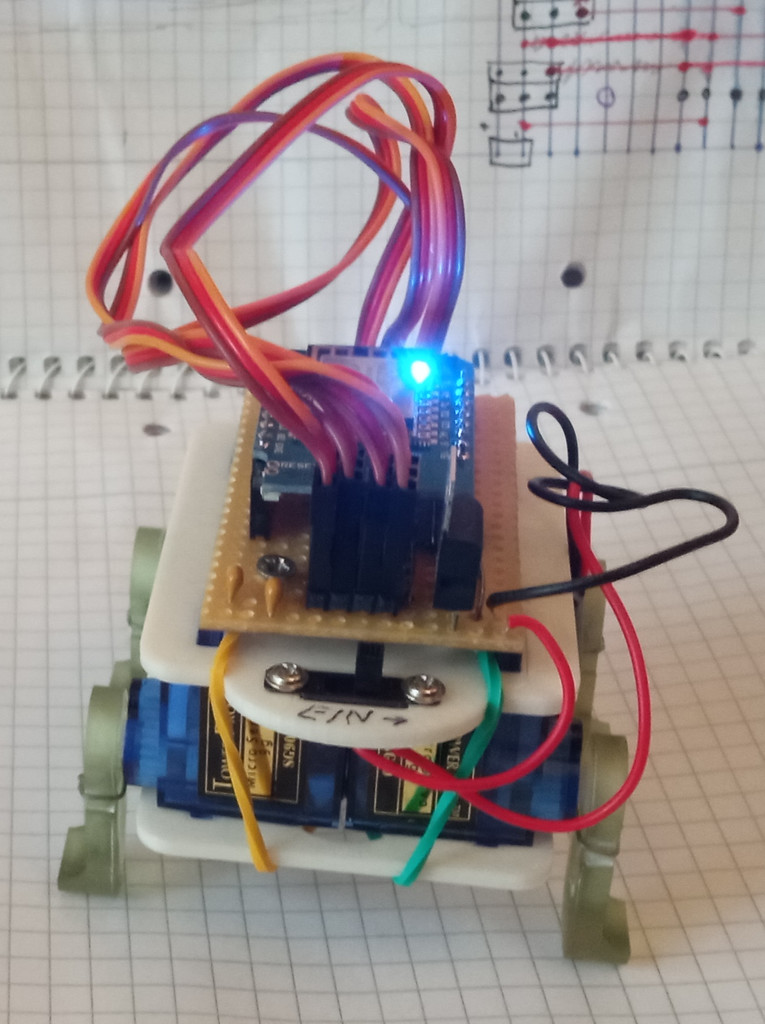
# What's this? This is a simple robot - not really my idea but I found it funny, so I designed my own. It direcly walks on servo horns, driven by a Wemos D1 Mini - just because i have dozens of them lying around.. I use it with micropython (https://micropython-on-wemos-d1-mini.readthedocs.io/en/latest/setup.html) and a self built mini web application server to control the robot currently, it isn't moving autonomeously since I didn't add any sensors.. source code for that server can be found here: https://gitlab.com/rapp.jens/turtle There's also a minimalistic schematic for connecting the servos and some 5V regulator. I may add some documentation over time.. so I do .. now.. # Parts you need * printed parts (top, bottom, 4 legs) * 4 sg90 servo motors * 2 rubber bands * plastic glue and zip ties * a 4x6 switch * some kind of 5V regulator (I also uploaded an example image based on 7805- got sooo many of them left) Don't change servo pins but feel free to add other gadgets (light sensor, etc.) * D1-Mini with micropython because i love these tiny things... Here is how you upload micropython to that thing: https://www.wemos.cc/en/latest/tutorials/d1/get_started_with_micropython_d1.html After, you can use ampy or other tools to upload my software hint: if you want to make changes on the robot firmware, it is helpful to rename main.py to e.g. run.py and run it manually (via import run; run.main([])) to test the robot. # print it I printed top and bottom part with my fdm printer. Since it doesn't like small parts, I printed the legs with a resin printer but fdm would work, too. # build it Building the robot is very easy: glue servo horns into the legs as shown on the photos. You should keep them in place with wire or zip ties because glue isn't the best friend for pom servo horns. Servos are just mounted by putting them between top and bottom plate and fix them with rubber bands. there are big holes on the bottom to thread wiring through and one on the back of the top plate. Bottom plate also has two frames to keep a 9V battery in place ( i use rechargeable lion batteries) now, solder the electronics (I used a line raster pcb) and mount it on the top plate (there are mount points which are aligned to 2.54mm (.1 inch) raster so you can nail, screw or whatever directly through existing raster points) The switch is mounted on the top plate which prevents pulling the pcb off the mount.. # use it First, you need to download or clone my software (link above). Then edit sys.json to make it fit your wifi (ssid, password, apmode if you want it to make its own wifi). Upload all files in the project to the d1-mini. Put the D1-Mini onto it's mount and switch on. (you can also connect your computer via usb to read what the machine is doing) After that, connect to the robot via web browser (eg http://192.168.x.x:8080 - use http, not https, since i didn't get that working on this little cpu) and play with it. I still haven't found a perfect way of walking. Feel free to suggest animation steps. I'm happy for all suggestions you make. # future My next improvement will be enhancement of the editor to test steps or animations before saving them. I might also play with an arduino nano connect (rp2040) and some sensors but haven't yet figured out how to use that wifi adapter with micropython..
With this file you will be able to print turtle - extremely simple four legged robot with your 3D printer. Click on the button and save the file on your computer to work, edit or customize your design. You can also find more 3D designs for printers on turtle - extremely simple four legged robot.